Pictures can get lost when you’re trying to free up some space or when you accidentally press the “delete all” control on your device. Of course, this situation can spike fear, but it is not as bad as you think.
Oftentimes, when you lose important pictures, such as your graduation and wedding photos, you go online to search for how to recover deleted pictures. In this article, we will share with you the best solutions to help recover deleted photos on various devices.
How to Recover Deleted Pictures on Windows
Images on Windows may be permanently deleted or only temporarily deleted. Whichever, they can always be recovered using the steps explained below.
Method 1. Recover Erased Photos from File History
File History is a Windows software that helps to back up files and keep a record of all changes made in your desktop library. This tool was initially introduced on Windows 8 and it’s still currently available on Windows 10 and 11.
The feature ensures all photos are automatically saved and recoverable to your device even when the recycle bin has been cleared. However, it requires the use of an external hard drive to perform better.
Related Post: >> How to Recover Files Deleted from Recycle Bin
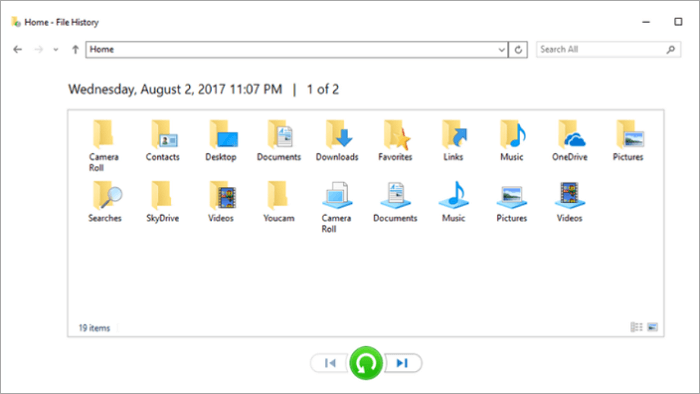
These are the steps you should follow to undelete deleted photos on Windows:
Step 1. Right-click on the folder where the deleted photos were previously stored.
Step 2. Click on Restore the previous version.
Step 3. Select whichever version you need to recover and click on the restore option.
Method 2. Undo Deleted Photos from Recycle Bin
When a photo is deleted from your PC, it immediately goes into the Recycle Bin where it will remain indefinitely until you run out of storage space.
Recycle Bin is available on every version of Windows and it gives you an option to set the time frame you want your photos to remain there. However, if you use the Shift + Delete keyboard shortcut, your photos will permanently be deleted from the computer; they won’t go to the Recycle Bin.
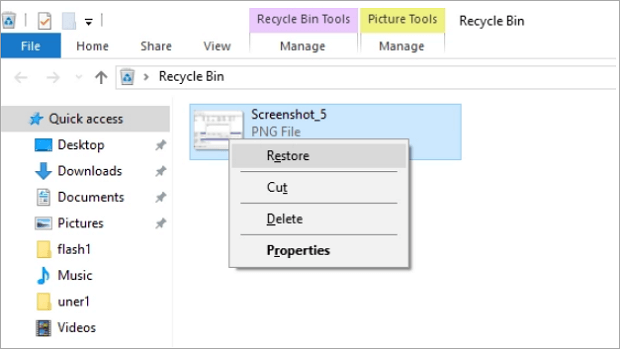
Follow these steps to recover erased photos:
Step 1. Double-click on the recycle bin to open it.
Step 2. Locate and select photos to retrieve.
Step 3. Right-click on the restore option or drag a photo from the recycle bin to your preferred location.
✨ Note: when you click restore, the photo will return to its previous location.
In some special cases, you may find the picture you want to recover is not in the Recycle Bin. What is the cause of this situation and how to solve this problem? This post will give you the answer: >> How to recover deleted photos not in Recycle Bin.
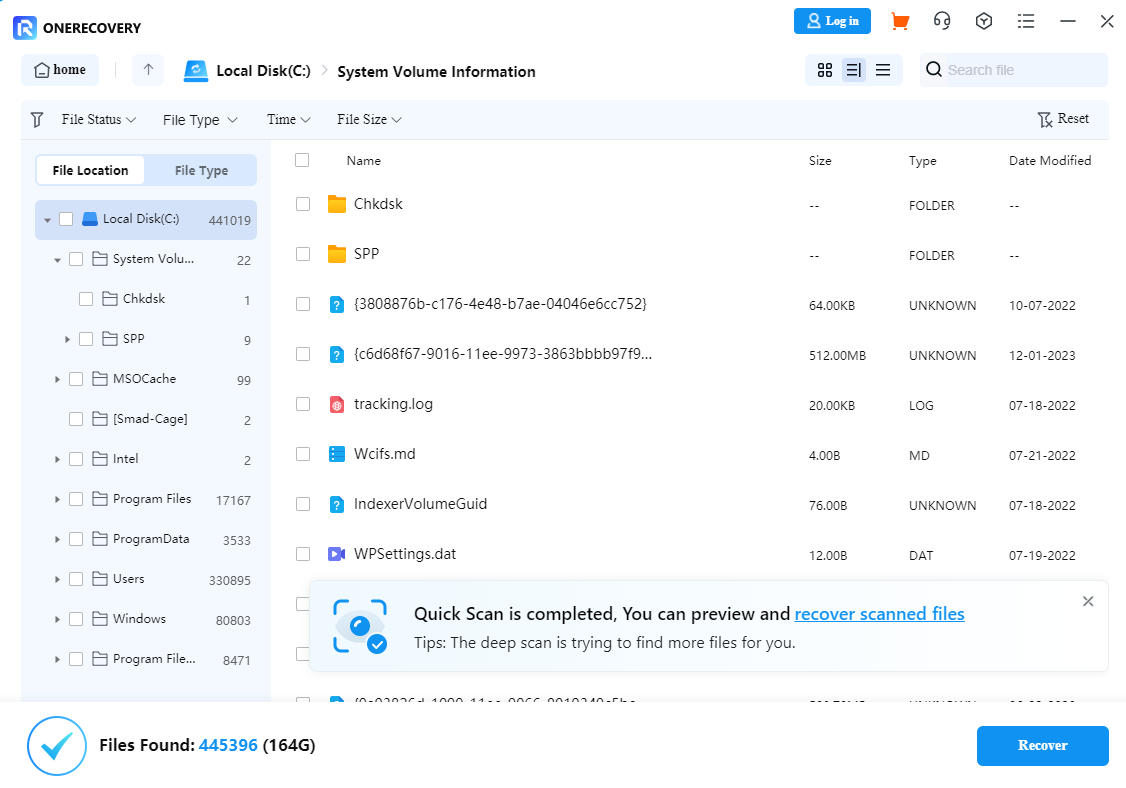
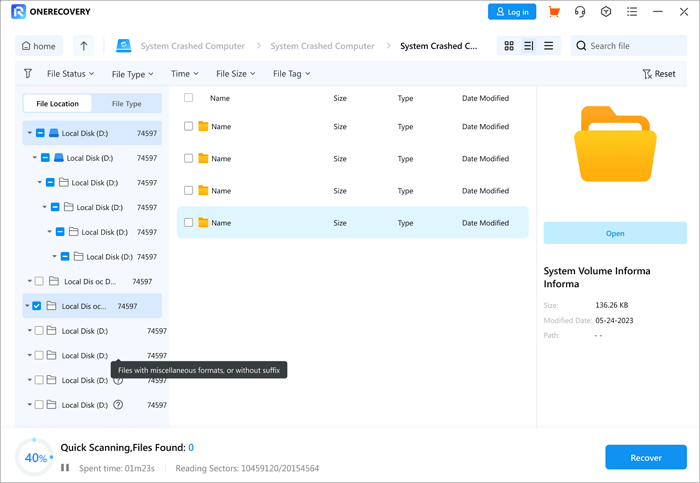
Method 3. Recover Deleted Photos Using ONERECOVERY
ONERECOVERY has an intuitive photo recovery tool for retrieving pictures that have been lost due to various reasons. It can be used to restore all types of photo formats from various storage devices, including HDD, USB, SD Card, and many more.
Additionally, this software can even recover lost due to hard drive failure, software crash, computer OS crash, and several other errors.
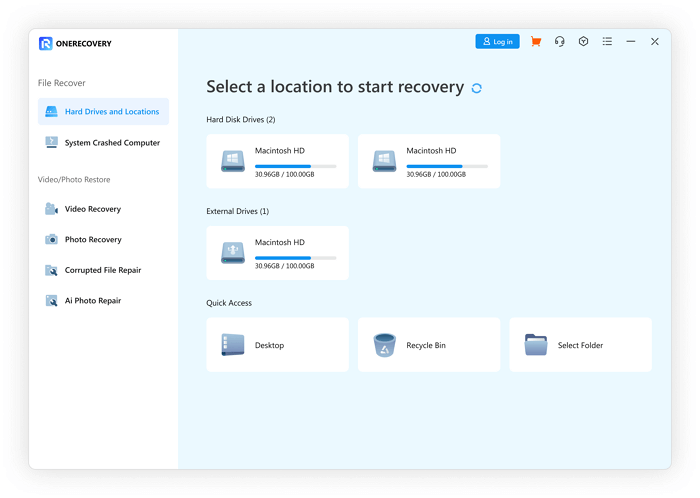
Below are steps on how to recover deleted pictures using ONERECOVERY:
Step 1. Download and install ONERECOVERY on your PC.
Step 2. Initiate a scan on the folder where the photos were saved.
Step 3. Choose and preview the photo you want to restore.
Step 4. To complete the recovery process, click Recover.
📥 Click to download and try it out for free:

Method 4. Recuperate Deleted Pictures From the Cloud
Cloud storage is a mode of storage that uses a remote server to save data on virtual machines owned by third-party companies. It requires the constant use of an internet connection to upload, access, and retrieve deleted photos.
This storage type consumes zero space on your device and offers an unlimited amount of space for your pictures in the cloud. This way, the limited space on your device won’t result in a picture loss.
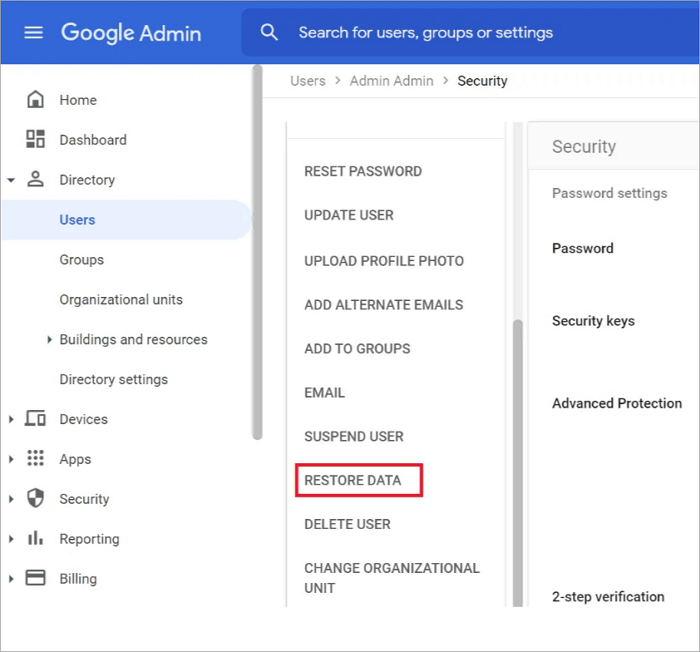
Follow these steps to retrieve photos from Cloud Storage:
Step 1. Open whichever cloud storage provider you use (Google Admin).
Step 2. Click on the user icon.
Step 3. Click on the eclipse icon and Select restore data.
Step 4. Select the data range you want to recover and click restore.
How to Recover Deleted Photos on Mac
Recovering deleted photos on a Mac can be done using some inbuilt tools on your device or with the use of external software. Below are three different ways to get this done.
Method 1. Get Back Deleted Photos from Time Machine
One good way to create a schedule for backing up your photos on Mac is with the use of Time Machine. When turned on, this software automatically backs up your photos at intervals that could be hourly, daily, or weekly. Not only does it create picture backups, but it can also be used in recovering previous versions of a picture with or without an external hard disk.
A notable downside of Time Machine is that it slows down your Mac’s performance during the backup process.
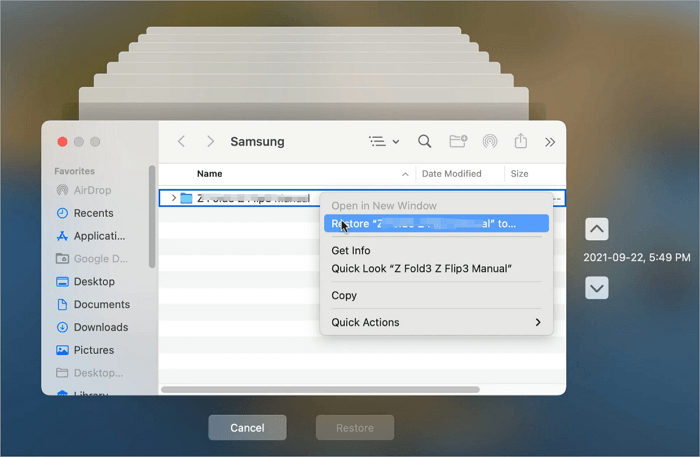
To undo deleted pictures on your Mac via Time Machine, here is what you need to do:
Step 1. Connect your Mac with the Time Machine’s backup disk.
Step 2. Open Time Machine by clicking its icon at the top-right menu bar.
Step 3. Select the date of your last backup.
Step 4. Go to the picture folder, select the photo, and click on Restore.
Method 2. Find Deleted Photos from iCloud
Apple offers every user a free cloud storage service, i.e. iCloud, with 5 GB of cloud storage. Since iCloud enables users to backup and sync various formats of files across devices, you can easily use it to get back deleted images that are stored on iCloud. In addition to your images, the calendar events, Numbers & Keynote files, etc., can all be saved on it.
It’s worth noting that you need to restore the picture within 30 days after it is deleted. And the restored picture will replace everything currently stored on all devices linked to your iCloud account.

Here are some steps to recover erased pictures from iCloud:
Step 1. First of all, you need to visit the iCloud.com website using the browser.
Step 2. Log into your Apple account.
Step 3. Find the “Photo” option on the home page of iCloud, and find the picture you want to restore.
Step 4. Click on the “Download” button to save the backup to your device.
Method 3. Recover Deleted Images Using ONERECOVERY
ONERECOVERY is also a great photo recovery tool for macOS as well as for Windows. The tool is widely adopted for its user-friendly interface and comprehensive file format support. Furthermore, this recovery software has a fast scanning feature that will save you a lot of time during the image recovery process.
Since this photo recovery program supports various types of Apple silicons and macOS file systems, including APFS, HFS+, FAT 12/16/32, etc., it can be considered one of the best choices for Mac users.
To recover your Mac photos using this software, follow the steps below.
Step 1. Download and launch the app.
Step 2. Select and scan the location where pictures were lost.
Step 3. Preview the results for the photos you want to restore.
Step 4. Click Recover for the photos you want back.
If you want to learn more about and compare the features of third-party photo & video recovery software, this post is what you need: >> Top 10 Photo and Video Recovery Software.
📥 Download the ONERECOVERY Mac version to enjoy a free trial:

How to Recover Erased Photos on iPhone
Recovering erased photos from an iPhone is quite easy. All you need to know is where to go and how to get it done. Below are methods to follow:
Method 1. Recall Deleted Photos from Recently Deleted
Every type of iPhone has a recently deleted folder in its photo app. This section is the destination for photos and videos that have just been deleted within 30 days, after which they will be deleted permanently.
This feature helps to recover photos that were deleted by mistake, or those you intend not to display in your gallery. The fault in this feature is that the photos still occupy space as long as they remain in the recently deleted folder, thereby limiting the available storage for saving incoming photos.

You can recuperate deleted pictures on your iPhone via this process by following these steps:
Step 1. Open the photos app and click on the albums tab.
Step 2. Click on the recently deleted album.
Step 3. Select the photo you want to restore and click on recover.
Method 2. Retrieve Deleted Photos from iCloud
iCloud is a service rendered by Apple to all iOS users. This service ensures all photo backups are available on all your Apple devices. Therefore, once a photo is deleted from your iCloud, it automatically deletes from all connected devices with just 30 days to be recovered.
However, before this service can be fully active, you need to turn on the iCloud photo library and make monthly subscriptions.
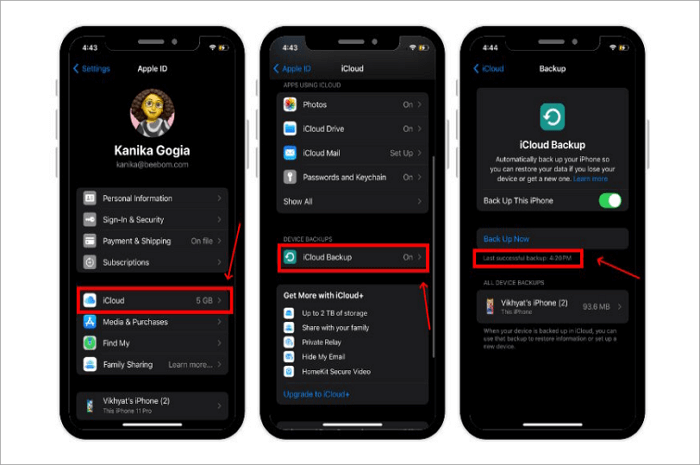
Here is a process on how to recover deleted pictures from iCloud:
Step 1. Open settings and tap your name at the top of the screen.
Step 2. Click on iCloud.
Step 3. Click on iCloud backup.
Step 4. Navigate and retrieve deleted pictures.
If you want to learn more about this solution, the following post is exactly what you need:
How to Restore Deleted Pictures on Android
Having your photos deleted from your phone can be quite confusing but as far as Android is concerned, there are ways to recover them.
Method 1. Retrieve Erased Pictures via Google Drive
Google Drive is a cloud-based storage tool that helps users to store, access, and retrieve their files online. When it comes to synchronizing, this tool is no fluke because it connects with all your devices and reflects an update of all the changes you’ve made.
However, there’s a limit to free account storage space. Google Drive offers 15GB maximum space for upload on free accounts. To get more storage space, you would have to buy.
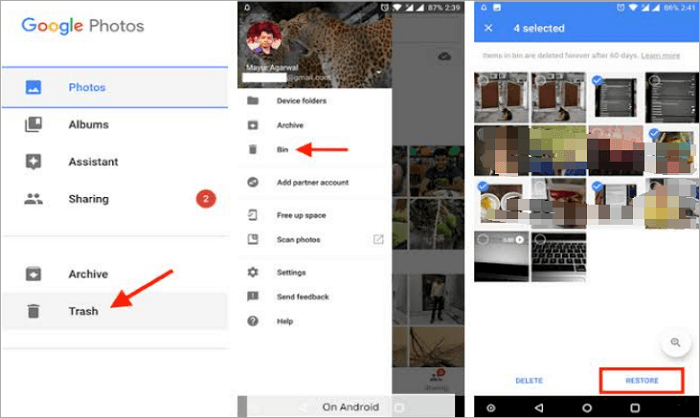
Follow these steps to learn how to recover deleted photos on Android via Google Drive:
Step 1. Sign in to the Google Drive app.
Step 2. Browse the picture you want to recover in the Trash.
Step 3. Click the menu button and tap restore.
Method 2. Retrieve Deleted Images from the SD Card
The SD card is an external component used to increase the storage space available on devices. It allows you to save more photos and also serves as a means of backup to recover lost images.
ONERECOVERY supports many types of external storage devices, such as SD cards, USB flash drives, external hard drives, etc. Therefore, if the lost photos are stored in an SD card, you can retrieve them using this software with simple clicks.
Here is a step-by-step tutorial for using ONERECOVERY to recover pictures on an SD card:
Step 1. Insert your SD Card into your card reader and connect it to your PC.
Step 2. Launch the software and choose the external disc drive i.e. your card reader) to commence the scanning process.
Step 3. The scanning process will display all existing, corrupted, and deleted photos on the SD Card.
Step 4. Select the pictures you want to retrieve and click Recover.
More Detailed Guidance: >> How to Recover Deleted Photos from SD Card
Conclusion
One similar thing with Android, Windows, iPhone, and Mac operating systems is that all deleted photos will first move to the Recycle Bin or Recently Deleted folder. So whenever your photos go missing, these are the first places you should check. However, if they got deleted as a result of a hard drive failure or software malfunction, reliable recovery software like ONERECOVERY is what you need.