Pixelated images occur when a picture is stretched beyond its resolution strength to the point where individual pixels become visible. Pixelation is a common problem when resizing a low-resolution image or printing an image with incorrect resolution settings.
Pixelated, blurry graphics can affect the visual quality of your presentation and can be frustrating to fix. But worry no more; by the time you finish reading, you will be able to fix a pixelated image like an expert!
Overview of Photo Pixelation
Before we fix a pixelated image, let’s see why images become pixelated and how to avoid this scenario altogether.
❓ What Does the Pixelated Picture Mean?
Most images are composed of small formations of colors called pixels. They form a smooth, high-quality picture if the pixel density is high enough.
When a low-resolution picture is zoomed in, these pixels become notable. We refer to images in this state as pixelated images.
🔎 Why Do Pictures Appear Pixelated?
An image may appear pixelated for several reasons. The most common cause is enlarging a low-resolution picture with insufficient pixels to represent details. It could also happen when a user compresses an image for sharing using a lossy format like JPEG.
File corruption and incorrect scaling can also make pictures look pixelated.
Related Post: >> 7 Ways to Repair a JPG/JPEG Images
💡 How to Prevent Pixelated Images?
Keeping the original dimensions of the picture without excessive enlarging and resizing will also help to make your photographs professional and appealing.
Saving images in lossless file formats like PNG will also keep images clear and sharp.
How to Fix Pixelated Pictures with ONERECOVERY
A pixelated image is no longer an obstacle to completing your project! AI-driven software like ONERECOVERY can fix pixelated photos in no time at all. This all-in-one photo restoration tool offers you several versions to help you repair photos on Windows, Mac, and online.
Make a Picture Less Pixelated on the Desktop
ONERECOVRY’s photo restoration tool analyzes pixelated pictures with advanced AI algorithms instead of using fixed templates to make them less pixelated. The customized approach makes it possible to recognize imperfections in the picture and offer a more targeted result.
Even if you have yet to gain prior experience or in-depth knowledge of image restoration, ONERECOVERY can make you look like an expert! The user-friendly interface and intuitive operation flow of this software make it suitable for everyone.
Let’s see how to make a pixelated image sharper with ONERECOEVRY.
Step 1. Download the software from ONERECOVERY’s official site and launch it. Select the “AI photo repair” tab.
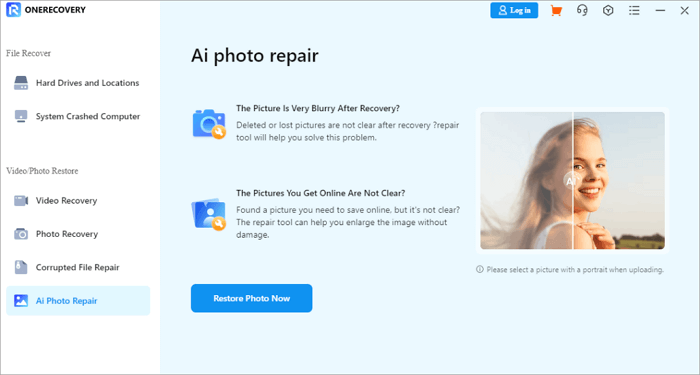
Step 2. Click the “Restore Photo Now” button. Select the pixelated image from the dialog box.
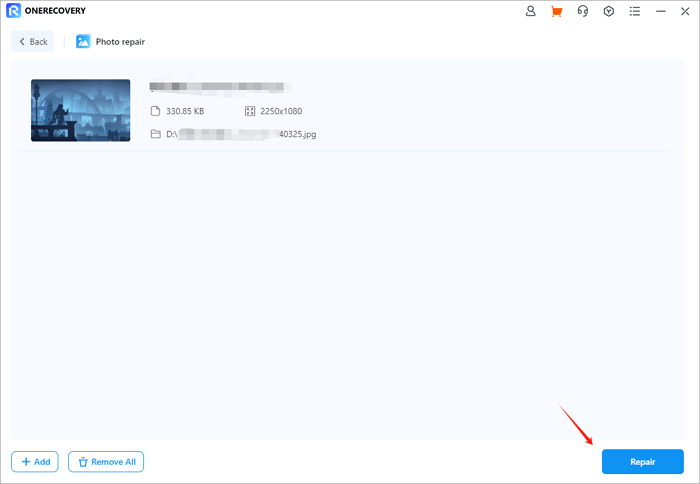
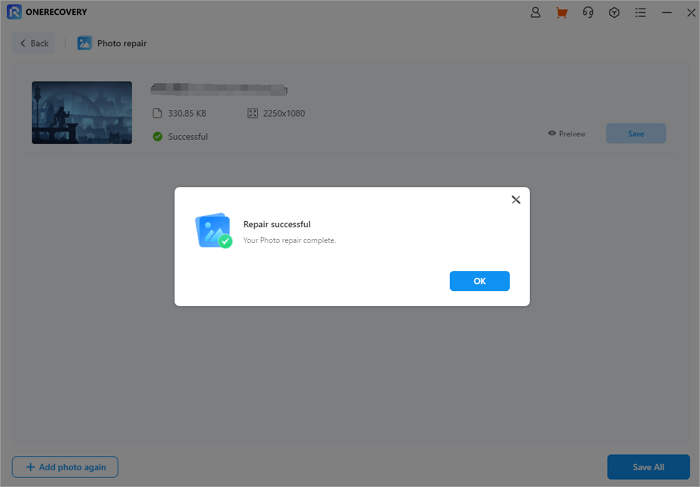
Step 3. ONERECOVERY will start processing the pixelated image.
Step 4. The app will complete editing and show you an unpixelated image. Tap the Save button and select a folder on your computer to save the new image.
📥 Download now to experience it for free.
Remove Pixels from Image Online for Free
Don’t have access to the desktop version of ONERECOVERY? Don’t worry. The ONERECOVERY image repair online tool allows you to improve your pixelated image with the same quality. Using the online version also saves time and data spent downloading the app as well.
With ONERECOVERY online version, you can make pixelated photos look good even on the go with your smartphone! Simply go to the ONERECOVERY online site on your smartphone browser and let it do the magic!
You can follow the below steps to make a picture less pixelated.
Step 1. Go to the ONERECOVERY online site.

Step 2. Select the Photo Repair tab. Click Upload Photo and select the pixelated image from your computer.
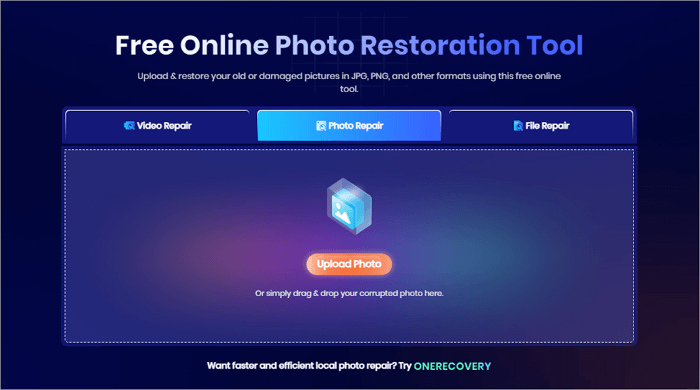
Step 3. ONERECOVERY will upload and start editing the pixelated image automatically.
Step 4. When the image is ready, click download to export the pixelated image to your computer. A clear, high-quality image will then be saved to your device.
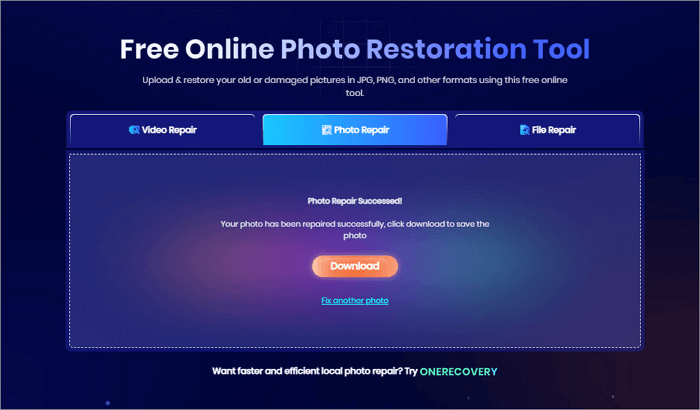
The same as its desktop version, ONERECOVERY’s online photo restoration tool also supports the repair of various image issues. For instance, you can use it to fix overexposed photos with only 3 steps.
How to Fix a Pixelated Image in Photoshop
Photoshop is a professional tool for working with pixelated images. It has many editing features that can help you improve the visual impact of even a low-quality image.
Sharpen and Blur Photos to Reduce Pixelation
Sharpening is an effective way to depixelate images, making them appear more detailed and clearer. Blurring works well with low-resolution images with minor pixelation issues, smoothing out harsh pixel edges. Blur and sharpening will both improve the overall visual effect of pictures.
First, we’ll talk about sharpening the image to reduce pixelation:
📌 Note: Be careful to control the degree of sharpening of the picture, excessive use of this method may create unnatural textures.
Step 1. Open the image in Photoshop by pressing CTRL+O.
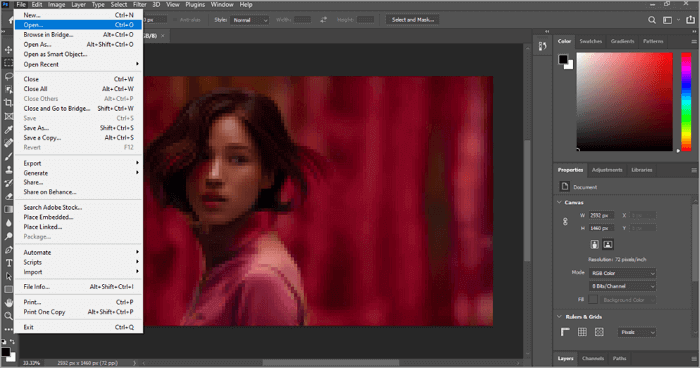
Step 2. Go to Filter>Blur>Gaussian Blur. A dialog box with a slider will appear on your screen. Use the ruler/slider to adjust the image until the photo image in the preview box becomes clear.
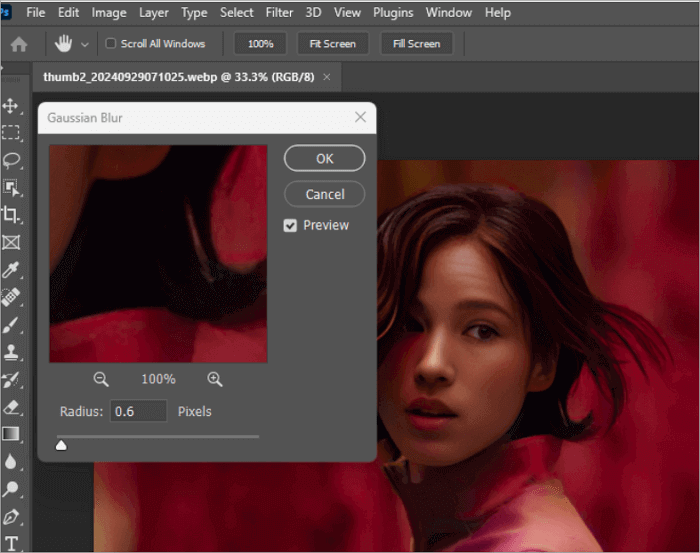
Step 3. Click “OK” when you are satisfied.
The Unsharp Mask can also help reduce image pixelation by enhancing edge contrast, though it may also amplify noise. By moving three sliders, you can make the image more dramatic.
Step 1. Select Filter>Sharpen> Unsharp Mask. A similar dialog box will appear.
Step 2. Adjust the image by sliding the ruler until you are satisfied.
Step 3. Save the image.
Minimize Pixels by Adding Soft Light
You can add a layer of soft light to smooth out harsh pixelation and create a more natural-looking image. This method will work better for portraits and flat-looking photos, as a soft light layer adds more depth.
Then, we will go through the steps to do that.
📌 Note: This method can change image brightness and contrast. Hence, users should be mindful of keeping the changes subtle.
Step 1. Open the image in Photoshop by pressing CTRL+O.
Step 2. Create a duplicate layer. Go to Layers>Duplicate Layer or use the keyboard shortcut CTRL+J.
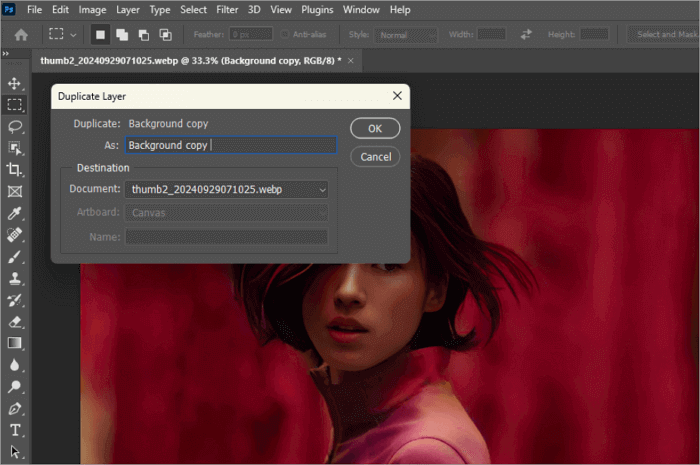
Step 3. From the layer panel, select Normal and set the new layers Blend mode to Soft light.
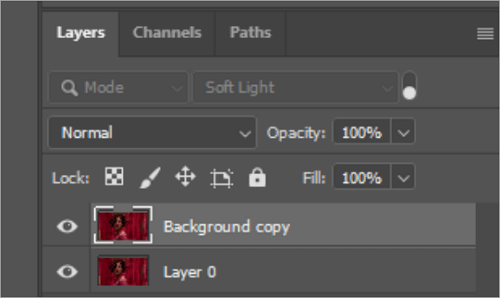
Step 4. Lower/ adjust Layer opacity as needed.
Step 5. Save the image.
How to Make a Pixelated Image Clear in Canva
Canva is a free online tool that is easy to use and helpful for making minor improvements in pixelated images. Unlike professional software like Photoshop, it may not be able to handle severely pixelated photos.
Using Canva to make a pixelated image clear is a fast and reliable option, especially for users without access to professional editing software.
Go to the Canva site and upload the image.
Step 1. Right-click on the image to open edit settings.
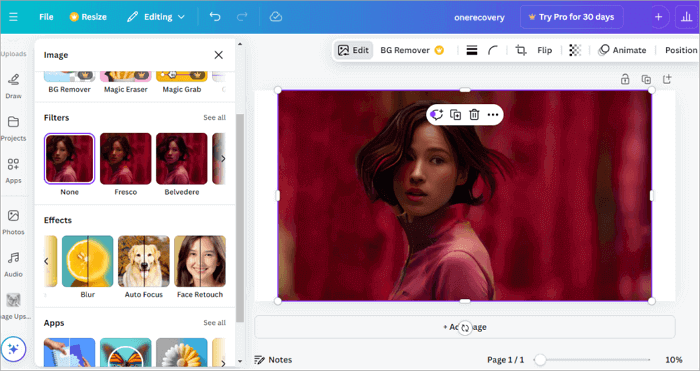
Step 2. You can use the Blur option to smooth out pixels and the sharpness tool to adjust the picture.
Step 3. Save /download the image using the share button on the top right corner of the screen once you are satisfied with the outcome.
How to Fix Pixelated Photos with Indesign
Adobe InDesign, a professional editing and publishing software, can quickly fix pixelation issues in low-resolution images. Pixelated images make a poor impression on print media, so InDesign advises using pictures with a minimum 300dpi resolution for your work.
InDesign can address image pixelation issues in PNG, TIFF, or even high-quality JPEG formats for professional-looking presentations and media. GIF images typically carry more pixelation issues, but InDesign can help you overcome these with a bit of extra attention and time.
Step 1. Open the image in InDesign.
Step 2. Check and adjust the scaling in the control panel. If the image scaling is above 100%, reduce it to 100% or below to retain the original quality.
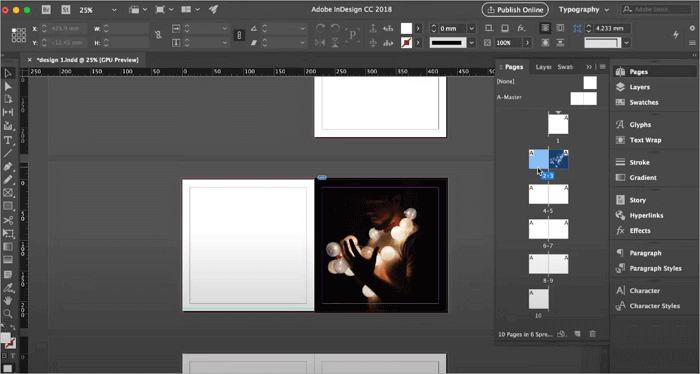
Step 3. When exporting the final document, check the compression tab to ensure the Bicubic Downsampling is set to a minimum of 300 dpi.
Conclusion
Pixelated images can be frustrating for the user, but they are fixable. Several tools that will help you to fix a pixelated image are detailed above, whereas ONERECOVERY’s free online tool stands out owing to its simplicity and results.
Pixelation issues can be avoided by sourcing only high-quality images for your work. If you are taking the photos yourself, ensure the camera settings are consistent with the type of photos you are taking and use a tripod where possible to avoid blurry pictures.
FAQs on Fixing Pixelated Pictures
Here are some of the most common problems regarding pixelated images.
How to turn pixelated images into HD?
Select the right tool to fix pixelated pictures depending on your requirements. You can use Photoshop, an open-source retouching software like GIMP, or AI-driven software like ONERECOVERY.
- Open the image in the selected platform.
- Upscale the image: use AI-based upscaling or Bicubic Smoother in Photoshop.
- Use a noise reduction filter to smoothen the image.
- Increase the sharpness of the image to refine details.
- Use a high-resolution format like TIFF or PNG to save the image.
How to fix pixelated pictures on your iPhone?
You can edit a pixelated image right on your iPhone using the Photos app or a third-party app like Remini or Snapseed.
- Open the image on your phone.
- If you are using the Photos app, use the sharpness and contrast tools to reduce pixelation.
- Enhance and HD resolution tools in Remini and Snapseed can reduce pixelation.
- You can also use an online tool like Let’s Enhance.io on Safari to remove pixels from images on your iPhone.
Can you remove pixelation from an image?
Pixelation of an image can be removed by using an image editing software like Photoshop or AI-based software, like ONERECOVERY.
- Upload the pixelated image to a platform of your choice.
- Upscale the image using AI or Bicubic Smoother in Photoshop.
- Blurring the image can take away harsh edges and smoothen the image.
- Apply a noise reduction filter to iron out grainy areas.
- Save the image in PNG or TIFF first to retain the quality.


