It can be frustrating when the final photos of your dish for the cooking blog come out all blurry, so you start wondering how to make images less blurry. A clear, sharp picture can make a massive impact in a social media post or a product description on a website, as it easily catches the eye.
The right picture can take your story a long way, and you will find everything you need to know to make a fuzzy picture clear in this article.
Why Do My Photos Always Turn Out Fuzzy
Pictures might not come out as clear or crispy as you want for many reasons. Some of the common causes are discussed below.
📸 Camera Shake: A slight movement while taking a photo can cause blurriness, especially in low-light conditions.
🎬 Out of Focus: If your camera is not focused correctly on the object or person you are capturing, the pictures will be fuzzy.
💡 Low-Light Conditions: Poor lighting can blur pictures. If you are shooting in low-light conditions, you should be extra careful of the camera’s aperture setting.
👋 Motion Blur: Trying to capture a speeding bike? Moving objects or a shaky hand can cause motion blurriness.
🔎 Improper Use of Zoom: If you use a telescopic lens to capture a bird far away, the slightest movement can mess up your picture.
How to Fix a Fuzzy Photo with a Photo Repair Tool
Even when a photographer makes a mistake when capturing the photo, professional photo repair tools like ONERECOVERY can help you make a blurry picture clear. It is Compatible with Windows, as well as macOS, Android, and iOS.
Make Images Less Blurry on Desktop
With ONERECOVERY’s photo restoration app, you don’t have to worry if your favorite photo from the trip has come out all blurry or overexposed. This AI-powered video repairing tool can analyze the image and automatically make it more attractive.
It can repair pictures in various formats and resolutions in batches. To be more specific, ONERECOVERY helps restore JPG, PNG, TIFF, GIF, and many other formats of images, whether its resolution is as low as 720P or as high as 8K.
How to make a fuzzy photo clear with the ONERECOVERY software:
Step 1. Open the ONERECOVERY desktop app on your computer and select the Photo Recovery Tool.
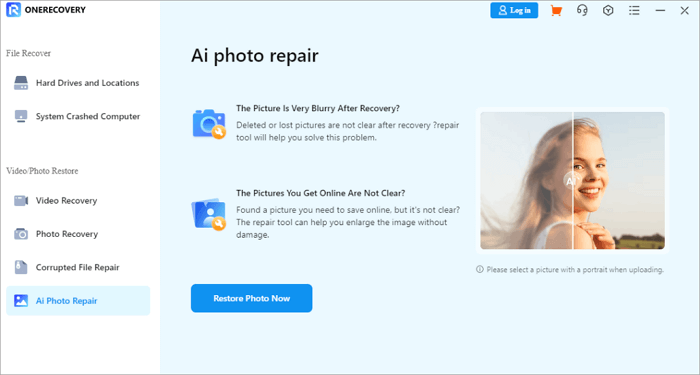
Step 2. Click Restore Photo Now. Select the image you need to repair from the dialog box.
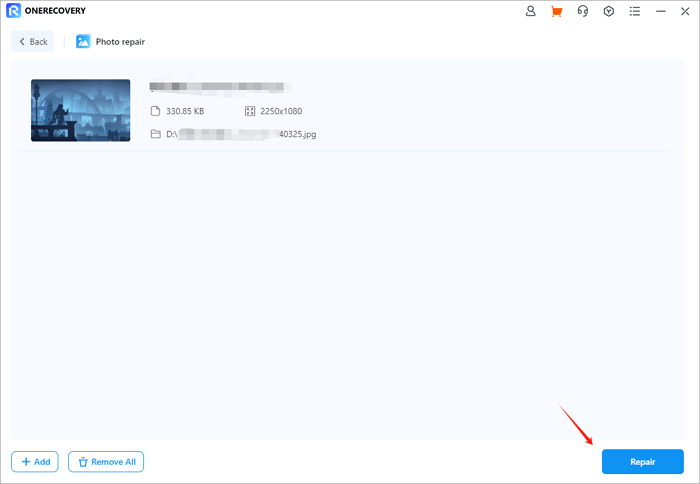
Step 3. ONERECOVERY will start processing the image.
Step 4. A sharper picture with vibrant colors will appear after repair. Click “Save” to complete the process.
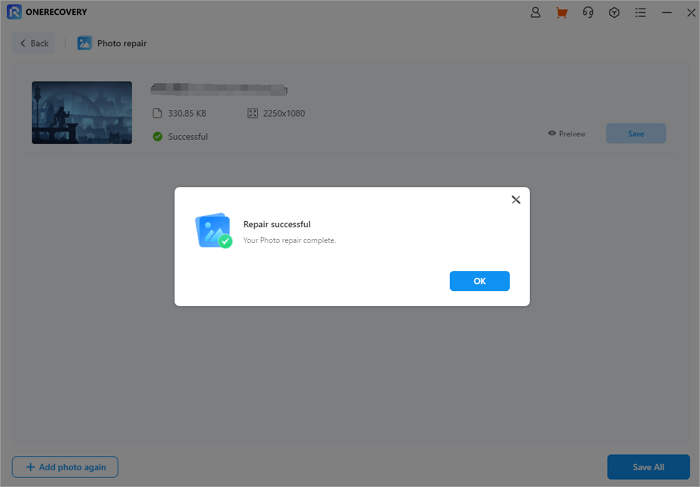
In addition to the restoration of blurry pictures, ONERECOVERY is also helpful when you need to fix pixelated images, restore old photos, or repair overexposed pictures.
📥 Give it a free test run—download it today!
Make a Blurry Picture Clear Online
ONERECOVERY also offers an online image-repairing tool that works on almost all internet browsers, allowing you to repair photos anytime with your laptop, tablet, or smartphone.
This online tool has all the features of ONERECOVERY’s desktop software; you can also use it as an online photo fixer to enhance your pictures.
How to make a photo less blurry with the ONERECOVERY online tool:
Step 1. Go to the ONERECOVERY site and select Photo Repair.
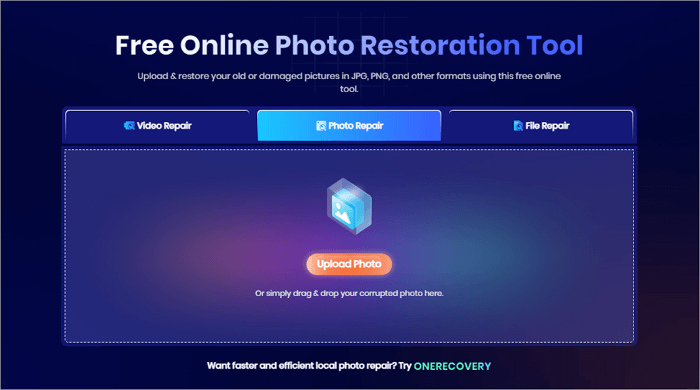
Step 2. The site will prompt you to drag and drop the photo that needs fixing or upload it.
Step 3. ONERECOVERY will process the image to make it appear vivid and sharper.
Step 4. Download the enhanced picture once the editing is complete.
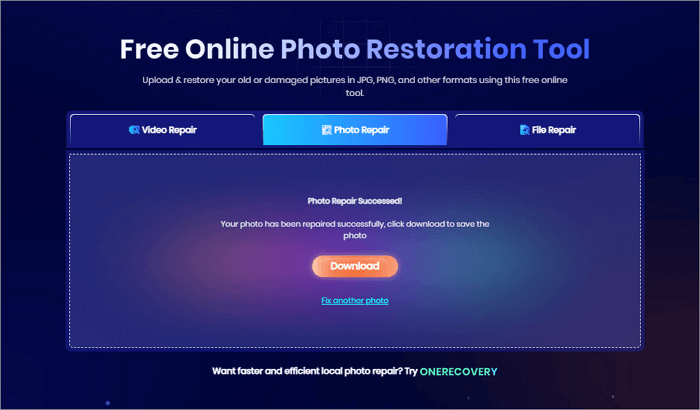
This all-in-one repair tool comes with many other helpful features, including fixing documents and videos. For example, when you get an error message of “The Archive is Corrupted“, all you need to do is drag and drop the file into ONERECOVERY online tool, and it will automatically scan and fix your files in a few seconds.
How to Make a Fuzzy Picture Clear in Photoshop
Adobe PhotoShop can edit a blurry picture to make it clearer and more appealing. PhotoShop is compatible with Windows and macOS.
This method cannot help if the image is too blurry, but it preserves the original image since an additional layer is used.
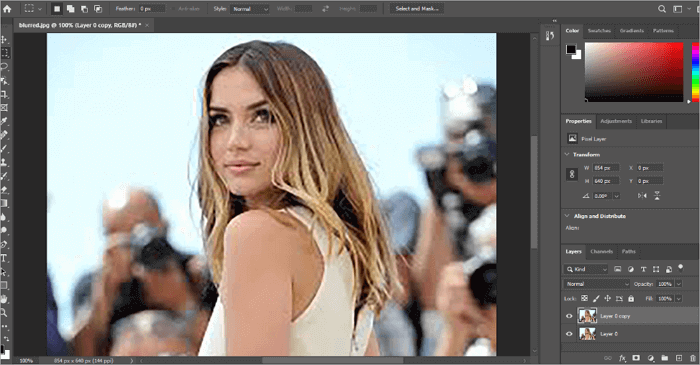
Step 1. Open the blurry photo in Photoshop. On the layers panel, Unlock the background layer by clicking the lock button.
Step 2. Press CTRL+J on Windows or Command + J on Mac to create a duplicate layer. This will make an identical layer to which the sharpening mask can be applied.
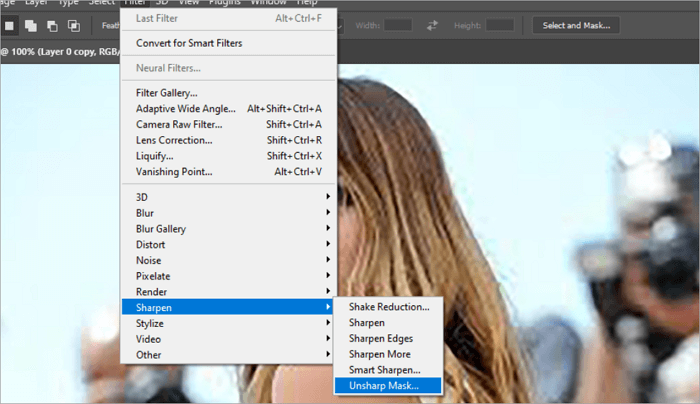
Step 3. To remove blurring, apply an unsharp mask by going to Filter> Sharpen>Unsharp Mask.
Step 4. The unsharp mask dialog box will appear. Set the amount to 150% and the threshold to 0. Adjust the radius from 1 pixel until the sharpening is at the desired level.
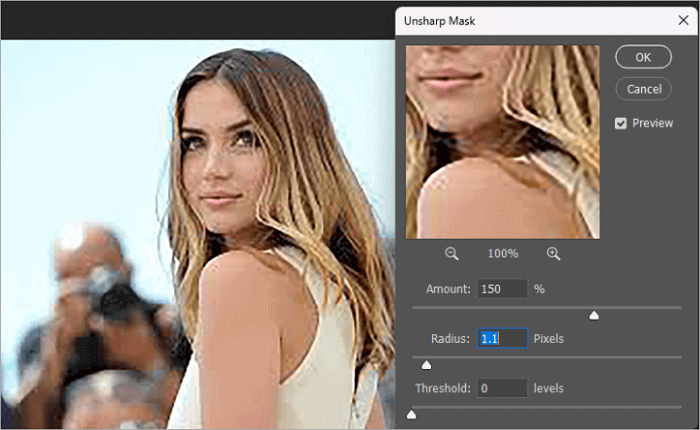
Step 5. Press ok once you are satisfied with the sharpness level and save the image.
How to Fix Fuzzy Pictures with Image Editing Apps
Photodirector is an AI-assisted image editing software compatible with Android and iOS. Users can enhance the appearance, improve blurry or fuzzy pictures, animate, change the background, or erase an object in the photo with just a few taps. So this app can help create eye-catching content for social media.
However, it has to be mentioned that some of its advanced features require a paid subscription, and video editing options are limited. And this app could slow down or crash on older smartphones.
Let’s see how to fix a fuzzy photo with Photodirector.
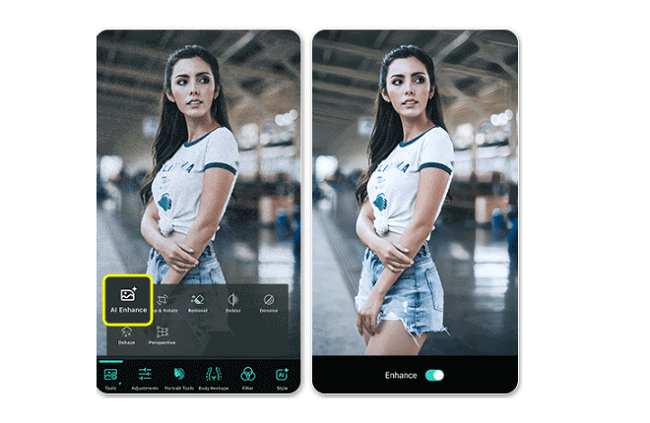
Step 1. Open the Photodirector app on your phone and select AI Enhance.

Step 2. Select the Blurry or fuzzy image you want to enhance from the gallery. Once the image is open in the app, slide the AI Enhance slider to the right. The App will work the magic and remove blur from the photo.
How to Make a Fuzzy Photo Clear Using Built-in Tool
We discussed many tools to clear a blurry picture, but you might already have the best app on your phone! iPhone and Android phones come with their photo editing software, which might be sufficient to sharpen a slightly blurry picture.
Built-in tools might not be as advanced as professional software, but they are easily accessible, quick, and often effective for minor edits.
For iPhone users:
Step 1. Open the Photos app and select the fuzzy image you want to sharpen. Tap Edit and scroll to Sharpness.
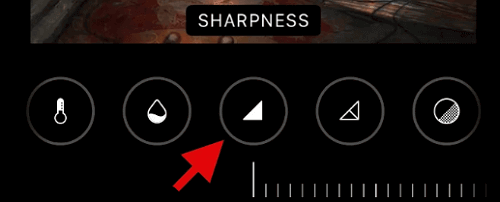
Step 2. You can increase the sharpness of the picture by moving the slider to the right.
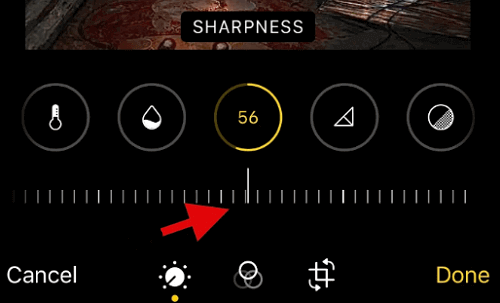
Step 3. Once satisfied with the image sharpness, tap Done to save the changes. You can fine-tune using Definition and Noise Reduction options.
For Android users:
Step 1. Open the Photo you want to sharpen and select edit from the menu.

Step 2. A new screen will open with editing tools on the bottom. Scroll right until you reach the sharpness tool.
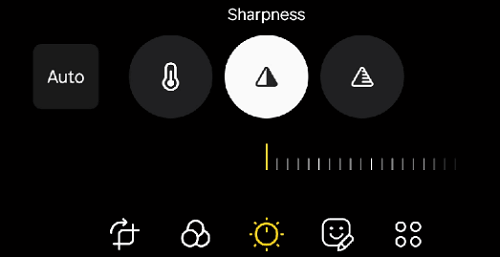
Step 3. Increase the image sharpness by sliding towards the left and save the image once you are happy with the outcome.
Tips: How to Avoid Blurry Images
While many tools exist to help you fix a blurry image, you can fix the problem at its root by taking a few simple precautions.
Adjust Camera Focus: Backing away from your subject and taking the picture with a narrow aperture will help you to capture sharper images.
Use a Larger Aperture: A wide aperture, such as 1.4 or 1.8, can give you a depth of field that allows you to be more selective with your focus.
Choose Optical Image Stabilization: Image stabilization will produce sharper shots in low-light conditions, allowing you to shoot at lower shutter speeds.
Conclusion
A photographer or content creator no longer has to worry if the initial photo does not come through as sharp as expected. Many editing software programs can fix blurry pictures, and we discussed how to make images less blurry in detail.
AI-assisted software like ONERECOVERY can fix a blurry picture within seconds, and a user need not be tech-savvy to edit a photo anymore. However, fuzzy pictures can be easily avoided by taking basic precautions like using a tripod or the correct aperture setting.
FAQs on How to Fix Blurry Photos
Here are a few of the most asked questions about blurry pictures.
How do you fix a blurry picture on an iPhone?
The quickest way to fix a blurry picture on iPhone is to use it’s built-in feature.
- Open the Photos app. Select the photo you want to sharpen. Tap Edit and scroll to Sharpness.
- Increase the sharpness of the picture by moving the slider to the right.
- Once you are satisfied with the image sharpness, tap Done to save the changes. You can fine-tune using the
- Definition and Noise Reduction options.
How do you make a picture less blurry online?
AI-assisted software like ONERECOVERY can fix blurry photos online in no time at all.
- Go to the ONERECOVERY site and select Photo Repair.
- Upload the photo that needs sharpening.
- ONERECOVERY will process the image to make it appear sharper.
- Download the picture once the process is complete.
Why do my photos always turn out fuzzy on Android?
You can fix fuzzy pictures on your Android by shooting in better light conditions and getting the object in the correct focus with your phone camera. Use HDR mode to shoot and check whether your autofocus is correct by tapping the object on the camera screen.
As the focal length of most smartphones is fixed, move closer to the subject rather than using digital zoom, which produces blurry photos.


