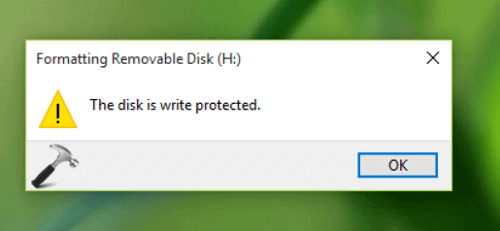
The other day I connected my reliable USB drive to transfer some files and lo and behold, there was an error – ‘The USB disk is write-protected.’
The most frustrating part is that, in these situations, you can only access the files without the ability to modify or delete any of them. However, in most cases, identifying the root cause of the situation is quite challenging. It could stem from something as minor as a small physical switch on the drive, file system corruption, or even malware.
But don’t worry—this post will break down the causes and guide you through the steps to resolve it.
Also Read: >> How to Fix “USB Drive Access Denied” Error?
Why Your USB Is Suddenly Write Protected?
I understand how annoying it can be when your USB flash drive unexpectedly becomes write-protected, stopping you from editing the files you need to submit before the deadline. Having experienced this myself, I’d like to share some common causes for this issue and quick solutions to resolve it.
| Cause | Description | Fix |
|---|---|---|
| Physical Write-Protection Switch | Some USB drives have a switch that enables write protection. | Locate the switch and toggle it to the ‘off’ position. |
| Corrupted File System | Power loss or improper ejection can corrupt the drive’s file system, triggering write protection. | Open Command Prompt (as admin) and run: “chkdsk X: /f” (replace ‘X’ with your drive letter). |
| Incorrect Registry Settings | Certain registry values can enforce write protection. | Open Registry Editor, navigate to HKEY_LOCAL_MACHINE\SYSTEM\CurrentControlSet\Control\StorageDevicePolicies, and set WriteProtect to 0. |
| Malware Infection | Malware can lock your USB to prevent file changes. | Perform a full scan with a trusted antivirus program. |
| Drive Reaching End of Life | The number of write cycles of flash drives is limited. | Replace the disk with a new one. |
Six Ways to Fix Disk-Protected USB Flash Drives
In this section, we are going to discuss 6 simple steps that you should take to fix the problem of a disk-protected USB. Before we start, make sure your USB drive is not locked physically by a write protection switch.
Method 1: Clear Write Protection from USB with Diskpart
Each time you encounter the error “The flash drive disk is write protected,” the first rescue that should come to mind is DiskPart. This handy Windows tool assists you in resolving write-protected drives with the help of a few commands.
Not only that, DiskPart is precise and assists in managing your disk attributes like removing the ‘read-only’ toggle. Plus, you can easily select the right drive by its size to avoid making the wrong changes.
Here’s how:
Step 1. Open Command Prompt as Admin (Win + X, then select it).
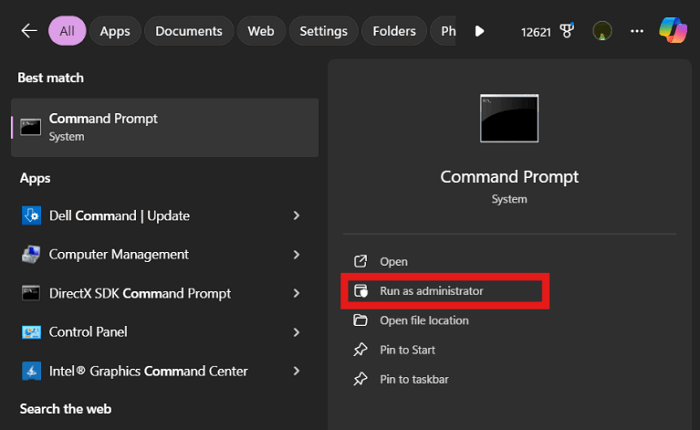
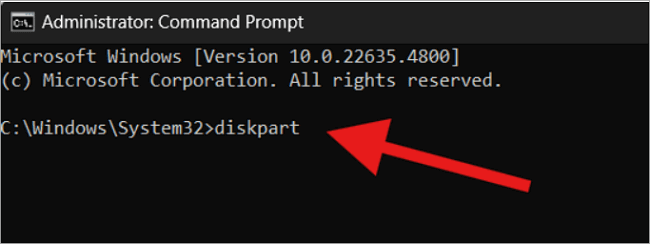
Step 2. Type in “diskpart” and hit Enter.
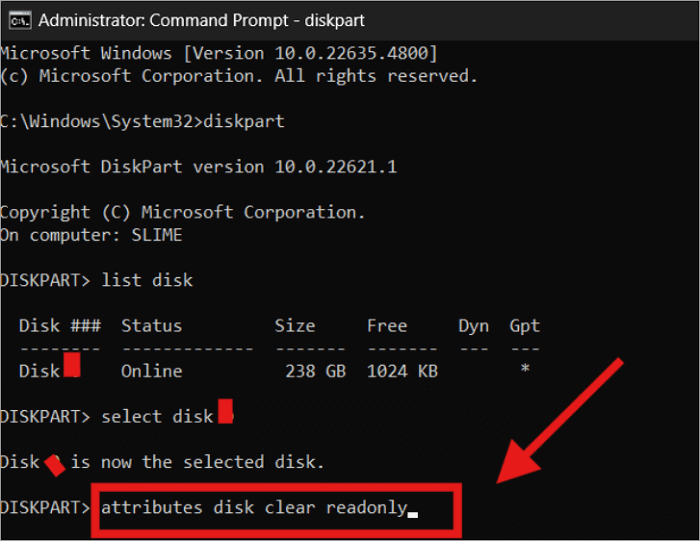
Step 3. Type list disk to see all drives.
Step 4. Find your USB and type select disk X (replace X with your disk number).
Step 5. Type “attributes disk clear readonly”.
Step 6. Exit by typing exit.
Method 2: Remove USB Write Protection via Registry
Here’s another method to fix the issue when your USB is suddenly write-protected: using the Windows Registry.
The Registry Editor lets you modify system settings directly and can help you disable write protection if your USB drive is malfunctioning. This tool is particularly useful when the issue isn’t due to a physical switch or software problems.
Here’s how:
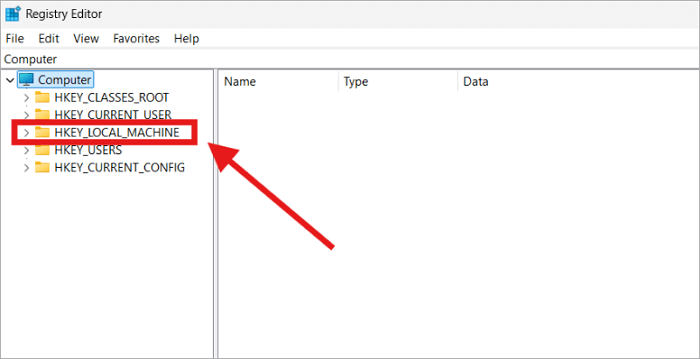
Step 1. Open the Registry Editor: Press Windows + R, type regedit, and hit Enter.
Step 2. Navigate to: HKEY_LOCAL_MACHINE\SYSTEM\CurrentControlSet\Control.
Step 3. Create a key: Right-click on Control, select New > Key, and name it StorageDevicePolicies.
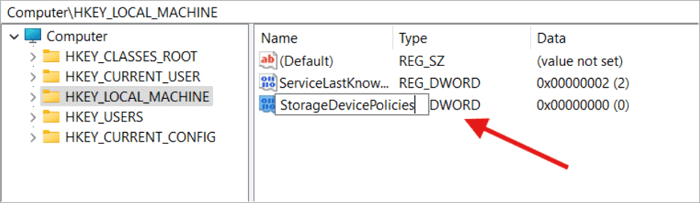
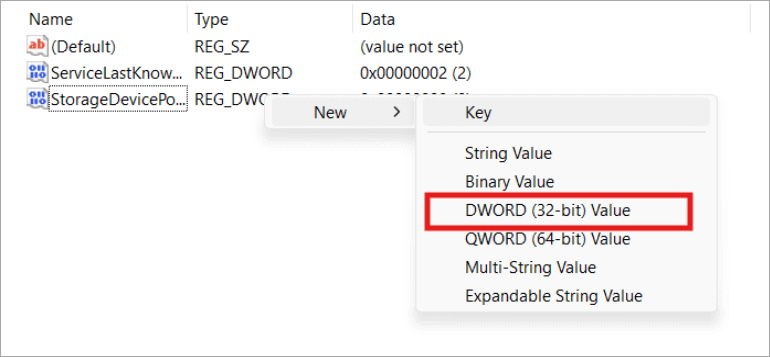
Step 4. Add a DWORD: Right-click the new key, choose New > DWORD (32-bit) Value, and name it WriteProtect.
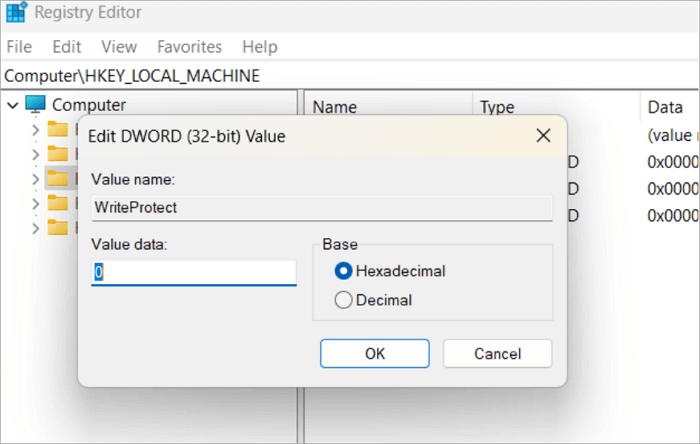
Step 5. Edit the value: Double-click WriteProtect, set the value to 0, and hit OK.
Step 6. Restart your PC to apply changes.
Just remember to back up your registry before making changes!
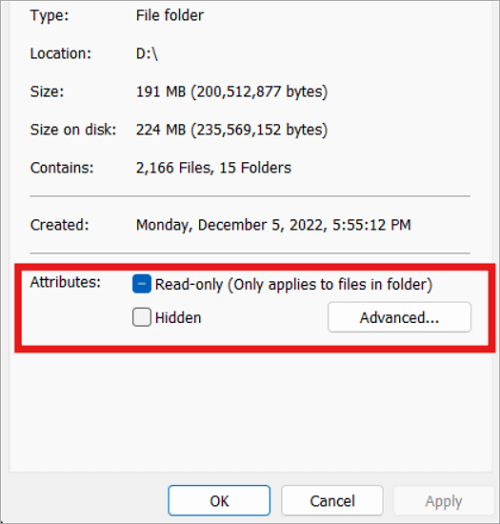
Method 3: Delete Write-Protected Files from the USB Drive
When it comes to dealing with write-protected files, there are certain things to check first. For instance, when one file is shared and is called ‘Read Only’ and cannot be deleted then it can create a problem with your disk-protected USB drive.
Here’s how to deal with it:
Step 1. Go to your USB drive and find the file that is causing the problem.
Step 2. In the Properties window select Read only from the Attributes section at the bottom of the window and uncheck it.
Method 4: Format the USB Drive Using File Explorer
Firstly, here’s a quick reminder: back up any important files stored on your USB drive. Once formatted, all data will be erased, and there’s no going back!
Now, let’s talk about using File Explorer to format your write-protected USB drive. This method is simple and user-friendly, perfect for anyone, even without tech skills. File Explorer offers an easy way to modify security settings and remove issues like when the USB disk is write-protected.
Steps to format a hard drive without losing data:
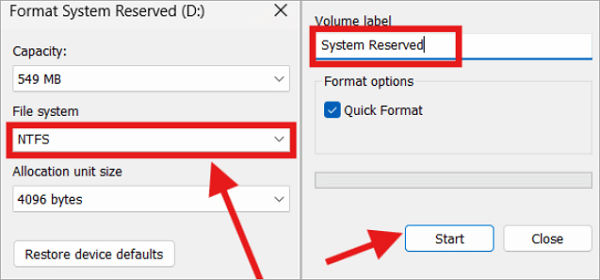
Step 1. Press Windows + E and go to This PC.
Step 2. Right-click your USB drive and choose Format.
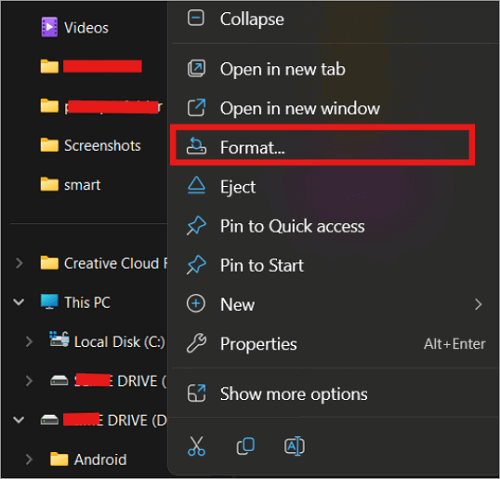
Step 3. Pick a file system: NTFS (Windows), exFAT (Windows/macOS), or FAT32 (4GB limit).
Step 4. Name your drive under Volume Label, hit Start, and confirm.
You can also check: >> How to format and write-protected SD card
Method 5: Disable BitLocker to Unlock Disk-Protected USB
So far, if you haven’t been able to remove USB write protection with the methods above, this one should do the trick: disabling BitLocker.
Turning off BitLocker makes your USB compatible with older devices and non-Windows systems. It also improves data transfer speed and saves you from entering passwords every time.
Here’s how:
Step 1. Plug your encrypted USB into your computer.
Step 2. Press the Windows key, search for “Manage BitLocker,” and hit Enter.
Step 3. Find the USB Drive under “Removable data drives.”
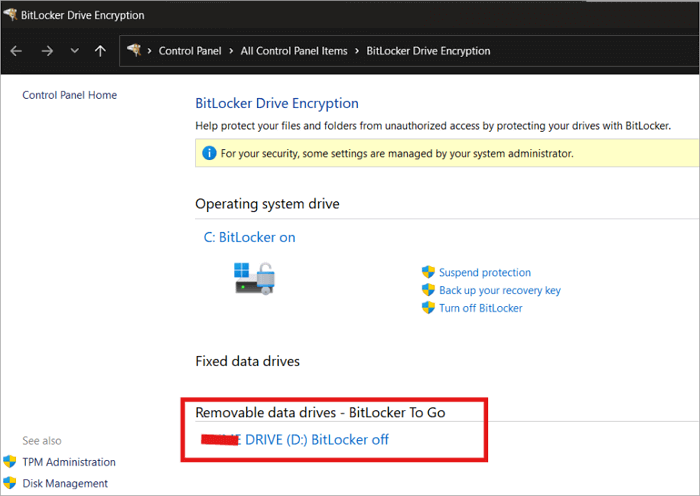
Step 4. Click “Turn off BitLocker” and confirm.
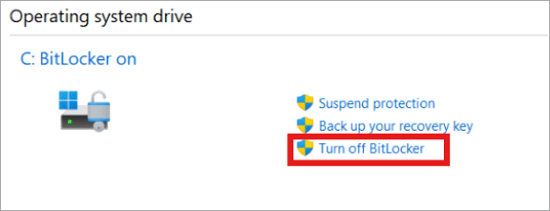
Step 5. Let the process finish—and then you’re good to go!
Keep backups safe, though, since disabling BitLocker removes encryption.
Method 6: Scan and Clean the Viruses in the USB
When was the last time you even thought about checking for viruses on that USB drive write-protected? Well, if you didn’t know, malware can cause all kinds of trouble—from locking your files to making the drive completely unusable.
But it’s okay! It might just need a quick scan and clean to sweep out some viruses, and your USB drive will be as good as new.
Here’s how:
Step 1. Insert your USB drive into the computer.
Step 2. Search “Windows Security” in the Start menu and open it.
Step 3. Go to “Virus & threat protection,” select “Scan options,” then “Custom scan.” Pick your USB drive and start the scan.
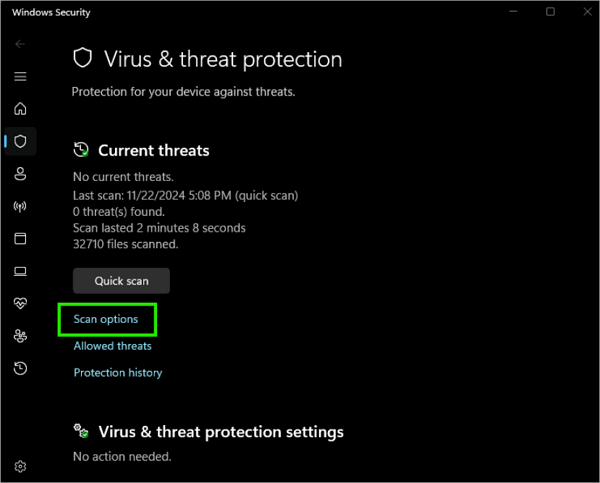
Step 4. Follow instructions to remove any threats found.
How to Recover Files After Formatting the USB Drive
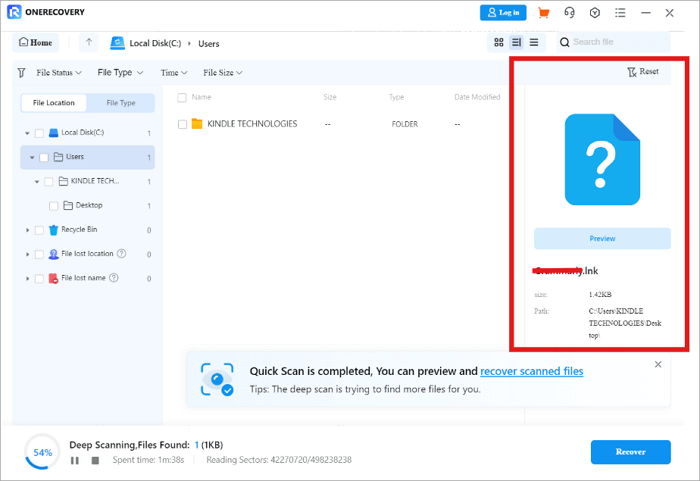
If you still forget to back up your data, or if the backup process fails for any reason, that’s where ONERECOVERY steps in to save the day.
This professional USB recovery software brings back lost files from formatted USB drives with ease. It supports over 1,000 file types and is perfect for retrieving photos, documents, videos, and more. Its user-friendly interface and preview feature make it simple for anyone to use, even if you’re not tech-savvy. ONERECOVERY has advanced algorithms to ensure a high success rate for data retrieval, even if your USB disk is write-protected.
Follow these steps to recover deleted files from USB flash/pen drives:
Step 1. Stop using the USB drive.
Step 2. Download and install ONERECOVERY (on a separate drive).
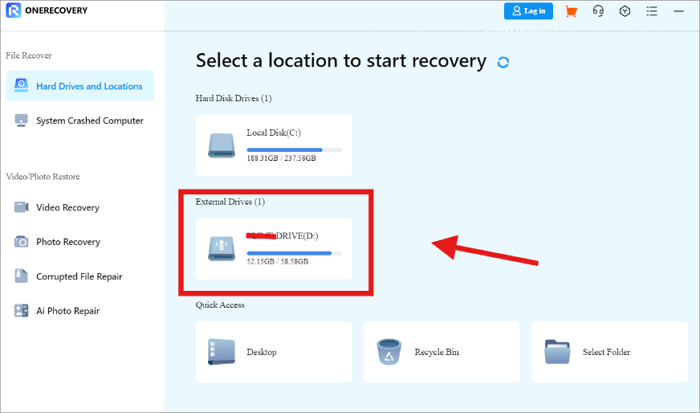
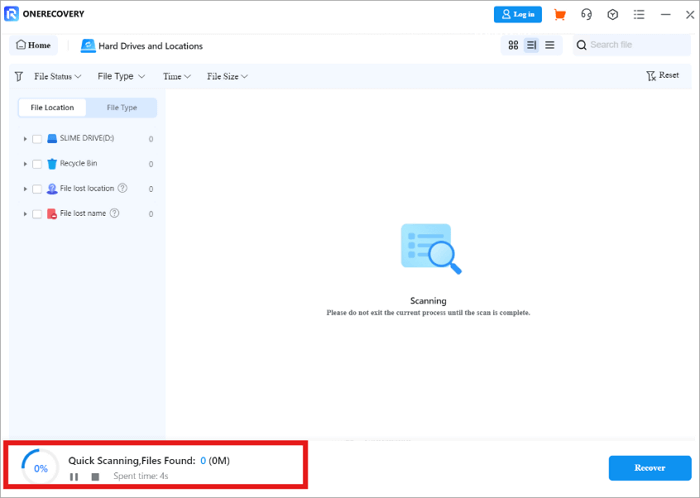
Step 3. Connect your USB, and scan for lost files.
Step 4. Preview, and recover them.
Conclusion
If you come across the ‘USB disk is write-protected’ error, there’s no need to panic—there are several ways to resolve it. In this guide, we explained six common reasons for this issue and offered solutions to eliminate write protection.
Whether the problem stems from a physical lock, corrupted files, or system settings, you can always follow these troubleshooting steps to restore full access to your USB and use it without any limitations.
Learn More About the ‘This Disk Is Write Protected’ Error
Seeing the “This Disk Is Write Protected” error feels like hitting a roadblock just when you’re ready to transfer files. But don’t worry—it’s fixable! Let’s dive into what causes this issue and how to resolve it step by step.
Why does my thumbstick say it is write-protected?
Your USB drive might be write-protected for several reasons. Check if the physical switch on your drive is not in the ‘unlocked’ position. The drive may also be written protected by corrupted file systems, which prevent the drive from being written to prevent further damage. Malware or old registry settings in Windows could also be the issue. Fixing these issues starts with identifying the cause, so take it one step at a time.
Also Read: >> How to Fix Corrupted Drives Without Losing Data
How do you fix write protection on a USB stick?
If you’ve been finding it hard to fix the write protection error on your USB stick, then this is for you.
- Open Command Prompt as an administrator.
- Type “diskpart”, then list the disk to see all drives.
- Identify your USB and type select disk X (replace X with your USB’s number).
- Now, type attributes disk clear readonly. This command removes the write protection. Exit by typing exit. Your USB should now be ready to use.
How do I format a write-protected USB drive in Windows 10?
The number one rule to keep in mind before formatting a write-protected USB drive in Windows 10 is to check if the physical switch on the drive isn’t turned off. If the error persists:
- Open the Registry Editor (Windows + R, type regedit).
- Navigate to HKEY_LOCAL_MACHINE\SYSTEM\CurrentControlSet\Control.
- Right-click “Control” and create a new key named StorageDevicePolicies.
- Inside it, add a DWORD named WriteProtect, set its value to 0, and click OK.
- Restart your computer to apply the changes, and your USB will be ready to format.