SSDs are usually preferred over HDDs because it has a faster transfer speed, better energy efficiency, and by far more reliable. To get even more desired benefits from your SSD, you might consider partitioning. By doing this you can have a separate partition for your data and another partition for the system data. When one partition of the SSD is affected, damaged, or corrupted, the data on the other partitions on the SSD are usually not affected.
This article gives step-by-step details on how to partition SSD.
Benefits and Preparations for SSD Partitioning
This section discusses the things that need to be done to prepare for SSD partitioning and the advantages of partitioning the SSD.
Advantages of SSD Partitioning
Partitioning SSD has different advantages that will help users have a more enjoyable experience using their devices. Some of the advantages of SSD Partitioning including:
✅ Keep System and Data Partitions Separate: People usually create 2 or more partitions; one is created for the OS and another partition is created to store data and not have everything mixed up. The importance of separating this set of data is to organize the data for ease of access and proper data management.
✅ Enable Multiple Operating Systems: Technically, it is impossible to run multiple OS on your SSD except for a partitioned SSD drive. Different operating systems can be installed in different partitions and they will function independently.
✅ Protect Data from System Problems: In case of a virus attack or a system problem, if one part of the partitioning is affected, there will be a minimal risk of data loss on the other partitioning.
If your data on a hard drive is lost for any of these reasons, you can follow the operations in this post to get them back: >> How to Recover Data from External Hard Drive
Prepare for Partitioning an SSD
Before you start the SSD partitioning, there are a few things you need to do:
👉 Data Backup: The first thing to do before you do any modification on your SSD is to backup the data on the drive. Modifying the disk may expose the file to corruption or data loss if things do not go as planned.
👉 Proper SSD Installation and Recognition: Connect the SSD properly to the computer. Ensure that the data cable is not damaged, and it’s installed correctly to prevent the “SSD not recognized” error.
Troubleshooting: >> How to Fix External SSD Keeps Disconnecting
👉 Enough Space for SSD Partitioning: Ensure that the SSD has enough unallocated space for partitioning. If the space is not enough, you can consider shrinking the existing partition to create more space.
It is also important to know the different states of SSD:
| 📝 States of SSD | 📌 Actions to be taken |
| Not Initialized SSD | This means users need to initialize the SSD first before they can begin partitioning. |
| Unallocated SSD | This means that the SSD is already initialized, and can be partitioned. You can only partition unallocated space. |
| Partitioned SSD | This SSD needs to be repartitioned. |
How to Partition SSD Using Windows Disk Management
Window disk management option is one of the easiest and most effective ways of partitioning the SSD. It has a more graphical interface as opposed to a command line format, making it easier for anybody to modify disks attached to the computer.
📋 Follow the steps below to learn how to partition a new SSD.
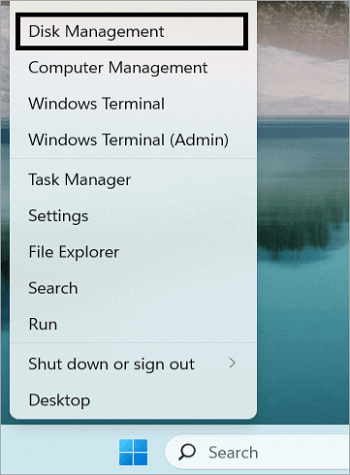
Step 1. Right-click on the “windows” sign and right-click on “Disk management.”
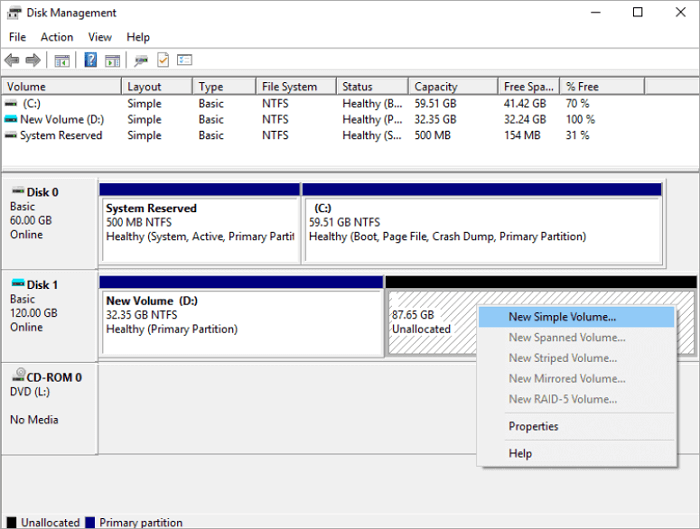
Step 2. Locate the SSD from the displayed list of disks.
Step 3. Right-click on the unallocated space. Next, click on “New Simple Volume” to open the new simple volume wizard.
Step 4. Click on “Next” on the new simple volume wizard.
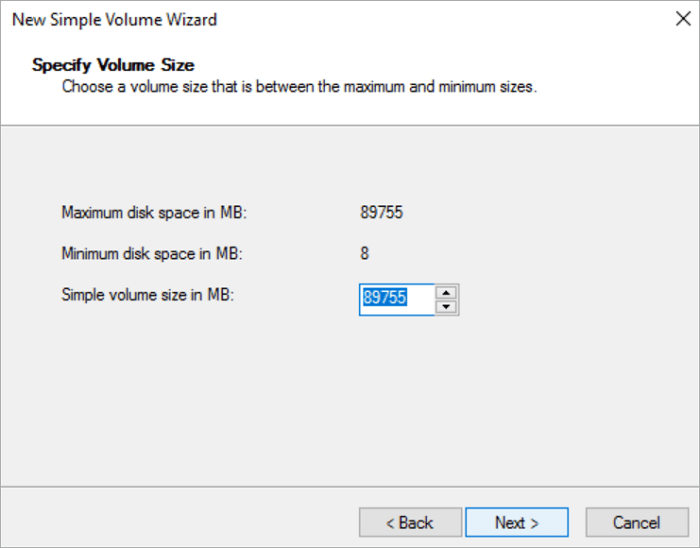
Step 5. Allocate the size to the partition you want to create, then click “Next.”
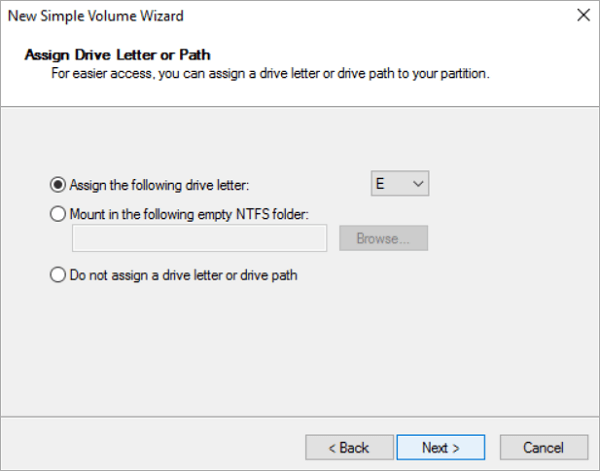
Step 6. Assign a letter to your drive by choosing from the available options. Alternatively, you can choose “Do not assign a drive letter or drive path” and then click “Next.”
Step 7. Choose the option “format this volume with the following settings.” Also, check the box “perform a quick format” and click “Next.”

Step 8. Click “Finish” to close the window.
How to Partition a Solid State Drive via DiskPart
DiskPart is capable of creating new partitions, deleting existing ones, or modifying their contents. Partitioning a solid-state drive via a DiskPart is a little technical since it uses a command line that might require understanding the command line. It is most suitable for people with technical understanding and experience with the command line.
📋 However, you can do it too by following these steps on how to partition a solid-state drive using DiskPart:
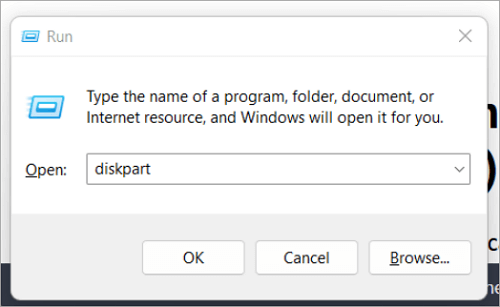
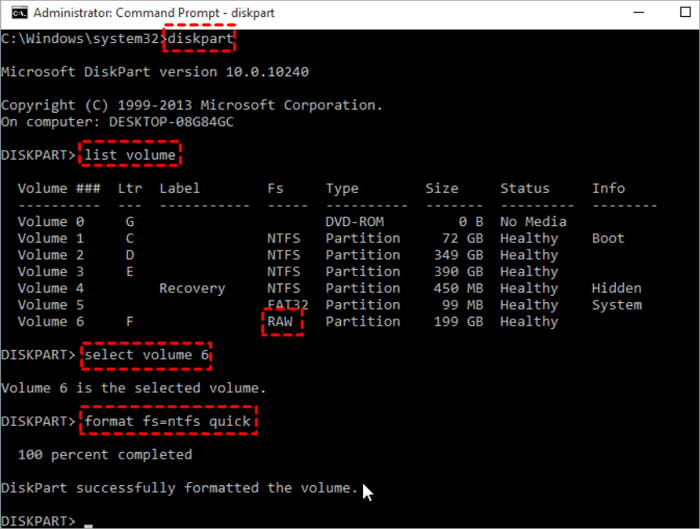
Step 1. You can search for DiskPart by typing “diskpart” in the search box or pressing the Windows + R on your keyboard and typing “diskpart”.
Step 2. Run DiskPart as an administrator.
Step 3. In front of “DISKPART” type in this command “list disk” and Enter to display all the disks connected to the computer. Next, identify the disk you want to partition from the list of disks displayed.
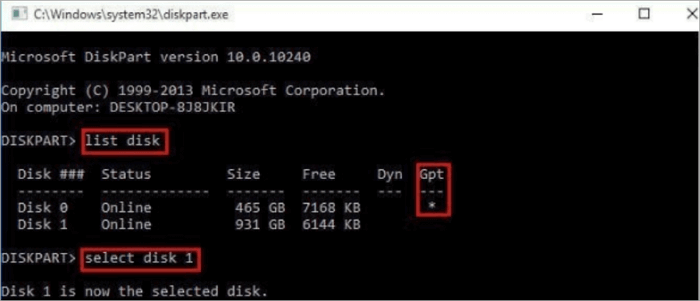
Step 4. Select the disk by typing the command “select disk 1.” Or you can replace the number “1” with the number of your disk that you’ve identified in the previous step.
Step 5. Type the command “create primary partition primary size =102400” and Enter. Replace “102400” with whatever size you wish to allocate to your partitioning.
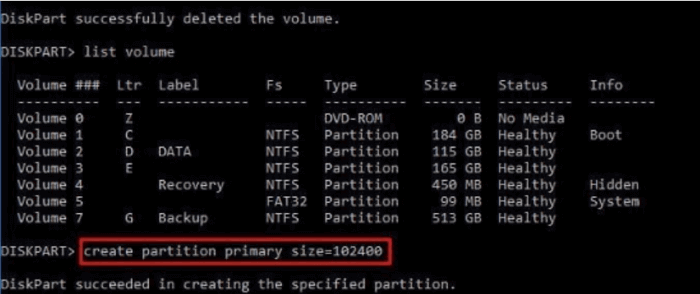
Step 6. The partition created appears as “RAW” when you type “list volume.” This means it needs to be formatted before it can be used. To do this type the command “select volume 6”.
Note: 6 should be replaced with the number of your partitioned disk. Next, type the command “format fs=ntfs quick”.
Step 7. Close the window.
Bonus Tips: How to Restore Partition
Even with proper preparation and following the given steps, modifying SSDs has some risks associated with this. There are often cases of data damage, loss, or corruption and in some cases accidental deletion of partitions. If that eventually happens, do not panic, ONERECOVERY can help recover the deleted partition.

📋 Follow these steps to recover the deleted partition using ONERECOVERY:
Step 1. Download and launch ONERECOVERY software.
Step 2. Choose the SSD you want to recover from.
Step 3. Scan the computer to locate lost files.
Step 4. Preview the files and recover the files from the deleted partition.
Step 5. Choose the location you want to move the recovered partition to.
If you want to try more partition recovery programs, the following post will introduce some of the most powerful ones that you cannot miss:
📥 Experience it for free—download today!

Conclusion
Partitioning SSD drives has a lot of advantages that every computer user can benefit from. The data management, the extra layer of protection it gives to files and the fact that it allows computer users to use multiple OS on their computers has made partitioning popular among computer users.
However, files can be lost, or damaged, or partitions can be mistakenly deleted. When this happens, ONERECOVERY software can help restore the lost partition and recover data from the SSD.
FAQs About SSD Partition
Out of curiosity, many computer users want to know more about partitioning their SSD. These questions will be addressed below:
❓ Is it good to partition SSD in Windows 11
💡 Yes, partitioning an SSD in Windows 11 has some advantages that are beneficial to users depending on their preferences. Some of these advantages include the overall improvement in the performance of the SSD, effective data management, and ease of data recovery in case of damaged or corrupted SSD.
❓ What is a partition on an SSD
💡 Partitioning on an SSD is a way of dividing the unallocated spaces on the SSD into different sections, and allocating the spaces for different uses. Each of the distinct divisions functions as an independent drive. The number and size of partitioning to be done on the SSD depends on individual needs and requirements.
❓ What type of partitioning is better for SSD
💡 There are 2 types of SSD partitioning, MBR (Master Boot Record) and GPT (GUID partition Table). GPT is recommended over MBR because it has more compatibility with the new OS and Hardware, and it maximizes the use of space on the SSD.