“I accidentally saved a Word document on Mac with an already existing Word document name and confirmed to replace the existing one. Now, my previous document is completely gone. How do I recover it?”
It can be so painful to spend hours or even days on a document and fail to save it properly. Understanding that such mistakes can cause significant breakdown and inconvenience, we’ve created a comprehensive guide to help you recover previous version of Word document Mac in the easiest ways.
6 Ways to Recover Previous Version of Word Document on Mac
Prevent losing your files forever. Here are the 6 guaranteed methods to recover old version of Word document Mac:
Try Mac File History Feature to Recover Previous Version Word
When you notice that you’ve overwritten a document (i.e. saved a document with another file’s name in the same location), your first recovery approach is File History. It’s programmed to automatically save different versions of files, thus you can restore previous versions when the need arises.
👉Mac recover previous version Word document through File History with these steps:
- Open the Word document whose previous version you need to retrieve.
- Navigate to the top of your screen, click on File, and select Browse Version History.
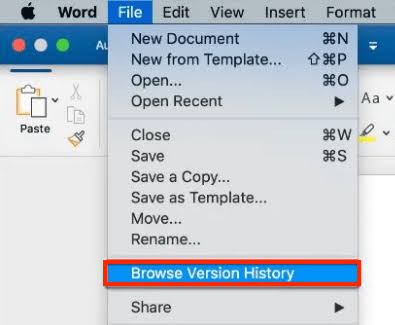
- A new window will appear, displaying all the old versions. Select the one you want to recover and click on Restore.
- Choose a new location to save the document on your Mac.
Use Time Machine to Recover Old Version of Word Document Mac
The Time Machine is an in-built feature in Mac that allows you to back up your data, including Word documents, videos, audios, pictures, and other files.
So, congratulations if you backed up your Mac data via the Time Machine. You don’t have to worry when you notice that a Word document is missing on your Mac. The backup on Time Machine will help revert your document to a previous version.
👉Follow these steps to recover previous version of Word document Mac through Time Machine:
- Connect the storage device where the Time Machine backup files were saved.
- Go to the Apple menu, click Go and choose Applications.
- Find and select Time Machine.
- Check through the backups for your Word document.
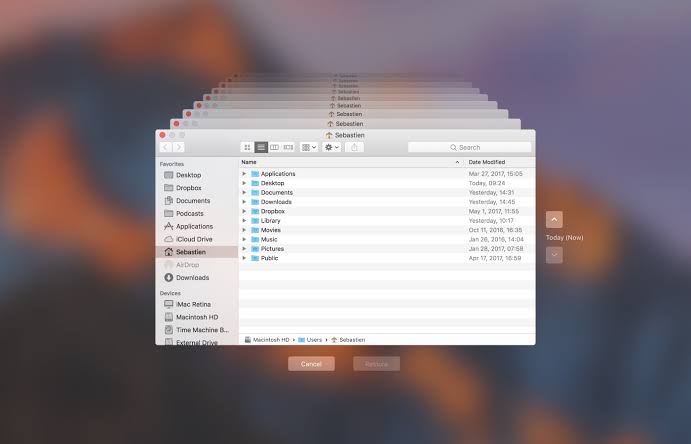
- Select the document you want to retrieve, then click on Restore. It will be returned to its original location.
>>>>Check out this full guide to restore from Time Machine in 2024.
Through TemporaryItems Folder to Restore Previous Version of a Word Document Mac
Mac comes with a TemporaryItems folder that saves documents you are currently working on as cache. So, when you close a Word document without saving or if your computer experiences some unfortunate occurrence and it shuts down, you can access the TemporaryItems folder to find it.
However, recently performed activities are not always available in the version stored in cache. But not to worry, you still get to restore a bulk of your doc content.
👉Here are the steps for unsaved Word document recovery on Mac:
- Go to Finder, click on Applications, select Utilities, and choose Terminal.
- In Terminal, input open $TMPDIR and press Return.
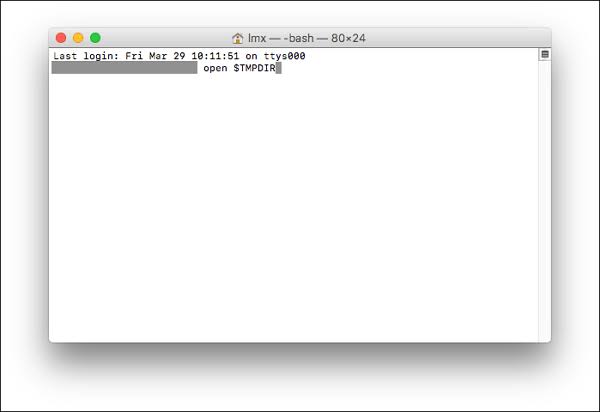
- Open TemporaryItems folder and find the files ending with “.tmp”
- Copy the files from the folder and paste in a different location.
- Change their extension from .tmp to .doc or .docx and open them with MS Word.
- Check through the files content till you get the one that contains the previous version you need.
❗NOTE: You need to act fast as the TemporaryItems folder only keeps cache files for a limited time.
Recover Not Saved Word Document through Word File Recovery Software
After trying the various methods above, if you didn’t get successful with recovering your Word document, try out a reputable data recovery software. While there are many options on the market, one of the best data recovery software that’s been globally known for efficiency, simplicity, and high success rate is ONERECOVERY.
ONERECOVERY by TinyFrom is an all-around data recovery tool, ranging from lost Word documents to Excel sheets, photos, videos, audio, and other types of files. It’s highly recommended by professionals for its user-friendly interface, dual scanning mode (quick scanning & deep scanning), data recovery for multiple devices, 100% privacy protection, and 24/7 customer support.
👉Here are the steps for how to recover Word document that was not saved Mac using ONERECOVERY:
- Click the download button below to safely download it, then install it on your computer.
- Open the software and select the storage location.
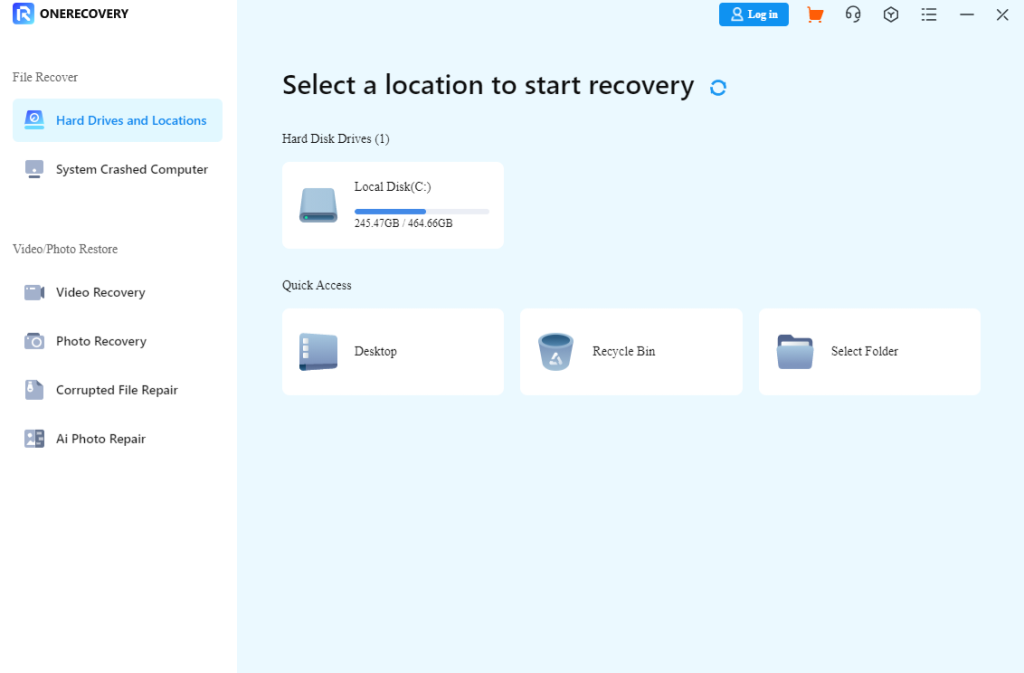
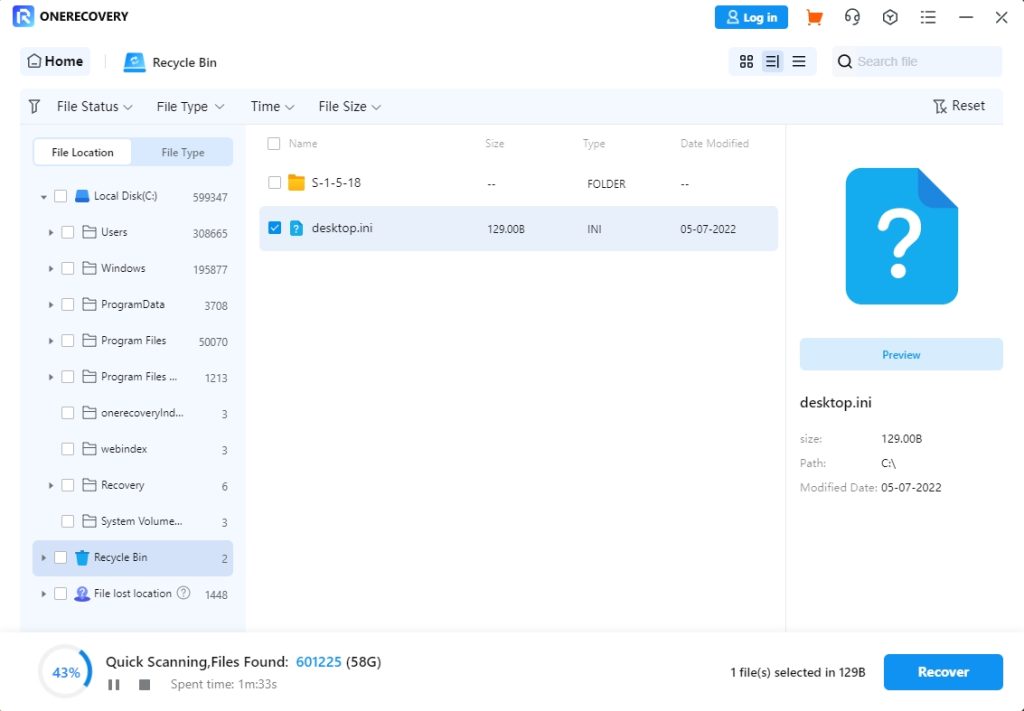
- Immediately, ONERECOVERY begins to scan previous versions of your Word document.
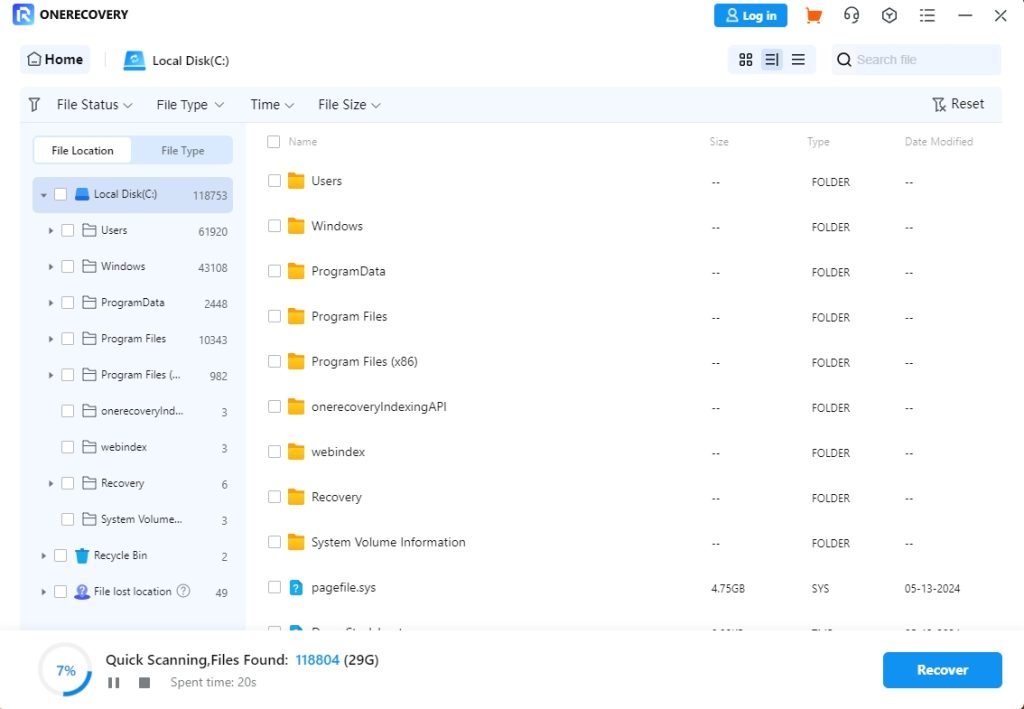
- Preview the results displayed, select the Word version you want to restore, and click Recover.
Recover Old Version of Word Documents Mac Using AutoRecovery
When Microsoft Word is installed on Mac, it comes with an AutoRecovery feature that automatically saves open documents every 10 minutes. This feature is turned on by default when you install MS Word. So, if the application or your Mac happens to crash when working on a file, you can recover it to the previous version.
This method is also applicable when you want to recover unsaved Word documents on Mac. It will recover the file to the state it was when the last automatic save happened.
👉Follow these steps for Microsoft Word revert to previous version on Mac:
- Go to Finder, click on Go, and select Go to Folder.
- In the new Window that pops up, input ~/Library/Containers/com.Microsoft.Word/Data/Library/Preferences/AutoRecovery and click on Go.
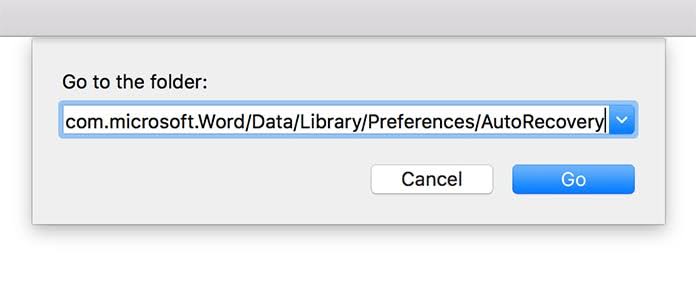
- Search for the document and open it with Microsoft Word to access the previous version.
- When you get the previous version, click File and select Save to store the file in a secure location.
▶️Paths for other file types are:
- Excel:
~/Library/Containers/com.microsoft.Excel/Data/Library/Application Support/Microsoft
- PowerPoint:
~/Library/Containers/com.Microsoft.Powerpoint/Data/Library/Preferences/AutoRecovery
- Numbers: ~/Library/Containers/com.apple.iWork.Numbers/Data/Library/AutoSave Information
- Pages: ~/Library/Containers/com.apple.iWork.Pages/Data/Library/AutoSave Information
Contact Microsoft Phone Support
If you’ve tried all the methods highlighted above and none helps with your Word doc version history, you need to contact Microsoft phone support.
Find the technical support phone number of your country or region and reach out to a Microsoft support representative to recover the old version of your Word document. Admins have your account details, so when you call, your profile will be ready.
Meanwhile, a PIN-based verification is done to confirm you own the account. The Microsoft support representative will send a verification code to the registered phone number or email in your profile.
Technical support is provided 24 hours a day and 7 days a week, so you can call anytime to get solutions to your Mac issues.
Conclusion
On this page, we’ve explained 6 practical ways to recover previous versions of Word document Mac. You don’t have to beat yourself up when you can’t restore a doc. Simply apply these approaches to get back your lost file.
To enjoy a one-stop solution that helps you recover overwritten, unsaved, deleted, and corrupted Word documents on Mac, use ONERECOVERY. It houses all the remedies both beginners and experts need for seamless data recovery.
FAQs on Mac Word Doc Version History Recovery
Get additional knowledge through these frequently asked questions about Word document previous version recovery on Mac.
- How to Revert the Word Document to the Last Version It Was Opened?
The most ideal options to use in reverting Word document to the last version it was opened are:
- File History
- Time Machine
- AutoRecovery
File History presents you with several old versions available and allows you to browse through, then choose the one you want to retrieve.
Time Machine enables you to recover backup data. But this only works if you’ve created a backup of your Mac on a storage drive beforehand. You can simply connect it to your Mac and revert the Word doc to the previous version.
AutoRecovery feature in Mac offers you the opportunity to retrieve as much as the last 10 minutes of your Word document. All actions performed on the document 10 minutes before are guaranteed to be recovered.
- Where to Find AutoRecover Word Files on Mac?
AutoRecover Word files go to a hidden location on your Mac, hence why it’s quite difficult to find them by simply navigating through Finder.
This is the best way to find them:
- Go to Finder > Go > Go to Folder.
- Enter this folder path: /Users/Your Username/Library/Containers/com.Microsoft/Data/Library/Prefernces/AutoRecovery
- How to Search for a Word in Mac?
There are several methods to do this, but the simplest is:
- Go to Finder.
- Click on the search bar at the top right corner of your screen.
- Input the Word document name or keywords.
- Search through the results to select the Word file you are searching for.


