Screenshotting on Mac is a quick way to capture and save information. It’s especially useful when you don’t have the chance to properly download information. By pressing and holding these three keys at the same time: Shift, Cmd, and 3, you can screenshot any page you want.
But what happens when you’ve made screenshots of important pages and cannot find them? Don’t worry, there are solutions for this. In this guide, we will explain how to retrieve screenshot on Mac in 4 ways.
Before worrying about retrieval, it’s essential you know where to find screenshots in Mac, so the search will be easier.
Ordinarily, screenshots on Mac are saved on the desktop. They usually indicate the date and time, such as “Screenshot 2024-05-05 at 9.15.03 AM.”
However, you can manually save the screenshots on a custom folder, such as Images or Downloads. Another way is to create folders to store specific screenshots. For example, you can create a folder for screenshots related to your project work. This helps with system organization and finding the screenshots faster.
Here are 4 tested and trusted methods on how to retrieve a screenshot on a Mac.
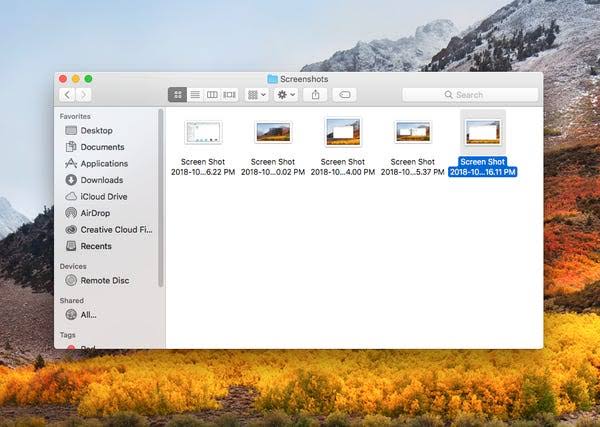
Finder is a great tool for searching for files and screenshots on Mac. A major advantage of using Finder is that you can save your custom search for later use.
👉These are the steps on how to retrieve screenshot on Mac through Finder:
Since this search is conducted on the whole Mac system, you might find many unnecessary screenshots. To delete, select them and drag to Trash.
If you cannot find the screenshots on the desktop or Finder, it could be that you mistakenly deleted them. To confirm, check Trash.
In case you deleted them permanently from the Trash, you can simply get them back by learning how to recover emptied trash on Mac and one of the methods is using an image recovery tool.
There are several image recovery tools on the market, but many of them are inefficient. Hence, why we recommend ONERECOVERY – a professional photo recovery software with a high success rate in restoring missing images to their location on Mac.
It’s arguably one of the best free file recovery software on Mac, boasting of a user-friendly interface that allows both beginners and experts to seamlessly recover lost screenshots. You don’t need to have expert knowledge or be computer savvy. The recovery processes are basic.
👉Below are the steps on how to retrieve screenshot on Mac using ONERECOVERY:
Spotlight is similar to Finders in how it works. The notable difference is that Spotlight cannot save your search. However, it offers a bigger and better view of screenshot files.
👉Here are the steps on how to view a screenshot on a Mac through Spotlight:
❗NOTE: Spotlight doesn’t list all items. To see full results, go to the bottom of the page, and select the Show All in Finder or Search in Finder option. Also, you can type and search for Screenshot in Spotlight. When the results appear, scroll downwards to click the Show All option.
In addition to the prolific functionality of the terminal to recover data from Mac hard drives, it’s also used to find screenshots on Mac. But the downside is that it allows you to only see the paths to your screenshots. You cannot actually view the screenshots by using Terminal because it’s a command-line tool.
👉Here’s how to find screenshots on Mac using Terminal:
Allowing screenshots to be saved on the desktop can make the screen oversaturated, resulting in a hassle when looking for specific images. Hence, it’s best to change where screenshots are saved on your Mac.
How to change where screenshots are stored on Mac varies depending on the macOS version.
If you have macOS Mojave and later versions installed, follow these steps to change the location where Mac stores screenshots:
If you have macOS High Sierra or older versions installed on your Mac, follow these steps to change screenshots location:
Where do screenshots go on Mac? Desktop.
Now, with this article, you know how to find them if they are missing, as well as how to change the location where they can be saved. For a quicker and more seamless approach to retrieving screenshots on Mac, use ONERECOVERY.
Learn more about finding screenshots on Mac. This will help ease your thought process whenever you cannot find a saved screenshot.
1️⃣Will Mac Automatically Save My Screenshots?
Yes, Mac will automatically save your screenshots. When you take screenshots, the Mac saves it on the desktop. Unless you’ve changed the location to save. If you have, just to the folder you set to save screenshots and access them.
2️⃣How to Delete the Screenshots on a MacBook?
There are 3 major ways to delete screenshots on a MacBook. Whichever method you choose, you need to select the screenshots you want to delete first. Meanwhile, it’s advisable you preview the screenshots, so you won’t delete the wrong ones.
👉Here are the ways to delete screenshots on MacBook:
3️⃣Is There a Screenshot History on Mac?
Yes, Mac has a screenshot history feature that allows you to access recent screenshots. However, this feature is only available on macOS Mojave and later versions.
👉To access the Screenshot History on Mac, follow these steps:
Losing your iMessages can be very painful, especially when you need to refer to some…
“I’ve somehow deleted the Downloads folder on my Mac while trying to create space. I’m…
“I took videos of my children when I taught them how to walk and when…
Does your MacBook Air refuse to boot up? The prospect of losing all your music…
Losing photos that were difficult to capture often results in a person becoming frustrated, anxious,…
Did you lose an email on your Mac and you are trying to get it…


