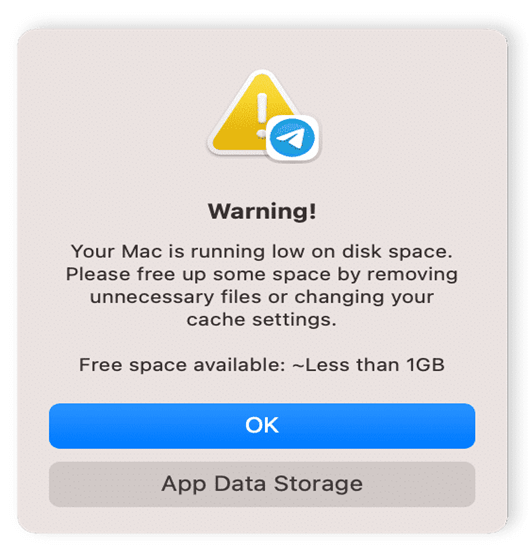
Have you ever been working on your Mac and received a pop-up saying, “Your Mac is running low on disk space”? You might wonder why your storage data is so huge, especially if you remember not having many files or documents. If you’re in the middle of a task with a looming deadline, you’re probably most concerned with how to clear system storage on your Mac. Continue reading this blog to find solutions for the excessive system storage on your Mac.
What is System Data on Mac?
On Mac computers, “System Data” refers to the files and information necessary for the operating system’s functionality, including temporary files, caches, logs, and system backups. These components can occupy a few gigabytes to over 100GB of storage, making understanding them vital for efficient storage management.
Here is a breakdown of several types of system data commonly found on a Mac:
| 📋Type of System Data | ✨Description |
| Temporary Files | Used during software updates, temporary files like .tmp and .psb are usually safe to delete if no installations are ongoing. |
| Cache Files | Cache files speed up app and website loading by storing temporary data. Common formats include .cache, .db, or specific folders. |
| System Logs | Record system and application events for troubleshooting. Log files, like system.log or wifi.log, typically end in .log. |
| Application Backups | Old data from uninstalled apps, these may include device backups and .plist configuration files. |
| Localization Files | Containing language data, these files might appear as .bak files or duplicates of application directories. |
| System Configuration Files | Files like .plist store system and app settings. |
Managing these files effectively can help free up space and enhance your Mac’s performance.
How to Check How Much Storage Space is Available
Now you have an understanding of what system data really means and the types it comes in. But how can you check how much storage space is available on your Mac? Here are the steps to follow:
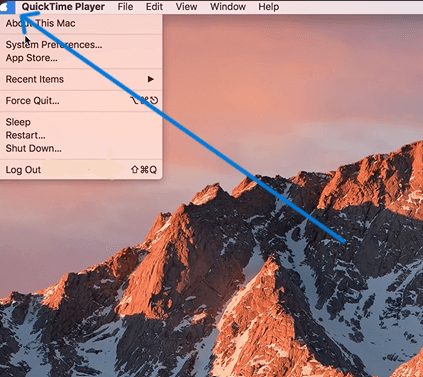
- Click on the Apple menu located at the top left of your screen.
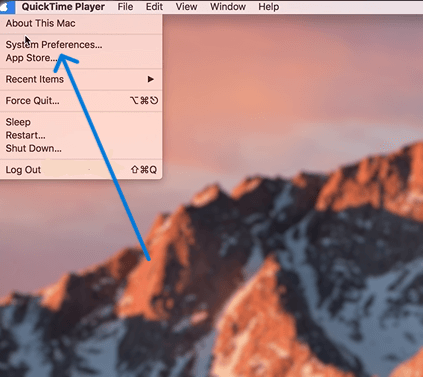
- Click “System Preferences” and then hit “General” in the sidebar.
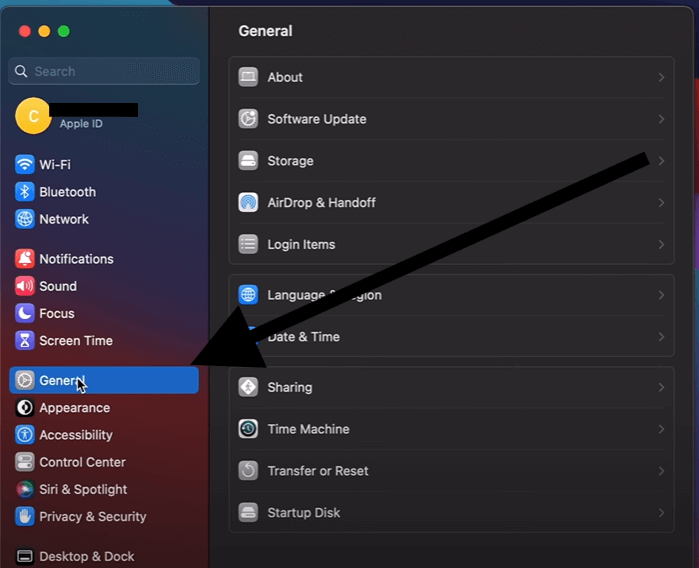
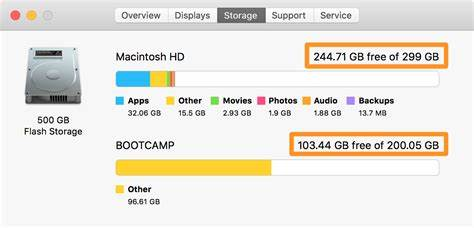
- Click on “Storage” at this point. A graphical view of your storage, showing you how it is used, will appear here.
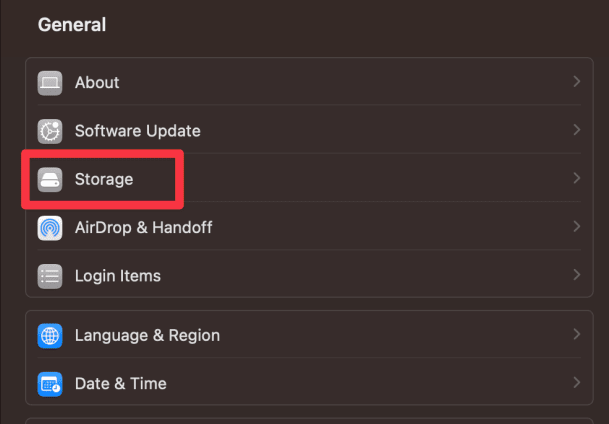
- When you hover over various colors in the graph, you can see how much space each category takes up. Your Mac’s free storage space is shown by a light gray area.
5 Solutions to Clear System Storage on Mac
Now, let me cut to the chase and answer that long-awaited question that led you to read this blog: here are methods that work best when it comes to clearing up mac system storage.
Method 1: Remove Time Machine Backups & Snapshots to Delete System Data on Mac
By removing time machine backups as well as snapshots, you can free up system storage on a mac. Below are the detailed steps and tips for each process:
1. Removing Time Machine Backups
Time Machine backups are typically stored on an external drive, and over time, they can accumulate and consume a lot of space. But I know you’re still wondering why that is. Well, take video editors, for instance. These backups save every change they make hourly, including large files. Over time, this leads to backups consuming hundreds of gigabytes, as each version of every file is preserved. Here’s how to manage these backups:
- Ensure your external backup drive is connected to your Mac.
- Then go to System Preferences > Time Machine.
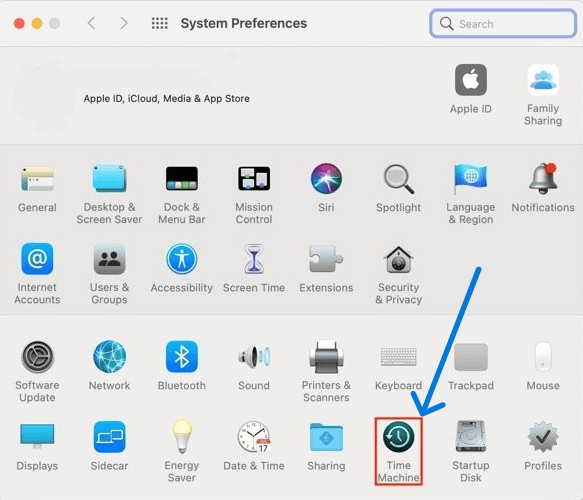
- Click “Enter Time Machine” after clicking the Time Machine icon in the menu bar.
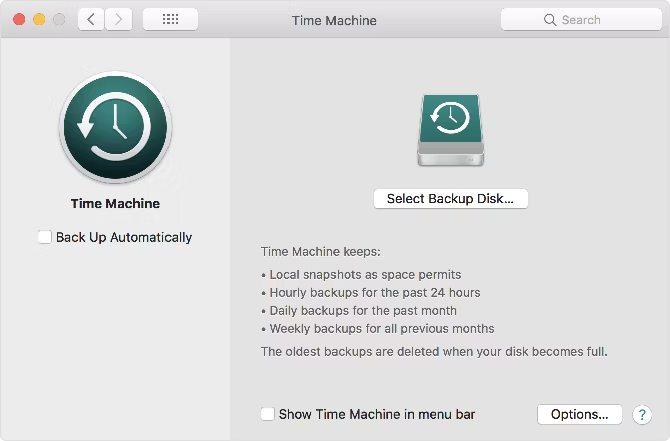
- Navigate through the different backups and find the one you want to delete.
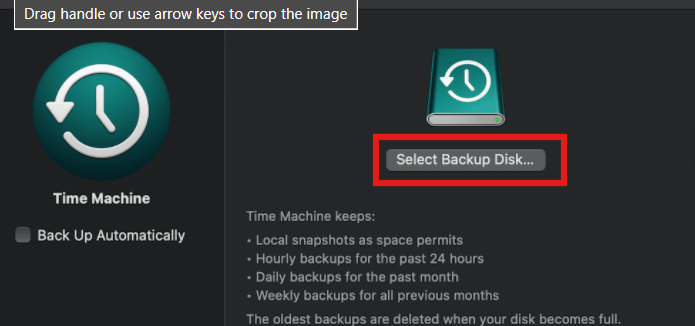
- Right-click on the backup and choose “Delete Backup” or use the gear icon in the Finder window to select “Delete Backup”.
💡Tips:
- Make sure to check the dates of the backups you are deleting to ensure you do not need the data from those backups.
- It’s wise to keep more recent Time Machine backups just in case you need to restore files that are accidentally deleted or lost.
2. Removing Time Machine Snapshots
Time Machine also creates local snapshots stored on your Mac’s internal drive, aiding mac data recovery when the backup isn’t connected. However, these snapshots consume significant space, storing hourly versions of modified files, particularly impacting users of large files or data-intensive applications. But here are steps to Remove Time Machine Snapshots:
- Open Terminal: Found in Applications > Utilities > Terminal.
- List Snapshots: Type ‘tmutil listlocalsnapshots /’ and press enter to see all snapshots.
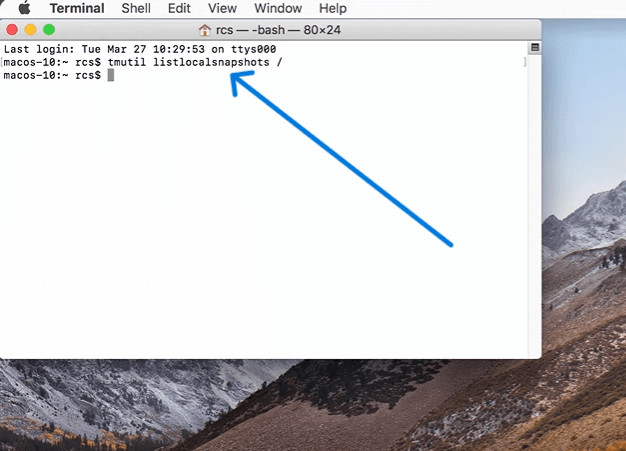
- Delete Snapshots: To delete a snapshot, type ‘sudo tmutil deletelocalsnapshots [snapshot-date]’ replacing ‘[snapshot-date]’ with the date of the snapshot you want to delete.
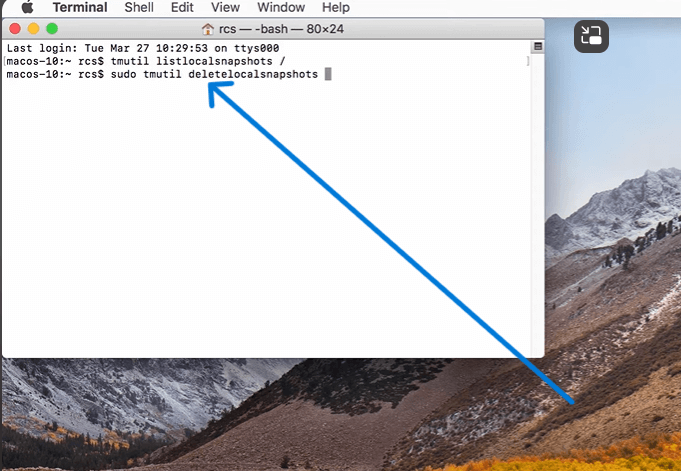
💡Tips:
- macOS automatically manages snapshots, deleting old ones as needed.
- Manually delete only to immediately free space.
- Enter Terminal commands carefully.
Method 2: Clear Old iOS Backups to Clear up Storage on Mac
Well, that’s not all. Another method you can employ to free space on your Mac’s system data storage is to clear old iOS backups. This is a great way to free up storage space. Here are the steps to follow in order to carry it out:
- Connect Your iOS Device: This involves connecting an iPhone or iPad to your Mac.
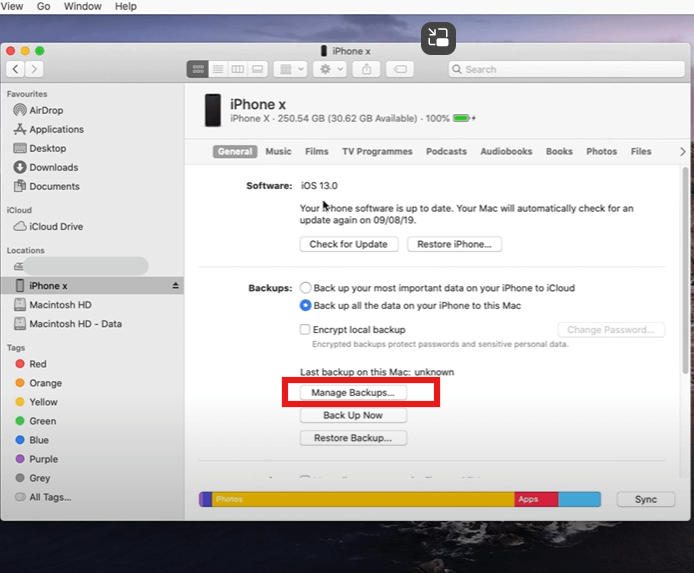
- Open Finder: After connecting the iPhone or iPad, proceed by opening Finder and selecting the device from the sidebar.
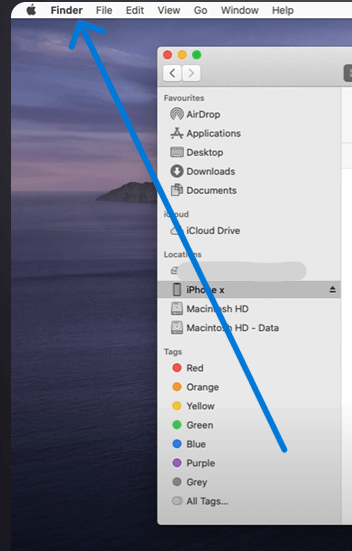
- Manage Backups: Select “Manage Backups” to see all stored backups on the Mac.
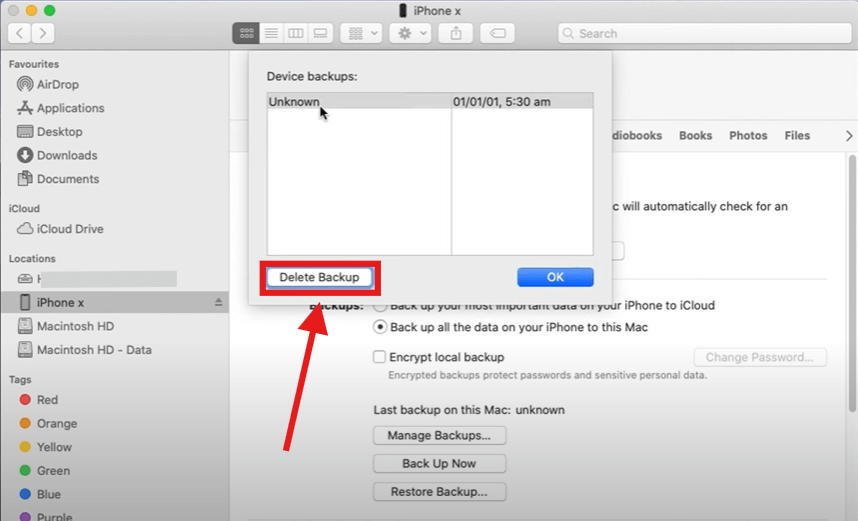
- Delete Backups: Select any backup you wish to delete, click on it then press the ‘Delete Backup’ button; if asked confirm your choice.
💡Tips When Applying This Method:
- Before deleting any backup files ensure that there is a newer one saved in iCloud
- Regularly removing old backups will prevent filling up of your storage too fast
- To make sure you’re freeing up space, check how big each backup is before deletion
This method assists in keeping sufficient space on Mac as it deletes unnecessary previous backups which tend to consume a large amount of space.
Method 3: Delete Mac System Data by Optimizing Storage
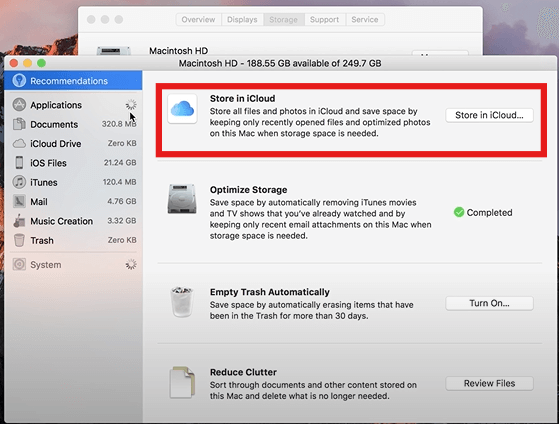
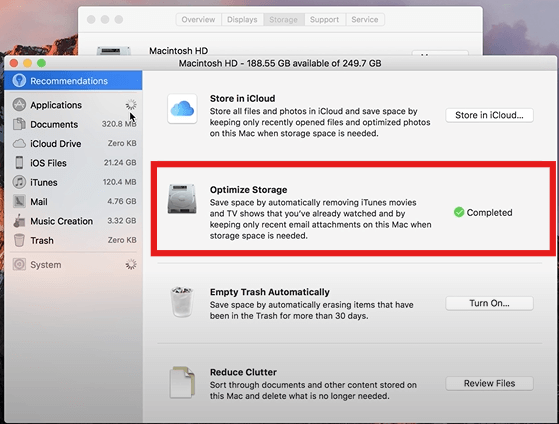
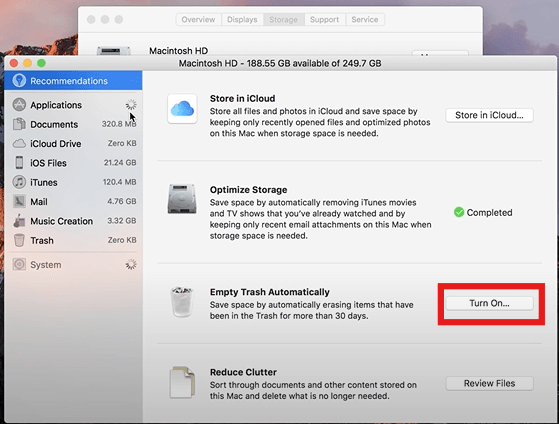
How to clear system storage on your Mac can also be solved through the method macOS offers, an optimization feature called “Optimize Storage.” Before any confusion arises about what this really entails, let me introduce you to how the optimization feature helps manage space by providing several options:
- Store in iCloud: By enabling this option, you are able to move desktop and document folders together with photos and messages and transfer them to the cloud storage, freeing some space on your Mac.
- Optimize Storage: It keeps only recent email attachments on your Mac but automatically removes watched movies and TV shows from Apple TV.
- Empty Trash Automatically: Turn it on so that trash deletes files after 30 days.
Using these tools helps you manage and reduce clutter on your Mac’s hard drive, making more space available for other uses.
Method 4: Manually Clear Mac System Data to Free up Storage
Manually clearing Mac system data is a practical approach to freeing up space on your Mac by identifying where the data is stored and deleting it. However, it requires careful handling to avoid losing important data. Here’s how you can manually clear system data:
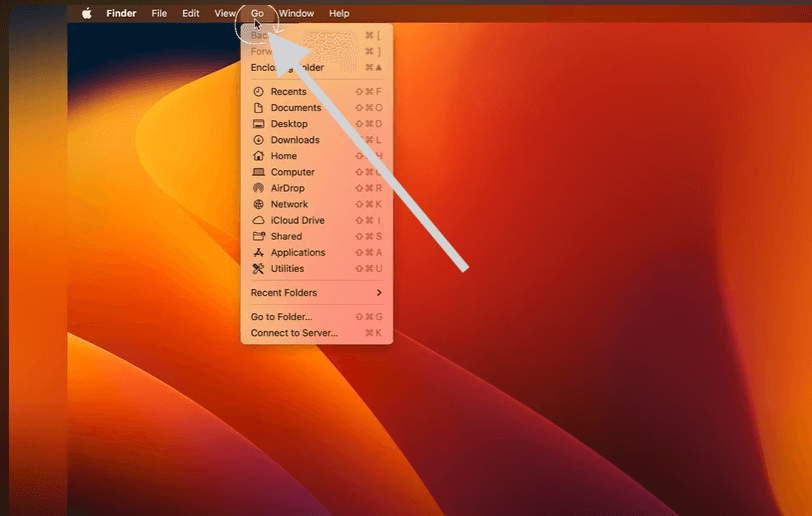
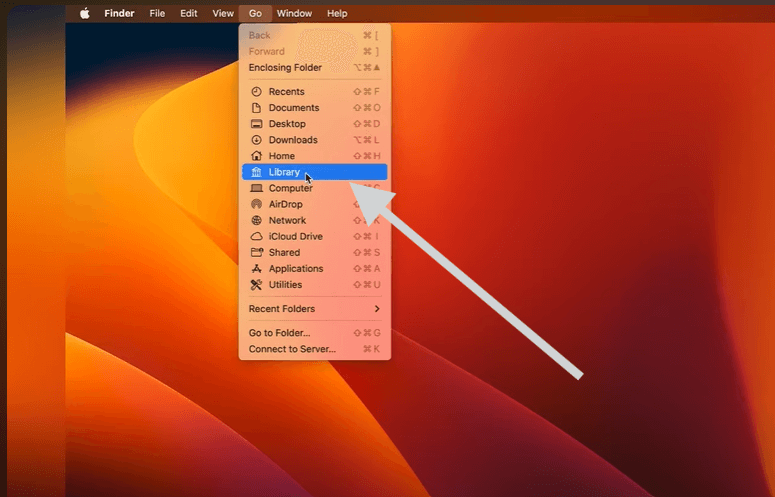
- Locate System Data: Open Finder and click on “Go”. Select “Go to Folder” then enter ~/Library/Caches for cache files or ~/Library/Logs for log files.
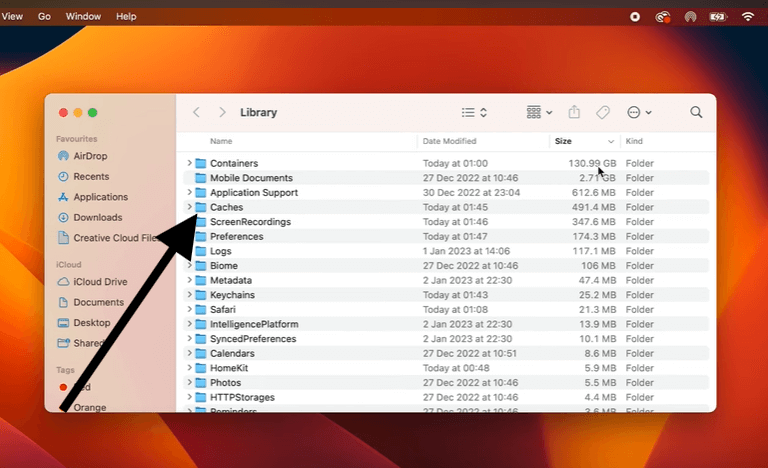
- Review Files Carefully: Check them well to confirm that they do not matter in any way to the working of your system or application since if you delete such critical files, they can cause errors in your system or even lead to malfunction of apps.
- Delete Unnecessary Files: Drag old and unnecessary cache files and outdated system logs into the Trash.
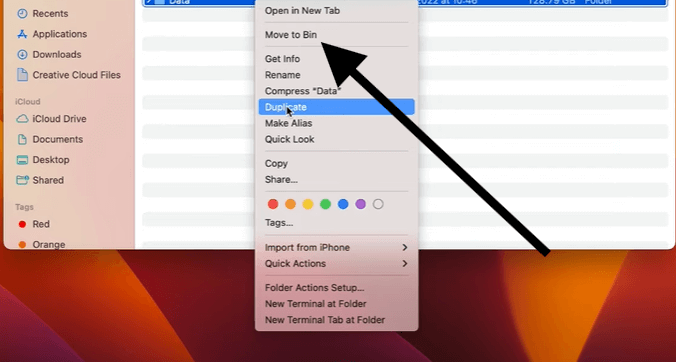
- Empty the Trash: Finally make sure you empty trash which actually frees up storage.
💡Tips:
- Always backup important information prior to deletion.
- Periodically clean system data using provided macOS built-in storage utilities.
Method 5: Clean Cache Files And Delete Your Downloads Folder
Cleaning the cache and deleting the Downloads folder are also effective ways to free up system storage on your Mac. You can follow this detailed guide below on how to perform these tasks:
- Cleaning Cache Files on a Mac:
Cache files are temporary data stored by applications to enhance performance but can occupy substantial space over time.
👉Steps:
- Open Finder: Click the Finder icon in your dock.
- Go to Folder: From the Finder menu, select “Go” then “Go to Folder”.
- Type the Path: Enter ~/Library/Caches and press Enter to access the cache folder.
- Select Files: Choose individual items or press Command + A to select all.
- Move to Trash: Right-click and select “Move to Trash” or drag the files to the Trash icon.
- Caution: Deleting cache files might affect application behavior. Proceed with caution.
2. Deleting the Downloads Folder:
This folder often contains large, accumulated files downloaded from the internet.
👉Steps:
- Open Finder: Click the Finder icon.

- Navigate to Downloads: Click on “Downloads” in the Finder sidebar.
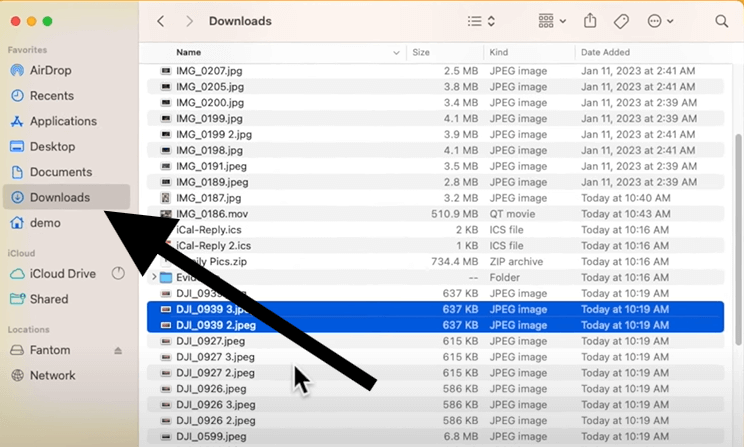
- Review Files: Examine each file to determine necessity and select accordingly.
- Move to Trash: Right-click and select “Move to Trash” or drag the files to the Trash.
Conclusion
We have provided you with five methods to answer your question, “How to clear system storage on Mac.” There’s no need to worry when your Mac displays the “Your disk space is running low” notification. Simply ensure you follow all the procedures given above accordingly.
FAQs on Deleting System Data Mac Storage
Are there still questions bothering you about how you can really get system data deleted from Mac storage? Well, how about having your questions answered before you even ask:
1️⃣Why Does System Data Take So Much Space on Mac?
- System Data on a mac includes caches, app data, system logs and iOS backups which can consume up significant space.
- These elements speed up processes but can accumulate especially with unused or old files from updates.
- Regular cleaning is essential so as to free up storage for new applications and files.
2️⃣How to Clear System Storage on Mac Free?
- To free up memory in your computer, use Finder to clean cache files; navigate ~/Library/Caches, select files and delete them accordingly.
- Remove unwanted items from the Downloads folder.
- The Trash should always be empty and important information has to be backed up regularly so as not to lose any vital data.


