Time machine? That feels more or less like our hero of backup when some important files and documents mistakenly get deleted. All you know to do next is restore from Time Machine, and you have those files back. But wait, how about we really know what the Time Machine is? Well, Time Machine is a built-in, free backup feature on Mac computers. It helps you save a copy of all your files, including photos, music, apps, documents, and emails. If you ever lose these files or need an earlier version, Time Machine can restore them for you.

How to Use Time Machine to Backup Files on Mac?
We now understand what Time Machine really is. That being said, how does one use Time Machine to Backup Files on Mac? Well, the procedure unfolds in these straightforward steps below:
- Connect an External Storage Device:
- Attach a USB, Thunderbolt, or FireWire drive to your Mac.
- This device should ideally have at least twice the storage capacity of your Mac to accommodate all your backups.
- Setup Time Machine:
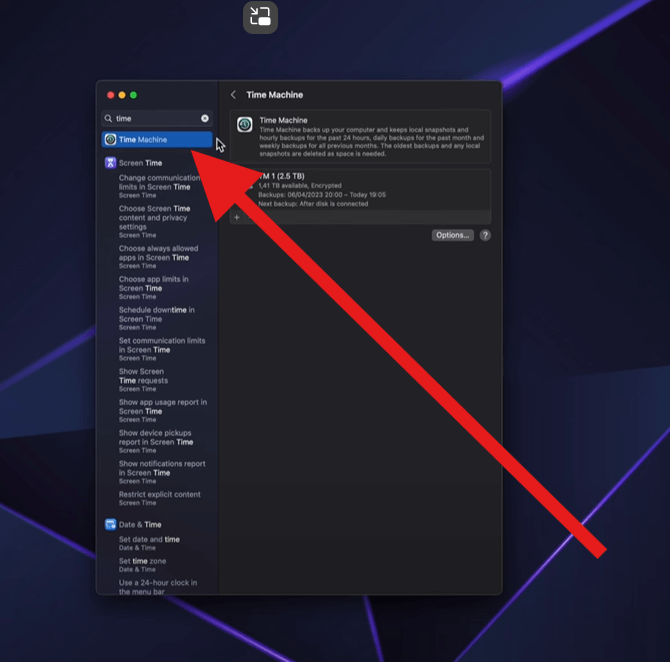
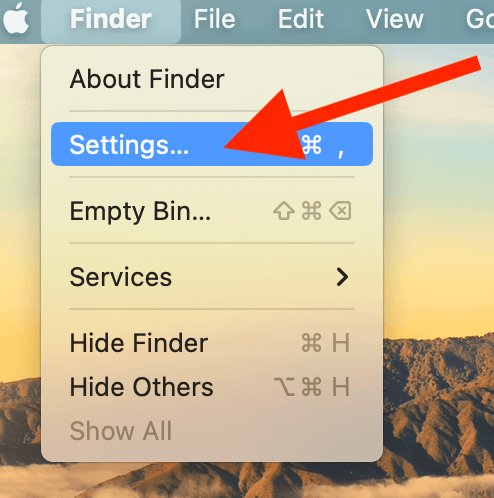
- Go to the Apple menu in the corner of your screen and choose “System Settings.”
- Click on “General” and then select “Time Machine.”
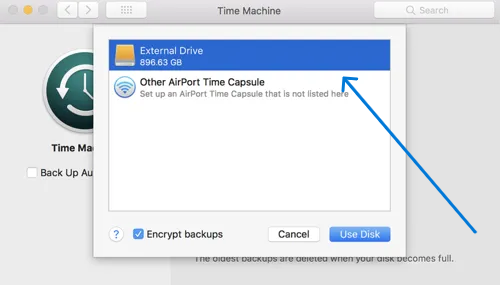
- Choose “Add Backup Disk” or press the “+” button to select the storage device you’ve connected.
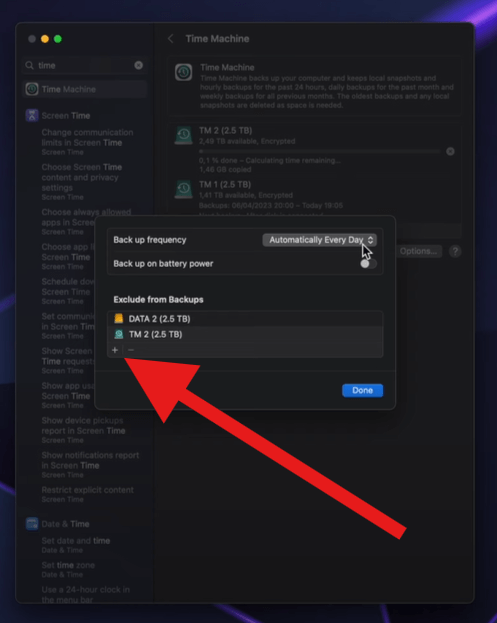
3. Configure Your Backup:
- You might be prompted to erase the storage device for use with Time Machine. You can choose to erase it or use another disk.
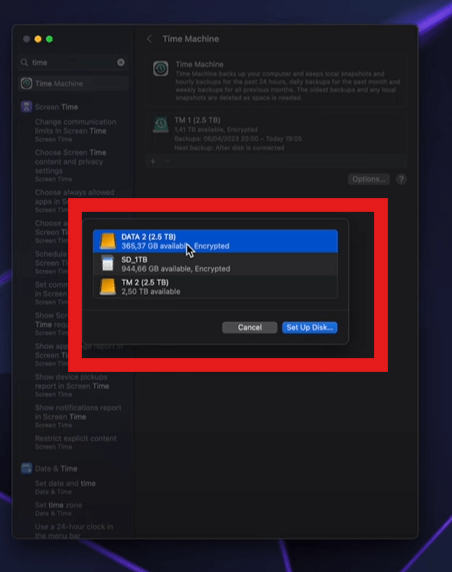
- If you’re using this backup disk for the first time, you may also be asked if you want this computer to use backups from another computer. You can decide based on whether you want to integrate old backups with your current machine.
4. Start Backup:
- To manually start a backup, select “Backup Now” from the Time Machine menu in the menu bar.
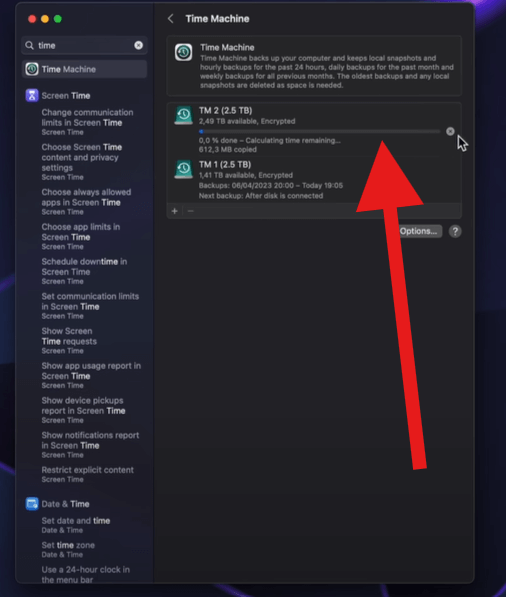
- Time Machine will also automatically perform hourly backups for the last 24 hours, daily backups for the past month, and weekly backups for each month, deleting the oldest backups when the disk becomes full.
How to Restore Files from Time Machine on Mac
For those whose real headache might not be how to back up using Time Machine, because your files are missing and you intend to get them back, well, here is where we talk about how to restore files from Time Machine on a Mac. Restoring files from Time Machine on your Mac is a straightforward process that allows you to recover lost documents or revert to older versions of files. Here’s how to do it:
👉Steps to Restore Files from Time Machine on Mac:
- Connect Your Backup Drive:
- First, connect the external drive that contains your Time Machine backups to your Mac.
- Enter Time Machine:
- Click on the icon for Time machine at the top of your menu bar then select “Enter Time Machine.”

- If you don’t see Time Machine icon in the menu bar, open Time Machine through system preferences >Time Machine then tick “show Time Machine in the menu bar.”
- Navigate Your Backups:
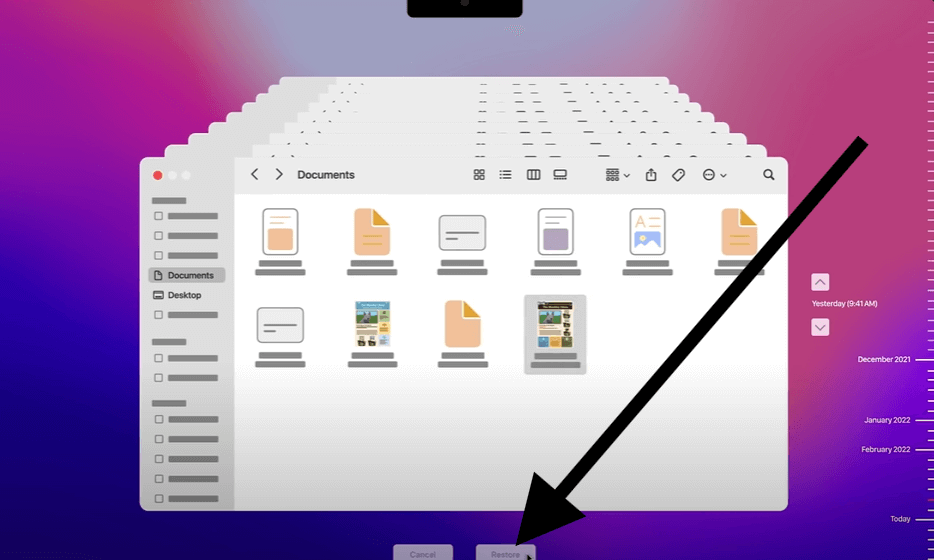
- Use the arrows and the timeline on the right side of the screen to navigate through the backups.
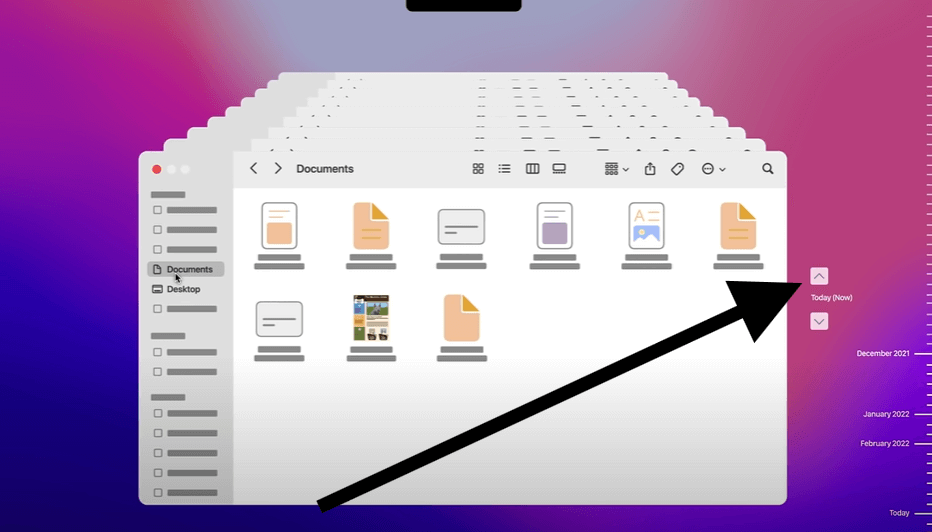
- Time Machine displays all your saved backups; you can go back to specific dates and times to find what you’re looking for.
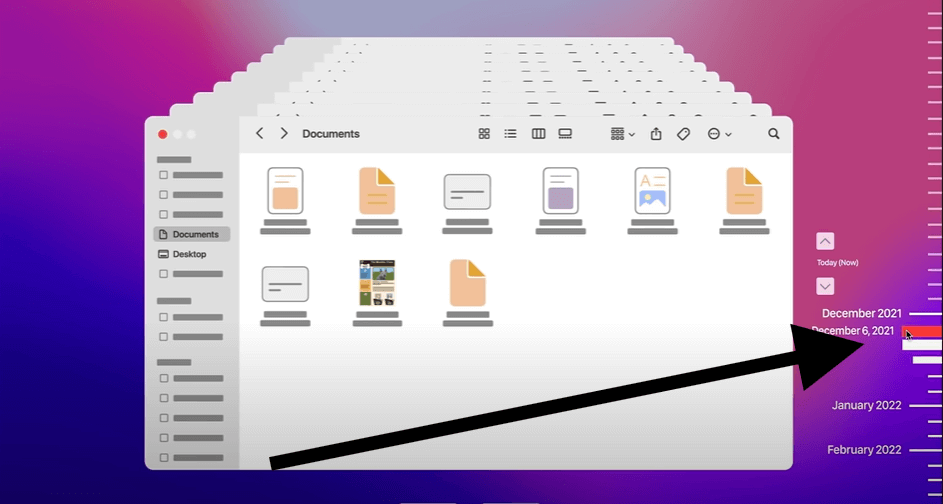
- Select the Files to Restore:
- Browse through the folders and files. Once you have found an item/folder that you need to restore, just click on it to select it.
- Restore the File:
- After selecting the file or folder, click the “Restore” button. Time Machine will close, and the file will be copied back to its original location or to a location you specify.
How to Restore macOS with Time Machine
Now, if we want to consider MacOS instead of a file, like we discussed above, how can we go about restoring MacOS with Time Machine? To answer, here are the steps to follow:
- Enter Recovery Mode: Make sure to switch your Mac on, then hold down the Command key and R key to boot your Mac into macOS Recovery Mode.
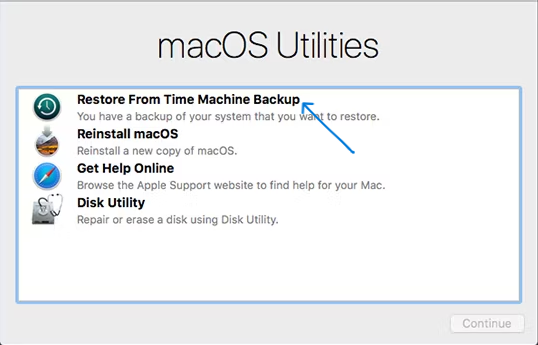
- Use Time Machine: Proceed to the macOS Utilities window, click on the “Restore From Time Machine Backup” button, and then click “Continue.”
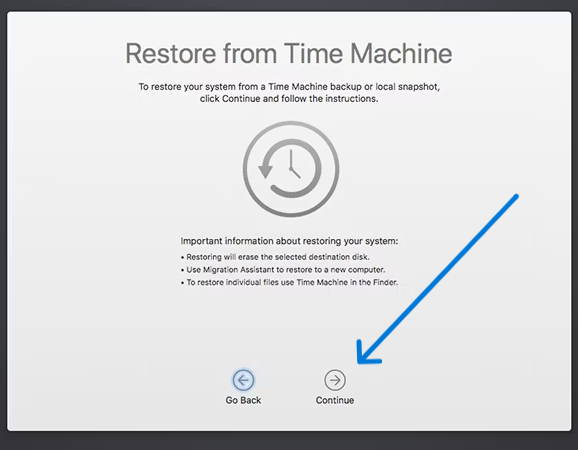
- Select Backup Source: Choose your external drive or Time Capsule containing your backup. Enter a password if needed.
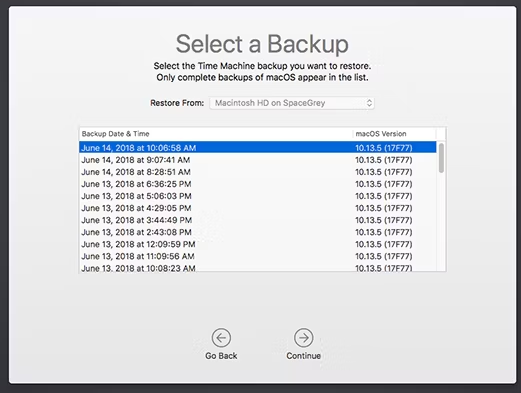
- Choose Backup to Restore From: Select your desired backup based on date and size.
- Select Destination Disk: Choose your Mac’s internal hard drive. Erase the disk first if necessary.
- Restore and Reboot: Click “Restore” to begin. After completion, your Mac will restart. The duration depends on the backup size and drive speed.
Bonus Tips: How to Recover Deleted Files without Time Machine Backup?
You might be thinking, “Do I always have to restore my deleted files, videos, and even those old pictures from a Time Machine backup?” Well, of course not. Let me introduce you to a mac file recovery software I’ve been using for most of my file recovery: ONERECOVERY. Here is how you can use ONERECOVERY:
- Download and Install: Get the ONERECOVERY app from its official site or click the download button below for a quick and safe download. Install it on your Mac, avoiding the drive where data was lost to prevent overwriting.
- Launch App: Open ONERECOVERY, which features a user-friendly interface to aid recovery.
- Select Drive: Choose the drive where the deleted files were stored. This could be an internal hard drive, an external drive, or a specific partition.
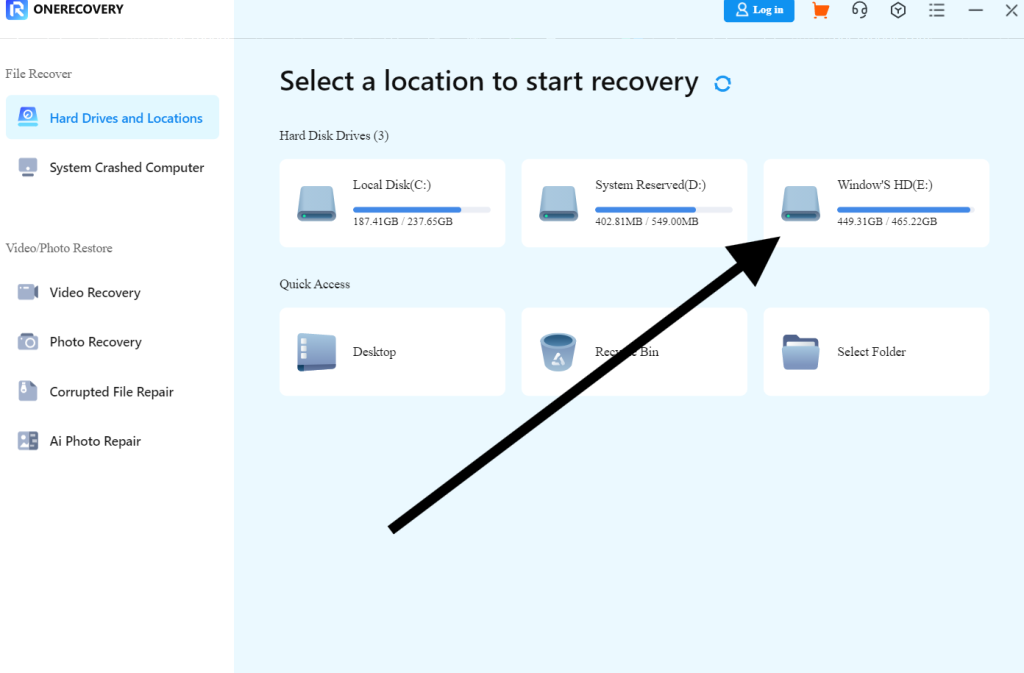
- Scan: Initiate a scan on the selected drive to find recoverable files.
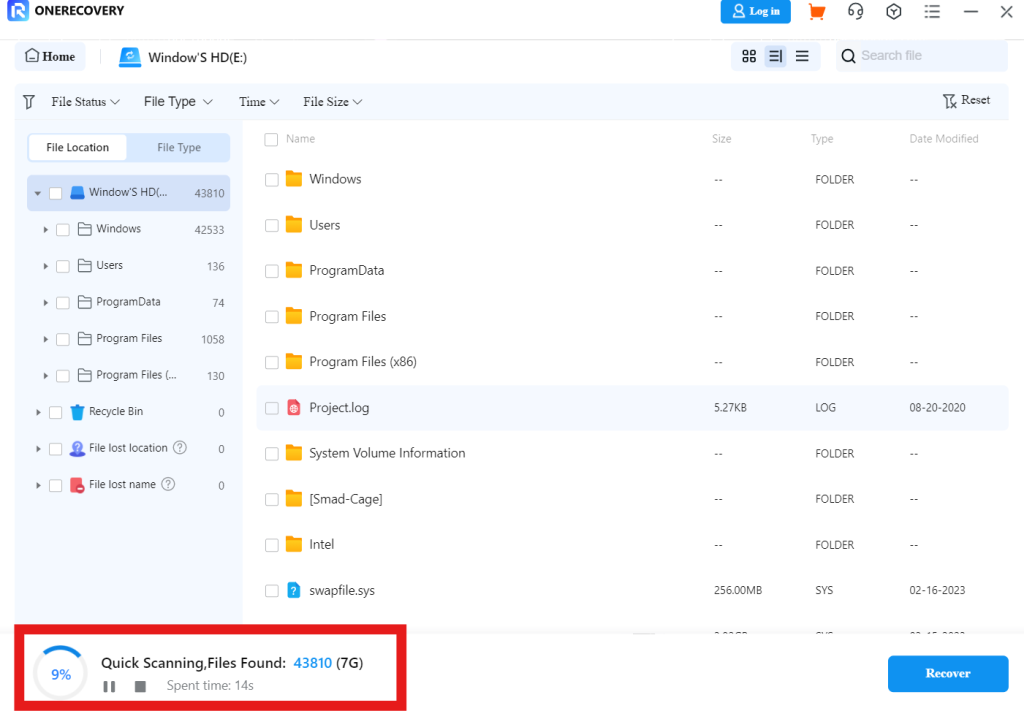
- Review and Select: Post-scan, preview and select files for recovery.
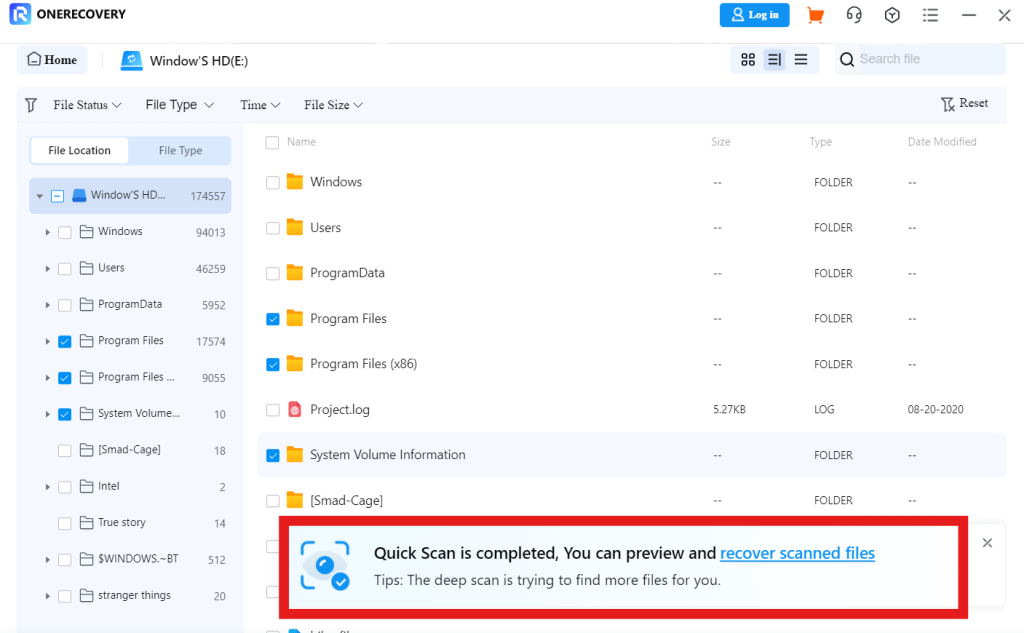
- Recover Files: Save the recovered files to a different drive to avoid data loss.

- Verify: Check the restored files for functionality.
Conclusion
If you are looking for how to restore a MacBook to an earlier date, Time Machine is the answer. It is a backup utility for Macs that enables file restoration and full macOS recovery from external drives. It operates automatically or manually, saving hourly to weekly backups. For non-Time Machine recoveries, ONERECOVERY offers an alternative solution, scanning and restoring deleted files from various drives.
FAQs on Deleting System Data Mac Storage
If you have ever been in or are still facing the dilemma of how to delete your system Data Mac storage, look no further; the answers below will address your question:
- How to Restore Individual Files from Time Machine to New Mac?
- To restore individual files from a Time Machine backup onto a new Mac, begin with attaching the external backup drive.
- On your menu bar, open Time machine; in case it is invisible, turn it on via system preferences.
- Go into Time Machine and use the timeline to find the desired back up then navigate through folders.
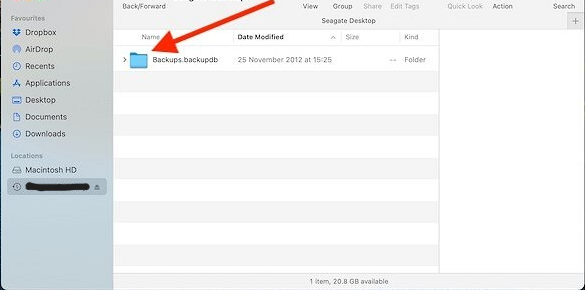
- Preview by pressing the spacebar on any file you want then click the “restore” button to get them back.
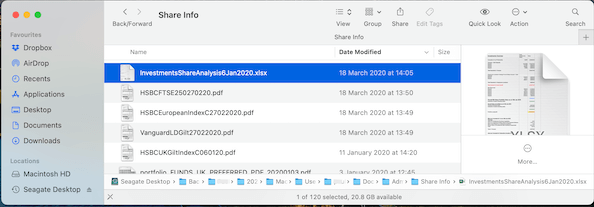
- Choose to restore files to their original location or a new one, replacing any existing files if necessary.
2. How to Restore My Macbook to an Earlier Date?
- Connect your external drive with Time Machine backups to your MacBook.
- Restart in Recovery Mode: Apple silicon Macs should hold the power button until “Loading startup options” shows; for Intel-based Macs, press Command (⌘) + R on restart.
- In macOS Recovery, select “Restore From Time Machine Backup,” choose the backup drive, and the desired backup by date.
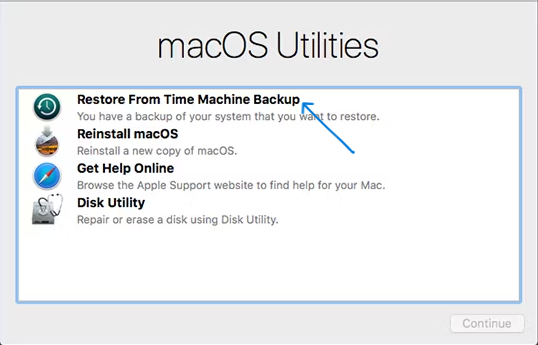
- Select your main disk as the destination; use Disk Utility if erasing is needed. Click “Restore” to start; the process may vary in time. Your Mac will restart once done.
