There is nothing more annoying than having to deliver a very important file stored on your external hard drive, only to find an error like “Mac is unable to write to the disk,” or you’re just not able to save or move the file. Questions like, “What does that even mean?” or “Is my Mac external hard drive read-only?” can send one into a state of anxiety, especially when a deadline is looming. However, worrying doesn’t solve the issue. That’s why, in this article, I will be showing you how to change an external hard drive from read-only on a Mac. Enjoy!
Why External Hard Drive Read Only?
Before you jump to the solution part, have you considered what could cause a situation where your Mac can only read an external hard drive? I mean, it doesn’t just make sense for a hard drive working flawlessly to suddenly start popping up errors like ‘you can only read external hard drive Mac’, don’t you think? That said, here are some of the common causes that could lead to this ordeal.
| Reasons | Explanations |
| 🍏NTFS File System | Macs can read but not write to NTFS-formatted drives without third-party software due to Microsoft’s proprietary design. APFS is the default file system for modern macOS devices, replacing HFS+, and exFAT is compatible with both Windows and macOS. |
| ❎Permission Issues | External drives might be read-only due to permission settings, particularly if used on different computers.macOS employs ownership and permissions for security. If a drive was formatted or used on another system, macOS might restrict write access due to original permissions. |
| ❗Formatting Errors or Corruption | External hard drives can corrupt from unsafe removal, power failures, or viruses. macOS may mount these drives in read-only mode to protect data from further damage. |
| ⚙️System Integrity Protection (SIP) | SIP on Mac enhances macOS security by restricting write access to protected system files and folders, even for administrators. This security measure can make external hard drives read-only to safeguard against harmful software. |
| 🔨Physical Damage or Connection Issues | If your external hard drive has incurred physical damage, like a fall or exposure to moisture, it might not work properly. This type of damage could hinder the drive’s capacity to handle data correctly, leading your Mac to set it in read-only mode. |
Now, with all that being said, how about you finally say goodbye to these annoying external hard disk read-only Mac errors? Yes, you can change the format so these errors can be fixed following the next guide below.
How to Fix External Hard Drive Read-only Issue
Did you try using your external hard drive with a different operating system like switching from Windows to Mac, and now it’s restricting you to read-only access? Below are the methods you can use to solve this.
Method 1: Reformat the External Hard Drive to Fix External Hard Disk Read Only Mac
If at any point you formatted your external hard drive with NTFS, a file system primarily used by Windows, then it will appear as read-only on a Mac because macOS by default can only read, not write to NTFS formatted drives. However, you can fix this problem by reformatting the external hard drive, by following the steps below:
- Before you begin, back up any important data on your external hard drive because formatting will erase everything.
- Make sure that your external hard drive is securely connected to your Mac so that no issues arise during formatting.
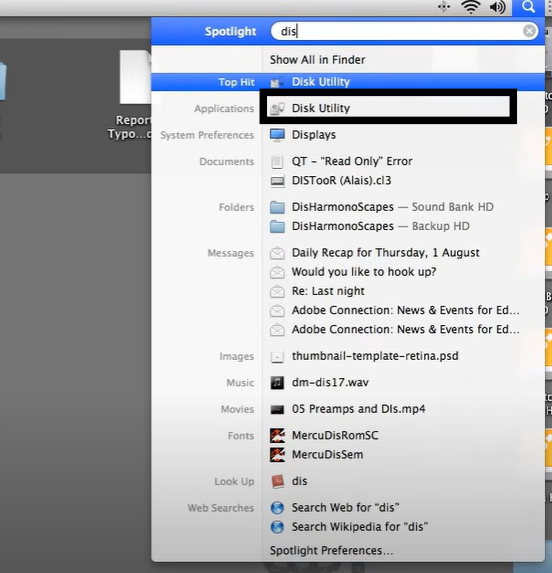
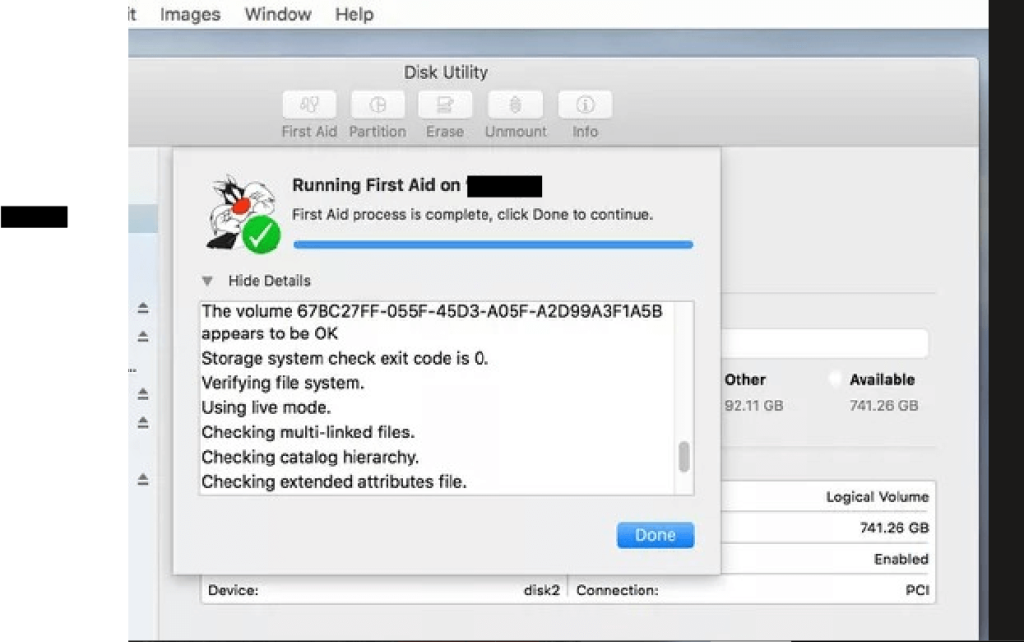
- Navigate to Finder, go to Applications, then Utilities, or use Spotlight (Command + Space), type “Disk Utility,” and hit enter to open Disk Utility.
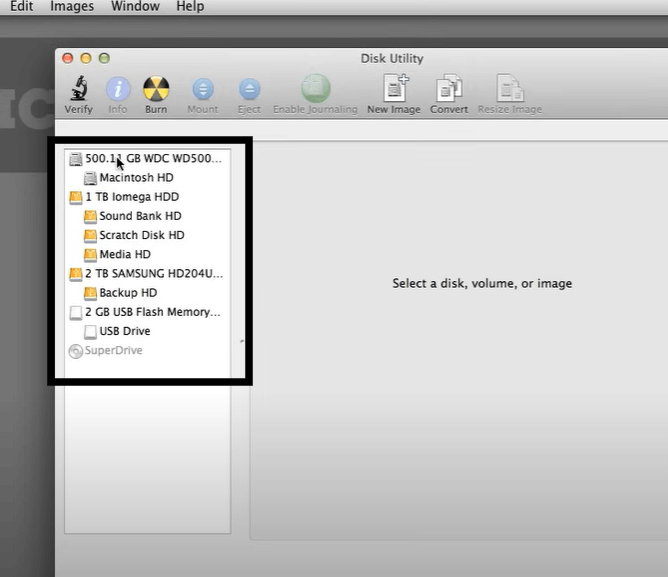
- In Disk Utility, select from the list of drives shown there the one you want to format externally.
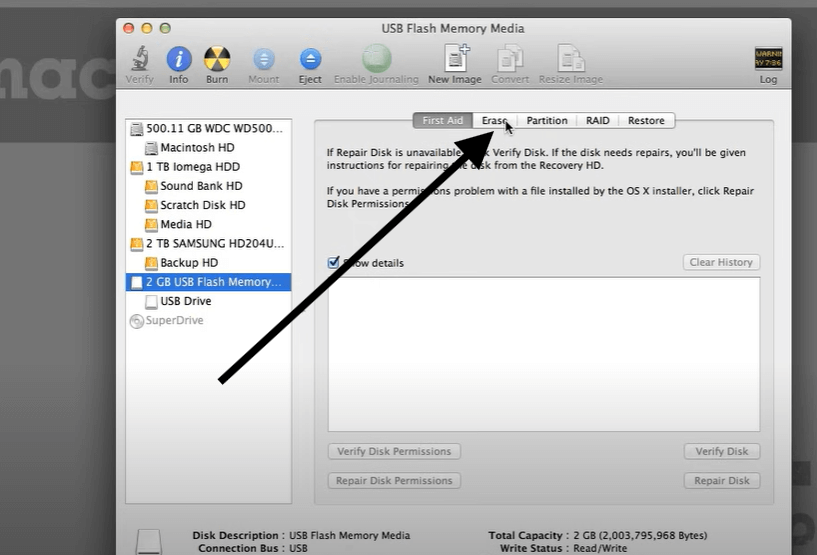
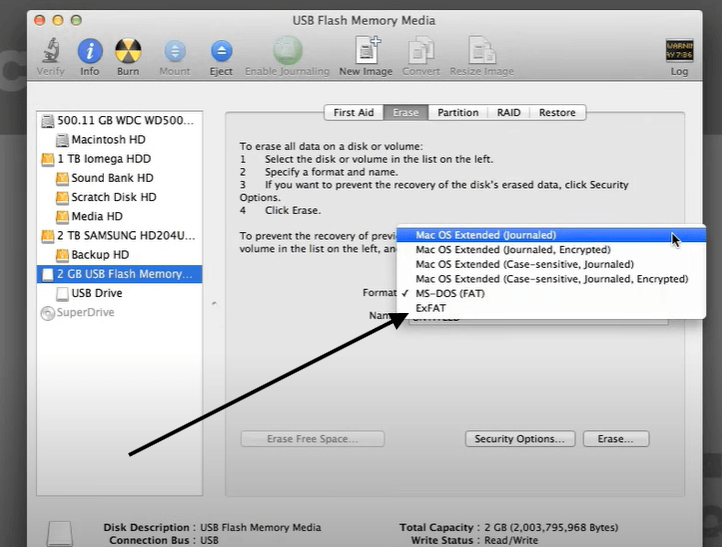
- For access to formatting options, click the Erase button. Choose a name for the disk, select ExFAT if it needs compatibility with both Mac and Windows or APFS/Mac OS Extended if it’s just for Mac usage. Then set the scheme as GUID Partition Map.
- Click on the Erase button when done in order to reformat, which wipes out all the data and creates a new file system.
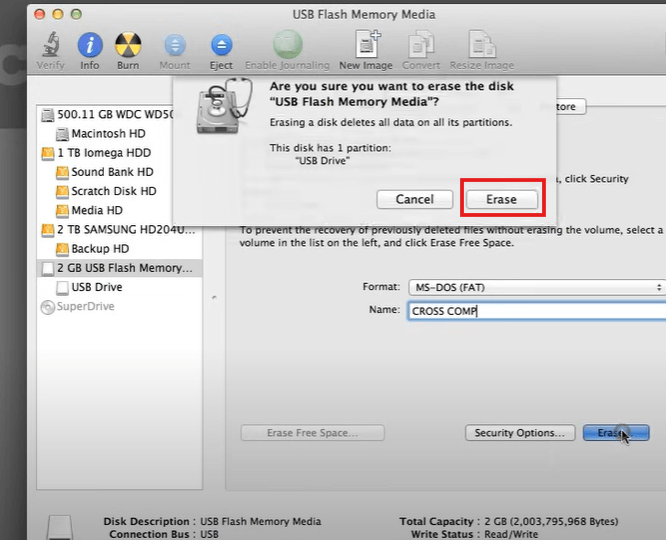
- Once you are through with formatting, close Disk Utility. Check whether files can be moved onto it in order to verify proper operation and writability.
Method 2: Change the Permissions of Mac to Fix Hard Drive Read-only Error
Your Mac might have specific settings set up for security reasons, which can cause the display of the “Mac external hard drive read-only” error. However, changing the permissions on your Mac can easily solve this issue. But why this method? Well, it addresses fundamental macOS settings that control how files and folders can be accessed and modified.
👉Here are the steps:
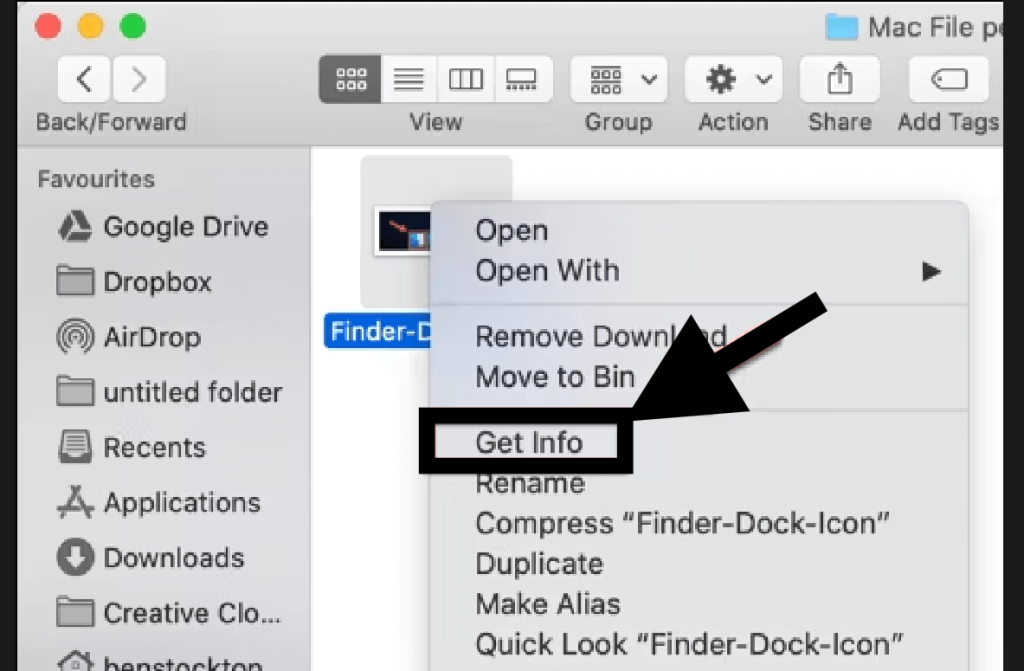
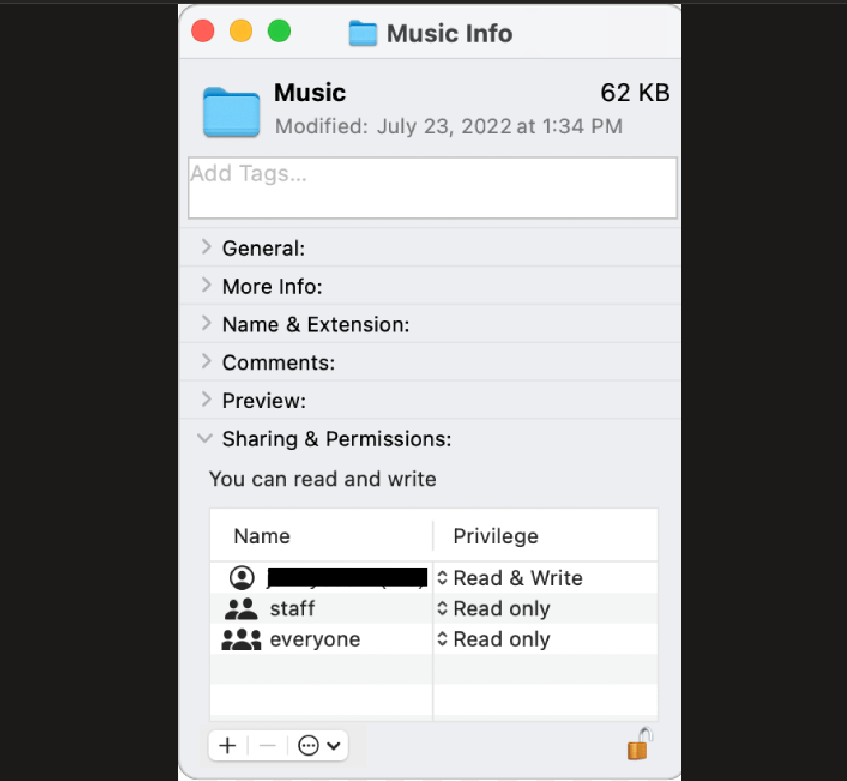
- Find your external hard drive either on your desktop or in the Finder sidebar.
- Right-click the drive icon and choose ‘Get Info’ to open a window with more details.
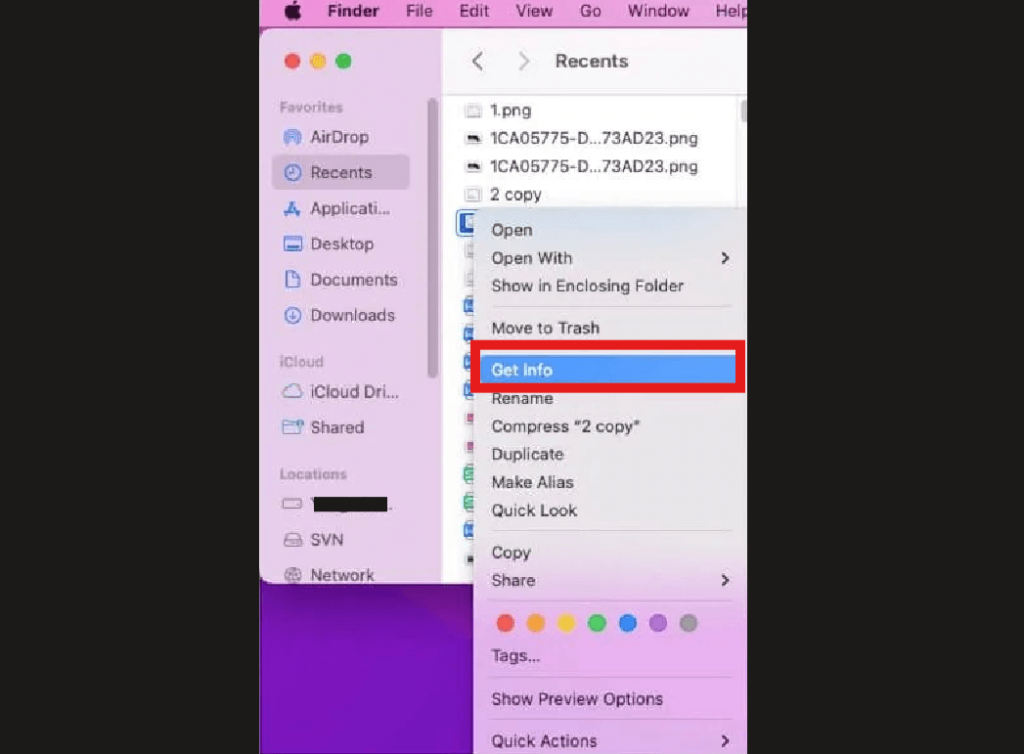
- Scroll to ‘Sharing & Permissions’ at the bottom of the ‘Get Info’ window.
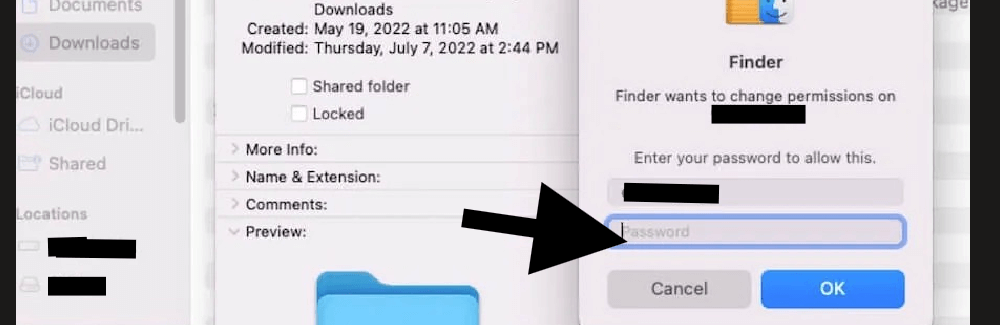
- Click the triangle icon to expand this section if it’s not already visible. Then, click the lock icon to unlock the settings, and enter your administrator password.
- In the ‘Privilege’ column within this section, click on the existing permission setting (usually ‘Read only’). From the drop-down menu that appears, select ‘Read & Write’ to modify the access level.
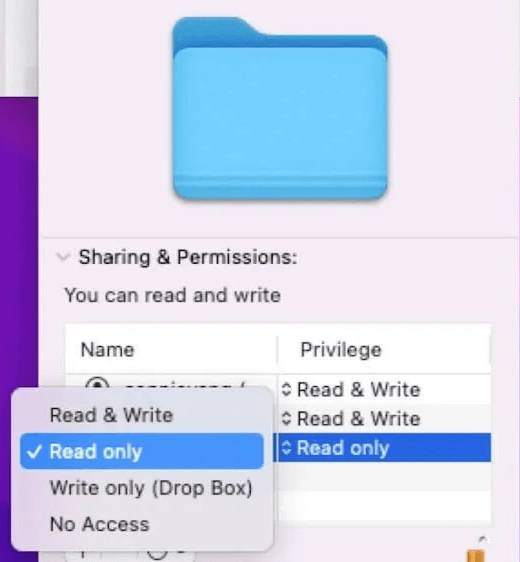
- Click the lock icon once more to re-lock and save your changes. Close the ‘Get Info’ window after making these adjustments.
- To confirm that you have changed permission settings well, try creating a folder or copying files to the drive. This proves that permission settings have been updated successfully.
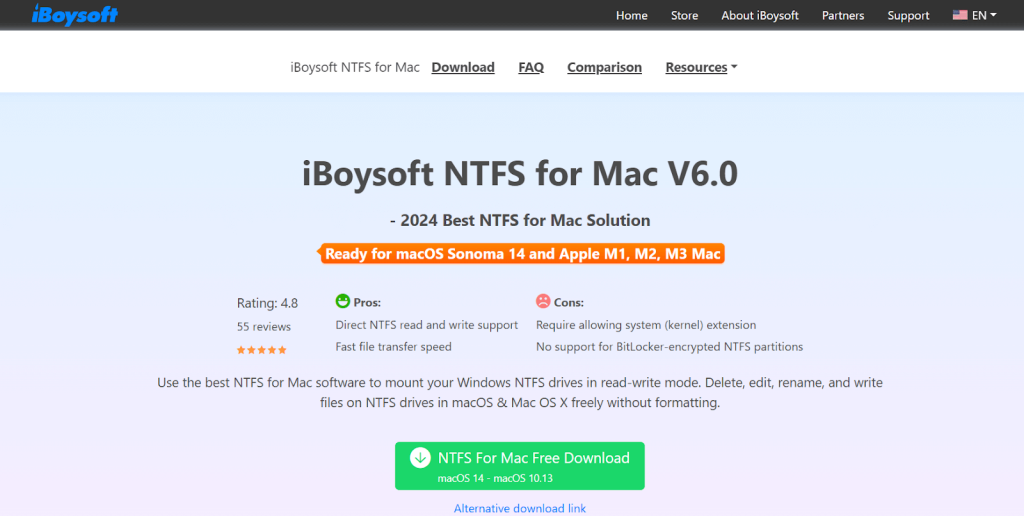
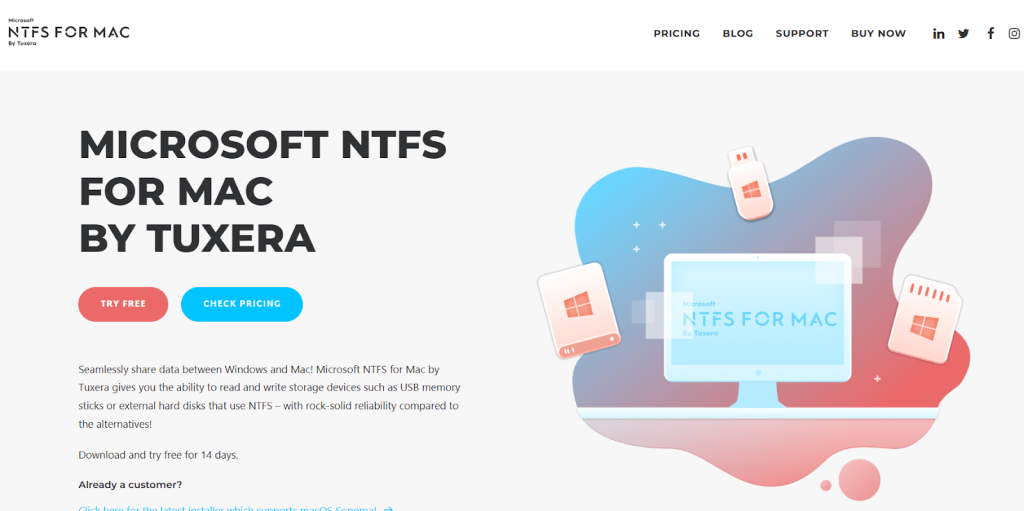
Method 3: Use the Third-party Apps to Access and Write to NTFS Drives on MacOS
When the errors seem undefeatable after using the other methods above, using a third-party app is a method that proves very reliable in this situation. This is because the software often comes with additional tools for disk health monitoring, data protection, and recovery options, which are not typically available in macOS’s native tools. Some third-party apps that you can use in this situation are:
- ✅Pros: Automates the mounting of NTFS drives in read-write mode; supports all major macOS versions.
- ❌Cons: It is a paid tool; hence, users will have to purchase it once their trial.
- Paragon NTFS for Mac
- ✅Pros: Offers reliable read-write access to NTFS drives; known for its high transfer speeds and stability.
- ❌Cons: Commercial software which means it requires purchase.

- Tuxera NTFS for Mac
- ✅Pros: Provides solid support for NTFS drives and is designed with data safety maintained during transfers.
- ❌Cons: The full version is paid, though a trial is available.
- Disk Drill
- ✅Pros: Supports not only NTFS but also includes some data-recovery tools, along with disk-health monitoring features.
- ❌Cons: More expensive than some other options and features may be more extensive than some users require.
However, if you’re using a third-party app, you must bear in mind that most of them are not free, and users may need to purchase a license. Using third-party software can sometimes lead to conflicts with system updates or other applications. There is a risk involved when third-party software interacts deeply with system-level functions.
Conclusion
When encountering a “mac external hard drive read only” error, common causes include NTFS formatting and permission settings. Solutions involve reformatting to a compatible file system, adjusting permissions, or using third-party software to enable full access and resolve compatibility issues.
FAQs on External Hard Disk Read Only Mac
If you’re still experiencing difficulties with issues concerning your external hard disk not discussed in the guide above, and you need some answers, here you go:
- How to Check Permissions on Mac?
Are you facing problems accessing software after installing new software? This could be due to incorrect permissions set during the installation. You can check for it by:
- Locating the file in Finder.
- Right-clicking on the file or folder, then pressing Command + I.
- Selecting “Get Info,” scroll to “Sharing & Permissions” to see users and their permissions.
- How to Fix External Hard Drive Keeps Failing to Read on Mac?
Are you still struggling with retrieving a file from your external hard drive or flash drive because your drive just keeps failing to read on your Mac? Use any of the methods below to address it:
- Check and swap USB cables or ports.
- Use Disk Utility’s First Aid.
- Ensure the drive’s format is macOS-compatible; reformat if needed.
- Reset NVRAM/PRAM.
- Update macOS.
- Manually mount via Terminal.
- Consider third-party repair tools.