“I just connected a new external SSD to my MacBook because the former SSD got damaged. Afterward, I turned on my computer, but the SSD didn’t show up. What could be the cause and how do I fix it? Please help!”
This has been a reoccurring complaint laid by users. While SSDs are versatile tools for data storage and security, they can suddenly become problematic and fail to show up on Mac.
The good thing is there are ways to fix SSD not showing up on Mac. Read on to learn how to make your Mac external SSD hard drive visible.
Why is SSD Not Detected on Mac?
Quickly, let’s note the reasons why there are SSD external hard drive Mac detection issues:
- Improper Connection: Using a wrong/loose cable or connecting the SSD to a damaged USB port will make the drive undetectable.
- File System Error: The SSD won’t show up if it’s formatted with an incompatible file system. MacOS’s major supported file systems are APFS, HFS+, FAT32, and exFAT.
- SSD Corruption: An attack on your SSD structure whether by virus, malware, or system crash can cause the drive to be unreadable.
- Physical Damage: A broken or severely scratched SSD won’t show up on your Mac. Critical cases like this should be taken to a professional repairer.
How to Fix SSD Not Showing Up On Mac?
Explained below are the solutions for fixing your Sandisk not showing up on Mac.
Restart Mac to Check Whether SSD Shows Up
Sometimes, Sandisk’s extreme portable SSD not detected Mac could be associated with the computer system memory. When your Mac is overloaded with many operations, it might not detect the connection of your SSD.
The best way to solve this is to close all the opened programs and restart your computer. This will give the system memory a fresh start.
👉To do this, simply:
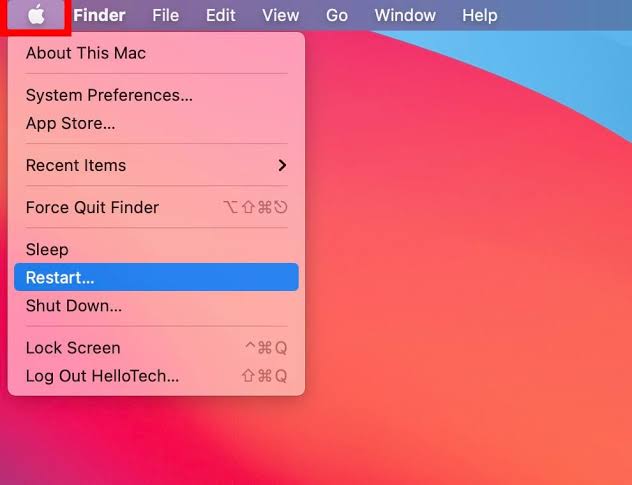
- Click on the Apple menu on the top-left of your screen.
- Select Restart.
Check the USB and Reconnect the SSD
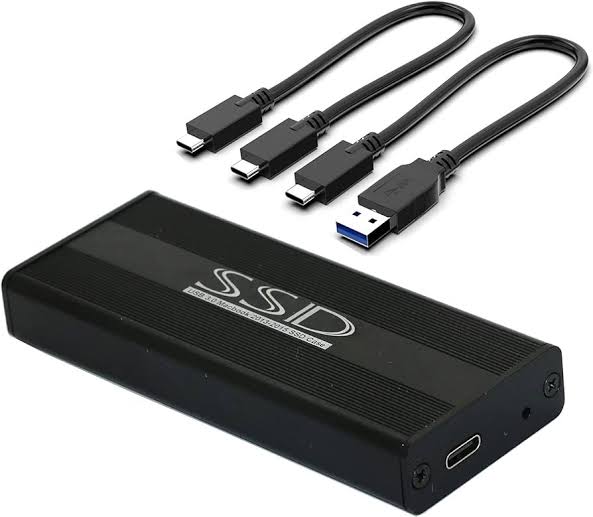
Every SSD external for Mac comes with its original cable that’s compatible with your SSD model and power needs. Using the wrong cable can cause your SSD not to be detected.
Other times, it could be that the cable is faulty or the USB port it is connected to is damaged.
👉To resolve this, follow these procedures:
- Get a cable that suits your SSD model and has the right power output.
- If the SSD doesn’t show up, connect it to a different USB port to check if the cable is faulty.
- If your SSD is a C-type drive, instead of connecting it through a USB-C adapter, connect it directly to your MacBook.
Use the Disk Utility to Fix Sandisk Not Showing Up On Mac
Disk Utility offers the ultimate solution for resolving many Mac issues, including fixing external hard drives that keep disconnecting. There are situations where an SSD fails to show up on Mac because it’s yet to be initiated in Disk Utility. The best remedy is to set up the SSD in Disk Utility by following these steps:
- Go to Finder and select Applications > Utilities > Disk Utility.
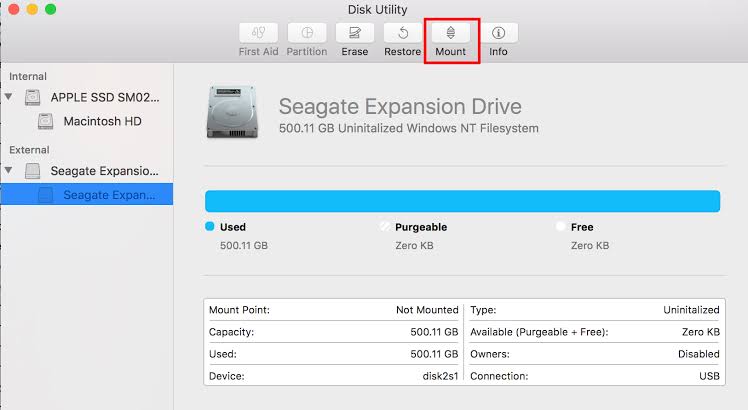
- On the Disk Utility page, you will see a list of hard drives on the left panel. Select the SSD drive you want to fix. It may appear as “Untitled”, “unformatted”, or “uninitialized.”
- Navigate to the top menu bar and click on Mount.
However, there could be some complicated Disk Utility scenarios. For example, if the SSD has been used on other computers for some time, but isn’t detected by your Mac Disk Utility. In this case, the SSD might be corrupted or have incompatible formatting. The solution is to retrieve your data from the drive and reformat your SSD.
Also, if the SSD is new but fails to show up on your Mac, and you receive a message saying “the disk you inserted was not readable by this computer.” In this case, you have to retrieve your data from the SSD and reformat the drive.
Reformat SSD to Formats Compatible with macOS
Your Sandisk extreme portable SSD not detected on Mac can be because of an incompatible file system. Change the SSD format to a macOS format, such as APFS, HFS+, exFAT, or FAT32.
❗NOTE: This method requires erasing the SSD, meaning that all your data will be lost. However, you can use ssd data recovery software like ONERECOVERY to get back your valuable data.
👉These are the processes to follow:
- Go to Finder and select Applications > Utilities > Disk Utility.
- Navigate to the left sidebar. Under the External tab, select the SSD you want to reformat.
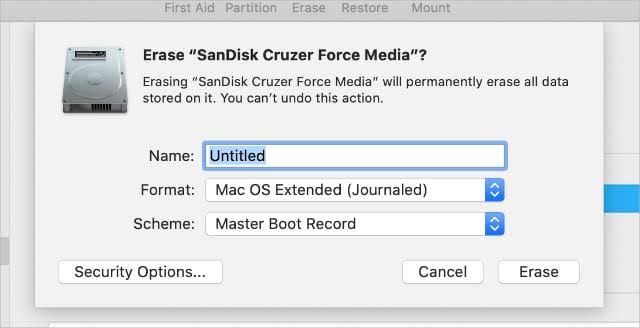
- Go to the top menu bar and click on Erase.
- Complete the SSD new information, such as the Name and Format. Then, click on Erase.
Use Terminal Commands to Detect and Erase the SSD
Another powerful tool you can rely on for fixing Mac issues is Terminal. It’s a command-line interface that gives you access to certain features of your operating system. When Disk Utility fails, you can resort to Terminal.
👉Here’s how to fix SSD not showing up on Mac via Terminal:
- Go to Finder and select Applications > Utilities > Terminal.
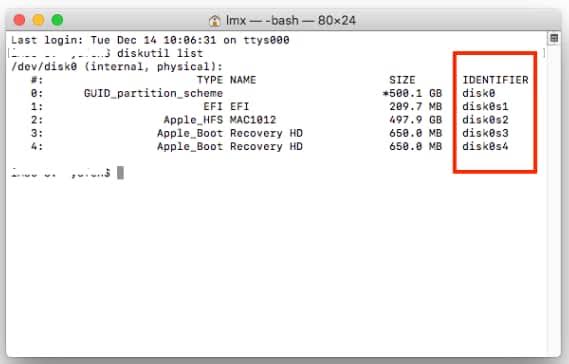
- Type this command: diskutil list. Then, press Return.
- Note the IDENTIFIER of the drive you want to fix. You can write it down for reference purposes.
- Type this command: diskutil eraseDisk JHFS+ MacOS /dev/identifier. Here, the identifier is your drive information from the previous step.
- Terminal will scan and display all the drive’s issues.
- If your SSD is corrupted, type this command: diskutil verifyVolume SSD_ID. Then, press Return.
- When the repair is finished, you can close Terminal, and get access to your SSD.
Conclusion
SSDs are great storage devices for keeping data. However, instead of being a reliable storage, they sometimes contribute to users’ problems by not showing up on Mac. Do not fear as this problem isn’t very significant. You can easily fix it yourself by following the solutions discussed above.
FAQs on SSD Not Showing Up Mac
For more insight about SSD not showing up on Mac, go through these frequently asked questions.
1️⃣How to Format a SSD for Mac?
If you just bought a new SSD, you will need to format it to a format compatible with your macOS. Wondering how to do this, here are the steps:
- Connect the SSD to your Mac using the appropriate cable and interface, whether USB, USB-C, or Thunderbolt.
- Go to Finder and select Applications > Utilities > Disk Utility.
- Navigate to the left sidebar. Under the External tab, select the SSD.
- Click on Erase at the top menu bar.
- Set the SSD name and format type (either APFS, HFS+, exFAT, or FAT32).
- Click on Erase to begin the formatting process. Once it’s completed, Disk Utility will show the SSD in the drive list.
2️⃣How to Use Sandisk SSD on Mac?
Using a Sandisk SSD on Mac is pretty simple. All you have to do is connect it to your Mac using a suitable cable and interface. Then, edit your system preferences to show the mounted drive.
👉Follow this procedure:
- Go to Finder, select Preferences, and click on General.
- Tick the External Disks box.
- Navigate to the Sidebar tab, scroll down to Locations, and tick the External Disks box.
- Your SSD will reflect for use.
3️⃣How to Recover Data from Not Detected External SSD on Mac?
Fixing a Mac external SSD hard drive not showing up can result in loss of valuable data. But do not be dismayed. You can easily use ONERECOVERY to recover data from SSD securely.
👉Here’s how to do that:
- Connect the SSD to your Mac.
- Download and install ONERECOVERY on your Mac.
- Launch the software and select the SSD.
- Immediately, ONERECOVERY begins to scan for all the data on the SSD, including deleted, corrupted, and overwritten data.
- Preview the results, select the data you want to retrieve, and click on Recover.