Sometimes, technology can betray us at the most inconvenient moments. For instance, when you are working on an important project with a tight deadline, and suddenly, your MacBook freezes completely. Nothing responds, not even the cursor. In such a critical situation, knowing how to force shutdown on MacBook becomes essential to regain control and avoid potential data loss.
In this post, we’ll walk you through the steps to force shutdown on your MacBook, ensuring you’re prepared for any tech emergency.
Preparation Before Force Shutdown on Mac
Imagine you’re working on an important project on your MacBook when it suddenly becomes unresponsive—that would be incredibly frustrating. This can be caused by several issues, such as software glitches, insufficient system resources, hardware problems, or conflicts with third-party applications.
Knowing how to handle this situation can save you from potential data loss. It all starts with knowing how to prepare for a forced shutdown on a Mac.
Follow these steps:
💾 Save Your Work and Close Applications: In case your Mac is still somewhat responsive, attempt saving any open documents as well as closing applications. This may prevent data losses.
📁 Backup Important Data: It is critical to back up your data regularly. Use Time Machine or any other backup solution to ensure the safety of your important files in case of an emergency.
🖥️ Disconnect External Devices: At times, problems emanating from external devices may freeze the Mac or cause it not to respond anymore. Unplug any peripherals like USB drives, external hard disks, and printers among others, and check if it works again.
By following these steps, you can minimize the risk of data loss and prepare your Mac for a forced shutdown.
How to Force Quit on a Mac with Apple Menu and Power Button
If your Mac begins to malfunction, pressing a small button might just be the solution. Whether your Mac has a power button or a Touch ID, pressing and holding it for slightly more than a second will display a menu with options like Restart, Sleep, Cancel, and Shutdown.
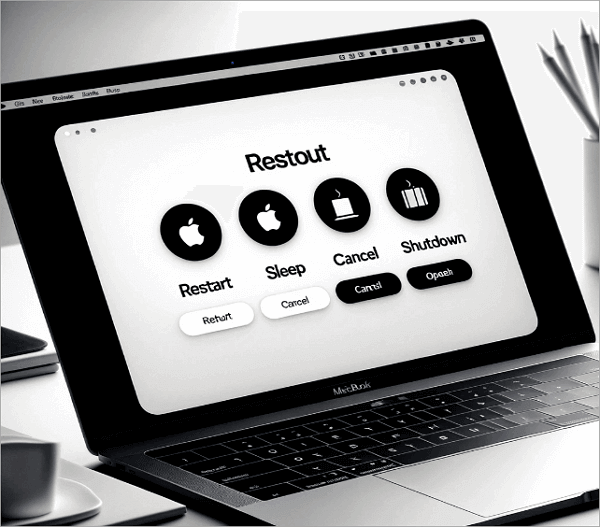
Start by selecting Cancel. Oftentimes, this method can unfreeze your Mac, leaving any undone work saved. If that does not solve the problem, press and hold down the power button or touch ID again for 1.5 seconds to reveal those options.

Choose either Restart or Shut Down from the menu this time. Although there’s a risk of losing unsaved data, this allows your Mac to start anew. If that is the case, you can recover your unsaved Word document here on this blog: >> How to Recover Unsaved Word Documents on Mac.
If the dialog box doesn’t appear, hold the power button or Touch ID until your Mac powers off completely. Wait a few minutes before turning it back on.
By following these steps, you can forcefully shut down Mac and resolve issues caused by system freezes.
How to Force Shutdown on MacBook Using Keyboard Shortcut
Whether you’re dealing with frozen apps or an unresponsive screen, use the Mac force power-off method to regain control instantly with a keyboard shortcut.
Force Quit in Mac by Resetting PRAM/NVRAM
Sometimes, our Macs just don’t cooperate, right? Let me tell you a quick fix I learned. PRAM (Parameter RAM) and NVRAM (Non-Volatile RAM) are small memory sections in Macs that store system settings. If your Mac is acting weird or not starting properly, resetting PRAM/NVRAM might help.
Here’s how to force shutdown on MacBook this way:
Step 1. Turn off your Mac.
Step 2. Press and hold Option + Command + P + R.

Step 3. Keep holding for about 20 seconds.
Step 4. Release the keys and let your Mac restart.
Mac Force Power Off by Resetting SMC
A few years ago, whenever my MacBook started acting up—like the fans running loudly or the battery misbehaving—I learned that resetting the SMC (System Management Controller) was often the solution. The SMC manages low-level functions such as power and thermal management.
You get to fix problems where applications do not function correctly or stop responding, as well as issues with keyboard backlighting and other system lights.
But it also comes with its own conditions. After resetting the SMC, certain system settings revert to defaults, such as settings for power configurations and system lights. This means you will need to reconfigure these according to your preferences.
Here’s a step-by-step guide:
Step 1. Shut down your Mac.
Step 2. Press Shift + Control + Option on the left side of the keyboard and the power button simultaneously for 10 seconds.

Step 3. Release all the keys.
Step 4. Press the power button again to turn on your Mac.
How to Forcefully Shut Down Mac via Terminal Command
Even though all methods above should be able to solve the task in less than a jiffy, another one that feels more like an advanced shortcut is using Terminal commands. The Terminal is a powerful tool within macOS that allows you to interact directly with the system through command line inputs.
Using the Terminal, you can control your Mac or locate necessary information without going through an immense quantity of data manually.
Remember that this technique applies to beginners and professional programmers alike. Here’s how:
1️⃣ Open Terminal: You can find it in the Applications > Utilities folder, or search for it using Spotlight (Cmd + Space).
2️⃣ Force Shutdown Commands: Once the Terminal is open, you can type commands to control your Mac’s power state. Here are a few useful ones:
- Immediate Shutdown: Type sudo shutdown -h now, then press the Enter button. This command turns off your computer instantly.
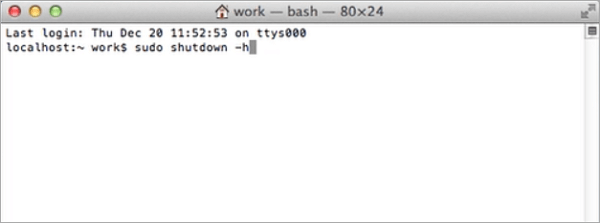
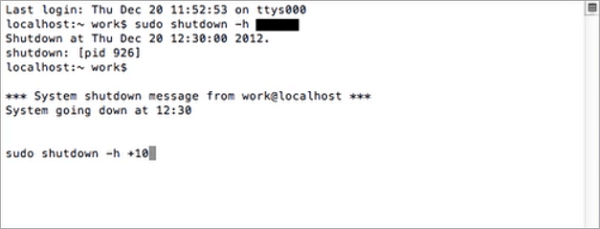
- Scheduled Shutdown: In case you would like your Mac shut down at a given time—let’s say, after ten minutes—then type sudo shutdown -h +10.
- Immediate Restart: To restart right away, just use sudo shutdown -r now.
- Sleep Mode: Put your Mac into sleep mode immediately by typing sudo shutdown -s now.
How to Solve the Issues After Restart
Okay, now you’ve successfully learned how to force shutdown your MacBook. However, it doesn’t end there, and there are a few steps you should take immediately after restarting your Mac. Here’s what you need to do:
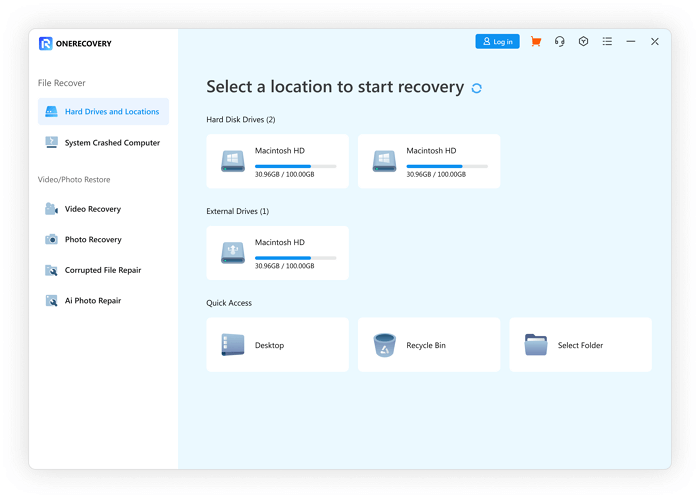
Check for Data Loss Using ONERECOVERY: To begin with, you can try using third-party software like ONERECOVERY to check for lost data. Now, how?
- Step 1. On the main screen, select your MacBook’s hard drive.
- Step 2. Press “Scan.” ONERECOVERY will scan for lost files.
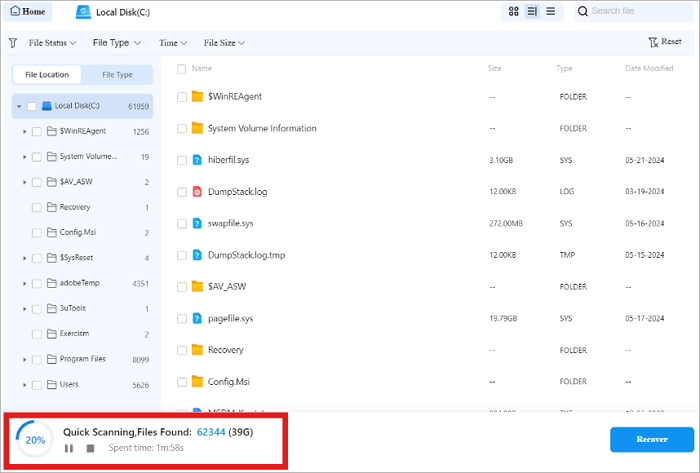
- Step 3. After scanning, it displays recoverable data for you to browse and salvage.
Further Reading: >> Free File Recovery Software for Mac
📥 Download it now and try it out for free.
Run Disk Utility: The next step will be to use Disk Utility to determine the state of the hard drive.
- Step 1. This utility can be found under the Finder > Go > Utilities folder.
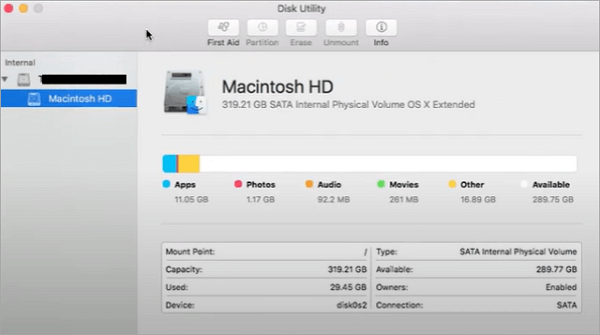
- Step 2. Once open, choose the main drive and click “First Aid.”
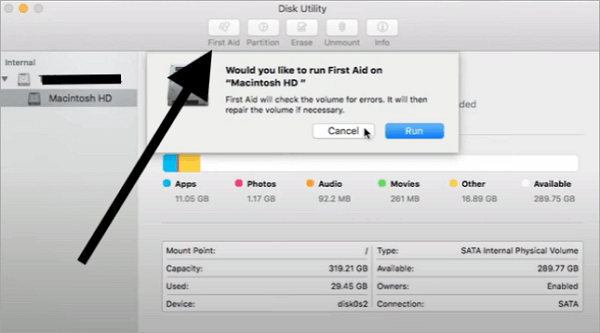
Step 3. In this process, the disk is checked and any disk errors resulting from abrupt shutdowns are repaired, if possible.
Uninstall Problematic Applications: Additionally, some applications that might have caused your MacBook to freeze or crash, thereby causing a forced shutdown could also be uninstalled. You can do this by opening Finder, and then navigating to the Applications folder before dragging out suspicious apps into Trash.
If you mistakenly drag the wrong app into the Trash, you can recover emptied trash on a Mac by following this blog: >> How to Recover Emptied Trash on Mac
Conclusion
Knowing how to force shutdown on your MacBook is very important, especially to avoid losing data and resolve issues. Before initiating a forced shutdown, save work, back up data, and disconnect external devices. You can force a shutdown using the power button, keyboard shortcuts, or Terminal commands.
After restarting, check for data loss with tools like ONERECOVERY, run Disk Utility to repair disk errors, and consider uninstalling problematic apps to ensure smooth functioning.


