“I cannot find a folder that I know exists on my Mac. How can I show hidden files on macOS?”
This question is commonly found on Apple discussion forums. It highlights a frequent issue many Mac users face.
Apple hides certain files and folders by default in macOS, typically to prevent accidental deletions or modifications that could affect system functionality. These hidden files, which include system files and settings, are essential to the OS.
If you too are looking to show hidden files on Mac, you must proceed carefully. It is not recommended to alter these files unless you know what you are doing, as unintended changes could lead to system errors or data loss. In this guide, we have discussed 3 different methods on ‘how to find hidden folders on Mac’ safely.
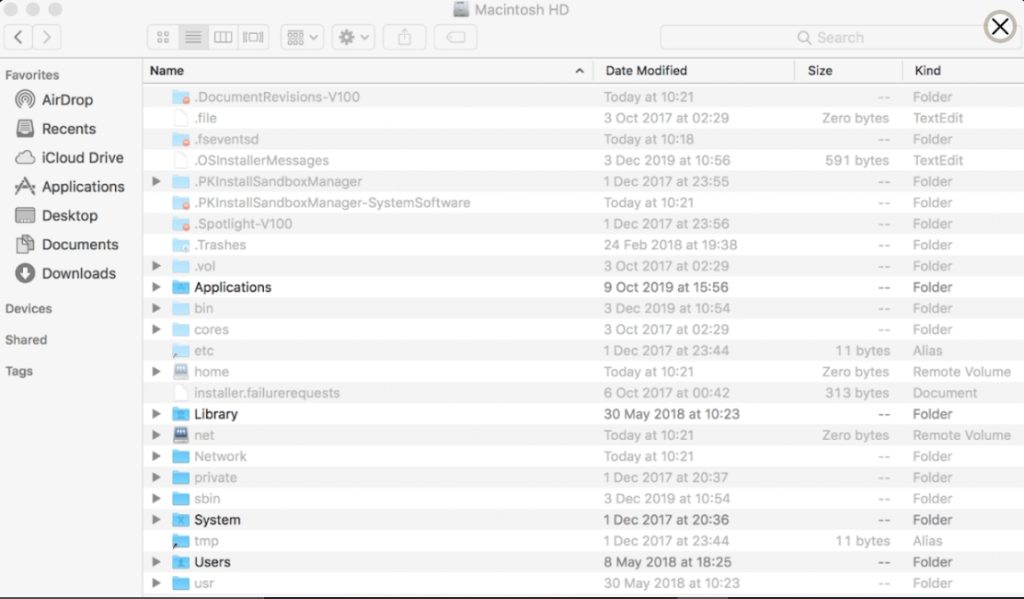
Where Is the Location of the Library Folder?
One of the most important hidden folders on macOS is the Library folder. It contains crucial system and application settings. By default, this folder is hidden to protect users from unintentionally modifying files that could disrupt their system. You might need to access it when troubleshooting or customising your Mac device.
👉Follow the steps below to locate the Library folder and view hidden files Mac :
- First of all, open the Finder tool.
- From the top menu, click on Go and hold down the Option key.
- Here, you will see the Library folder appear in the drop-down menu.
This method will show hidden files MacOS and also the Library folder.
Beware, making changes here directly affects how your Mac operates. So, it is recommended to leave these files untouched unless absolutely necessary. If you are unsure, consult resources or professionals to avoid any accidental damage.
How to Show Hidden Files & Folders on Mac?
Many users encounter hidden files and folders on their Mac, either by accident or when trying to troubleshoot a problem. Fortunately, there are several methods to see hidden files Mac, each suited for different scenarios.
Below, we have mentioned three methods on ‘how to see hidden files in Mac’. Whether you prefer using the Finder interface or the more advanced Terminal commands, or you need to retrieve lost or deleted files, this is your ultimate guide to Mac see invisible files. Let’s begin!
See Hidden Files in Mac with Finder
Using Finder is the easiest and most intuitive way to show hidden files on your Mac. This method works well for users who are not comfortable using Terminal or more advanced options.
The reason this solution is widely used is that it allows you to quickly toggle the visibility of hidden files without making any permanent changes to your system settings.
👉Follow these steps on how to reveal hidden files Mac using Finder:
- Open Finder on your Mac.
- Navigate to the folder where you want to view the hidden files.
- Press Command + Shift + Period (.) on your keyboard. Once you press this key combination, hidden files will appear in the current Finder window.
The MacOS Finder hidden files and folders are usually greyed out, so you can easily differentiate them from regular files.
💡Expert Tip: Be cautious when viewing or modifying hidden files. Don’t be in haste to display hidden files in Finder as some of these are vital to macOS functionality. Only modify when you are confident in what you are doing.
View Hidden Files on Mac in Terminal
The terminal method is one of the most powerful methods to reveal hidden files because, unlike Finder, its commands give you more control over your system. It allows you to make system-wide changes to file visibility.
👉Here are the steps on how to find hidden files on Mac using Terminal:
- Open Terminal by searching for it in Spotlight or by navigating to Applications, and then Utilities.
- Here, type the following command and hit Enter:
“defaults write com.apple.finder AppleShowAllFiles TRUE”
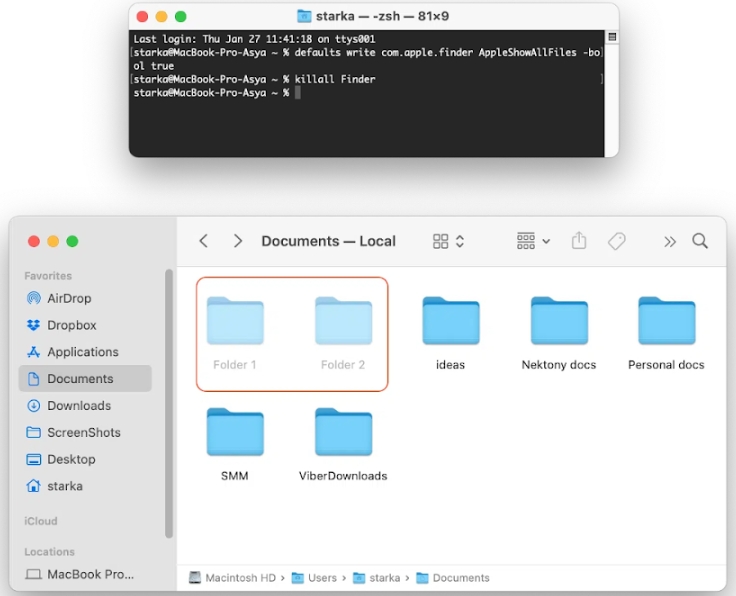
- After running the command, type“killall Finder” to restart Finder and apply the changes. It will make all hidden files and folders visible across your Mac.
To hide the files again, all you need to do is replace “TRUE” with “FALSE” in the first command and restart Finder using the same process.
💡Expert Tip: While Terminal is a strong tool, it is important to use the correct commands to avoid unintentionally altering system settings. If you are not sure, it is best to consult a professional before proceeding.
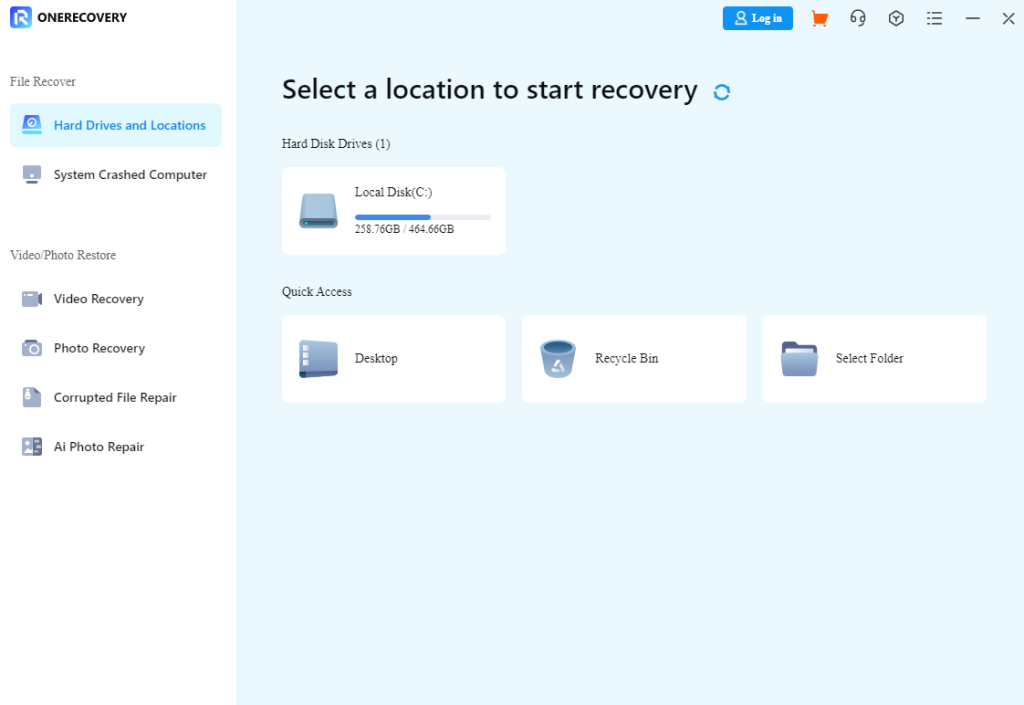
Using File Recovery Software to Retrieve Missing Folders from Mac Desktop
If you have accidentally deleted hidden files while attempting to free up Mac space, or if some files have mysteriously disappeared from your Mac’s desktop, first of all, don’t panic!
We have a solution. You might need more than just Finder or Terminal, like mac data recovery software- ONERECOVERY!

ONERECOVERY is an excellent tool designed specifically for Mac show hidden files. This software supports deep scan technology to restore any file or folder. Its advanced algorithms are capable of restoring older, long-deleted files and permanently deleted files on Mac devices.
👉Here are the steps on ‘how to show hidden files MacOs’ using ONERECOVERY software:
- To begin with, download and install Tinyfrom ONERECOVERY by clicking the button below.

- Now, launch the software and select the drive or location where your files were located (e.g., your desktop).
- Click Scan to allow the software to search for hidden or deleted files.
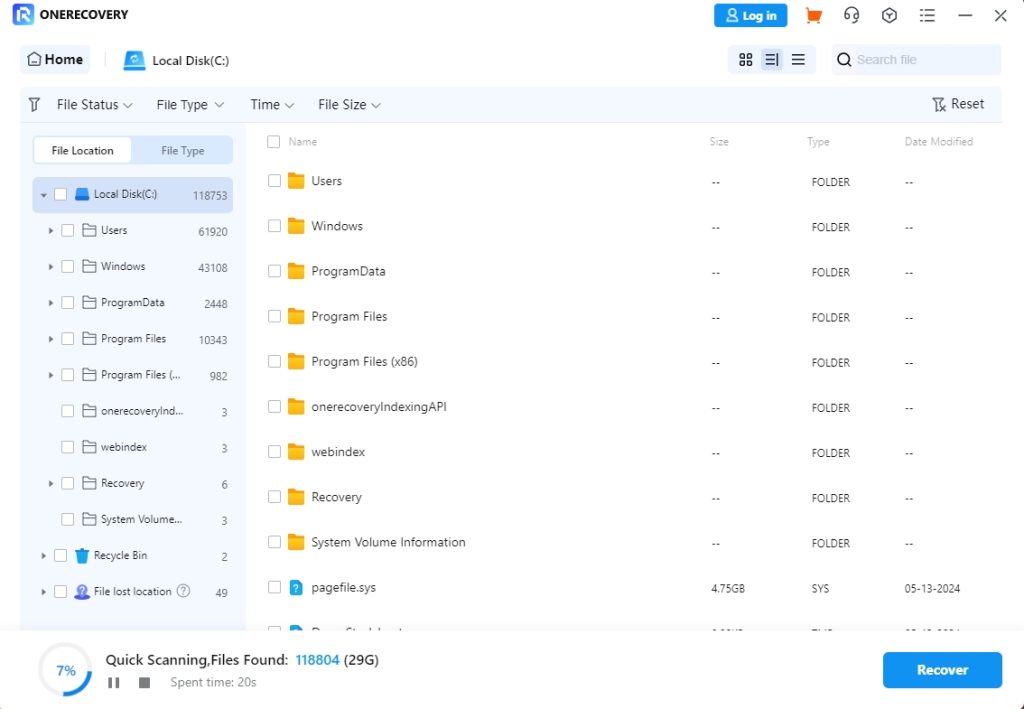
- Once the scan is complete, you will see a list of recoverable files. Select the ones you want to restore.
- Finally, click Recover to save them back to your Mac.
Conclusion
Revealing those invisible files and folders on a Mac is possible using Finder, Terminal, or specialised software like ONERECOVERY. Whether you are trying to recover deleted files or simply manage your system’s storage, these methods provide practical and efficient solutions. But it is essential to be cautious when dealing with hidden system files to avoid unwanted changes.
FAQs on Showing Mac Hidden Files
Are you curious about why these files are hidden? or how to unhide them permanently? Hidden files are confusing, so let us answer some common questions to clarify things.
- Why Are There Hidden Files on My Mac?
Hidden files exist on macOS to protect important system files and settings from being accidentally modified or deleted by users. These files include system preferences, caches, and application support files that are crucial for your Mac’s smooth operation.
If you need to clear system storage on Mac, it is better to target unnecessary large files rather than hidden system files. Always remember that modifying these files without proper knowledge can lead to system malfunctions.
- How to Unhide Folders on Mac Permanently?
To make hidden folders permanently visible on your Mac, use the Terminal method with a slight modification.
Instead of toggling between hidden and unhidden states, you can use the following command to permanently show all hidden files and folders:
“defaults write com.apple.Finder AppleShowAllFiles -bool true”
After running this command and restarting Finder, hidden files will remain visible until you change the setting back. This method is especially useful for users who frequently need to access hidden folders to recover disappeared desktop files on Mac and do not want to repeat the process every time.
Learn more about recovering desktop files here.
- What’s the Shortcut to Show Hidden Files on Mac?
The quickest way of Mac showing hidden folders is using the “Command + Shift + Period (.)” shortcut. This works in any Finder window and instantly toggles hidden files and folders on and off.
It is a convenient method for users who only occasionally need to see hidden files without permanently changing system settings.