Are you trying but failing to format your SD card? Its white protection may be the reason you are unable to make any modifications.
If your system shows “Unable to Format SD Card Write Protected,” it is the result of white protection on your SD card. And to format the card, you will have to unlock it first.
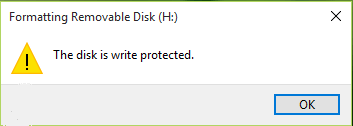
In this post, we’ll guide you through the steps to remove write protection from your SD card and then format it. By following our simple instructions, you’ll learn how to format write-protected SD card and get it working like new again.
What’s the Meaning of Write Protection?
Write protection is a feature that prevents any modifications, deletions, or additions to the data on a storage device like an SD card. It forbids you from formatting, deleting, or saving new files to the card.
It is often used to safeguard important data from accidental changes or deletions. So, if you need to format or modify your protected card, you must first remove this protection to gain full access to the card’s contents.
How to Remove Write-Protected SD Memory Card?
This section will guide you through various methods to unlock your SD memory card write protection:
Unlock the Write-protection Switch to Remove SD Card Write Protection
It is the easiest method available as many SD cards come with a physical write-protection switch on the side. This switch can be slid up or down to enable or disable write protection.
To turn off the switch, first locate the switch on the side of your SD card. Then slide the switch to the unlock position. And that’s it, you are done!
This action disables write protection, allowing you to format the card. This method is highly effective and preferred because it directly controls the physical lock mechanism on the SD card. You do not need to make any internal changes, hence, it is the best choice for non-techies!
Remove Write Protection From an SD Card in Properties
Another widely used method is to change the properties of the SD card through your computer. It is very effective because it changes the file system attributes and removes the software-level write protection.
👉Follow these simple steps to disable write protection SD card:
- Insert the write-protected SD card into your computer.
- Now navigate to This PC and locate your SD card.
- Right-click on the SD card and select the Properties option.
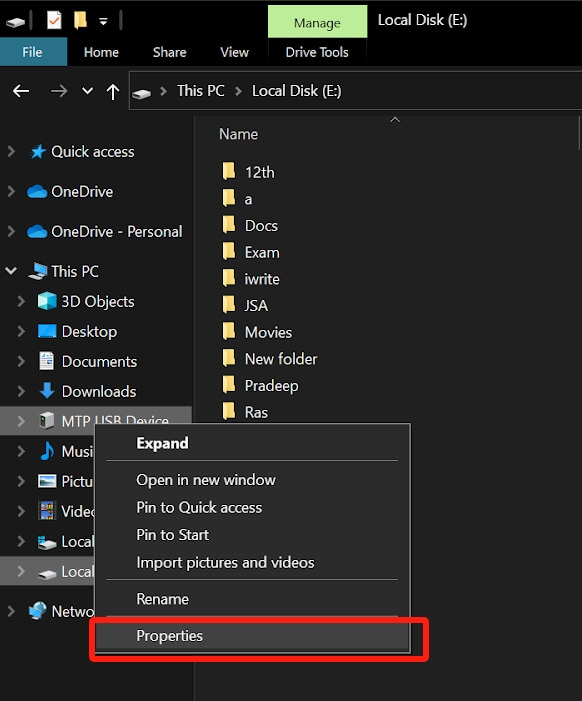
- In the General tab, uncheck the Read-only option if it is checked.
- Next, click Apply and then OK.
Use CMD Command to Change the Write Protection of the SD Memory Card
CMD (Command Prompt) should be your go-to solution if you are unable to address white protection using simple file property changes.
Using Command Prompt (CMD) is one of the most powerful ways to remove write protection from your SD card because it directly interacts with the disk management system of your computer. It can easily clear software-induced restrictions and file system errors. This in-built tool ensures your data is not altered or lost throughout the process.
👉Here is ‘how to remove write protected SD memory card using CMD’:
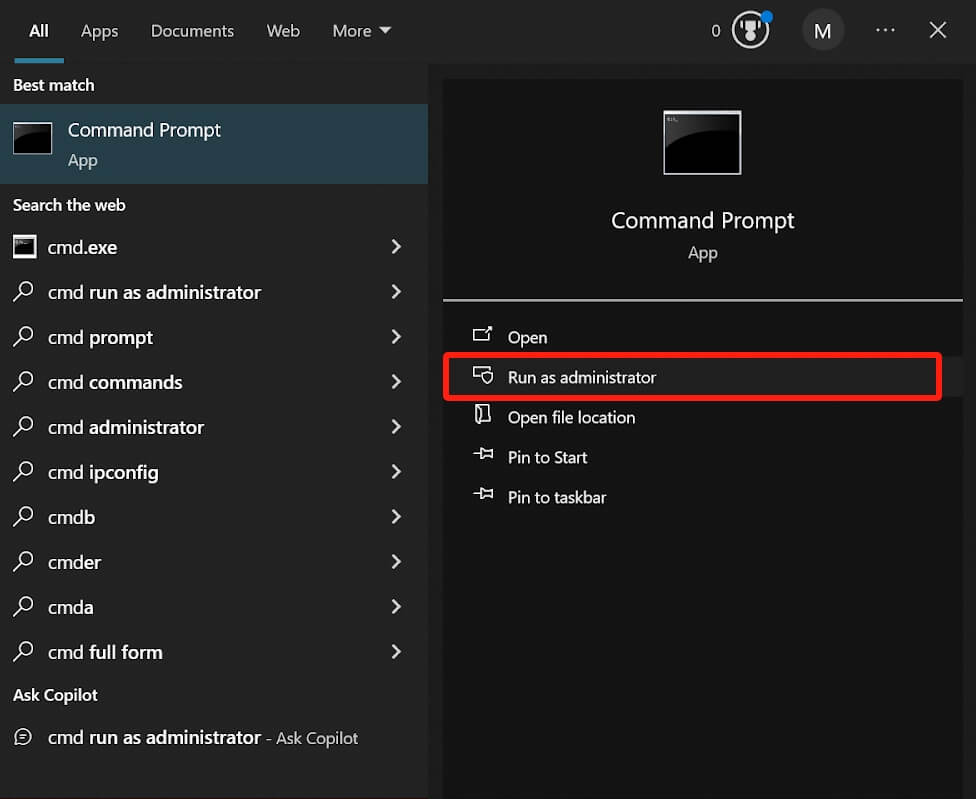
- First, open CMD as Administrator. Type “cmd” in the Windows search bar, right-click on the Command Prompt and select the Run as Administrator option.
- In the CMD window, type “diskpart” and then press Enter. The Diskpart utility tool will appear on your screen.
- Now type “list disk” and press Enter to display all disks connected to your computer.
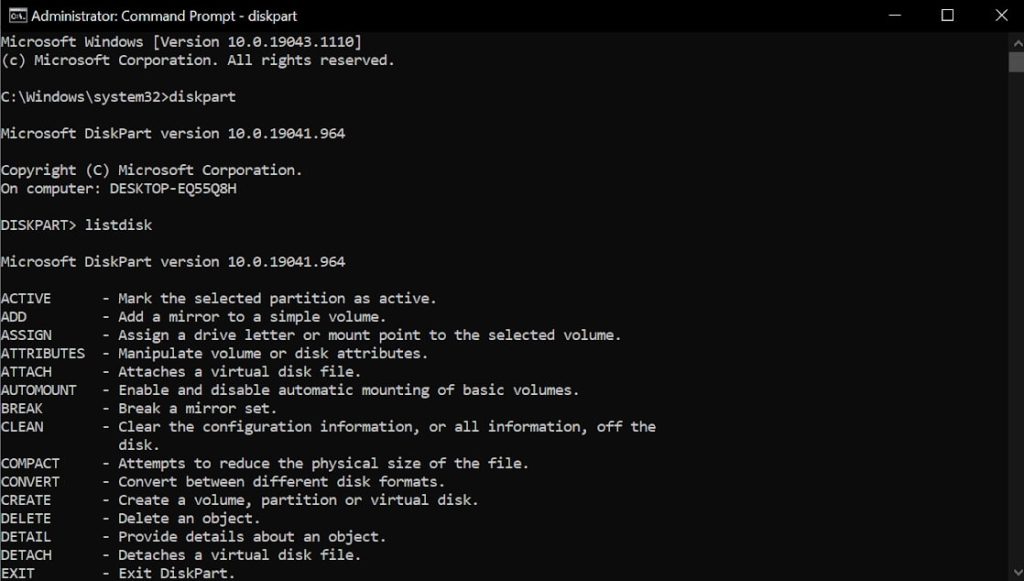
- From the list appearing on the screen, locate your SD card.
- Next, type select “disk X” (replace X with the number of your SD card) and press Enter.
- Finally, type “attributes disk clear readonly” and then press Enter.
This command removes the write protection attribute from your SD card, allowing you to format it.
Use Registry Editor to Disable Write Protection
Let’s now move deeper into the system configuration by the Registry Editor.
Registry Editor disables write protection by altering system settings in your operating system. It is effectively used to remove stubborn write protection that persists even after using the above methods.
👉Here is a detailed guide on how to unlock write protected SD card using Registry Editor:
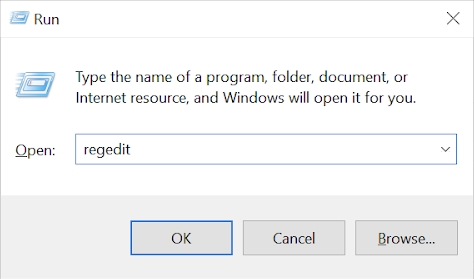
- Open Registry Editor by pressing Win + R, then type regedit, and press Enter to open the Registry Editor.
- In the Registry Editor, go to HKEY_LOCAL_MACHINE\SYSTEM\CurrentControlSet\Control\StorageDevicePolicies. If the StorageDevicePolicies key does not exist, you will need to create it.
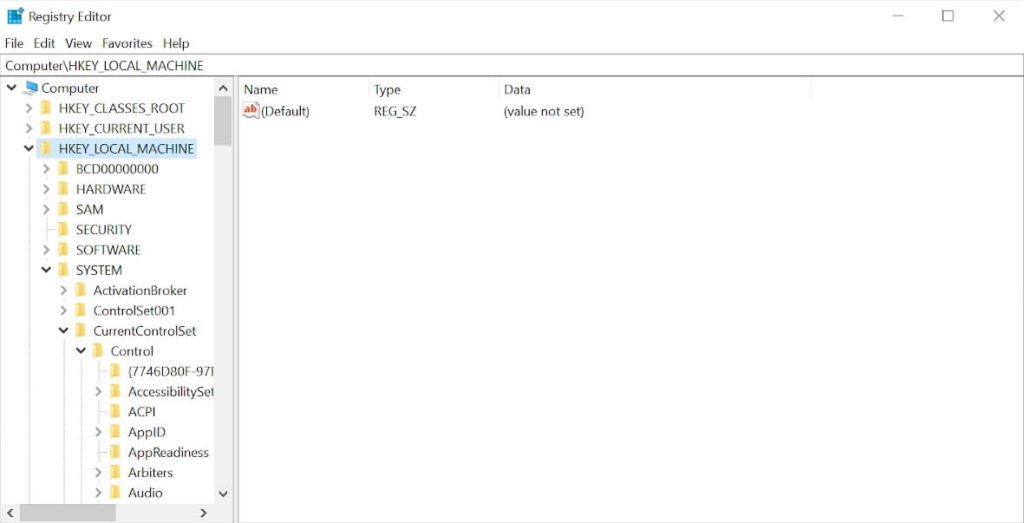
- You will see a key named WriteProtect on the screen, double-click it.
- Set the value data of WriteProtect to 0 and then click OK.
Wondering why setting the value 0? By setting the value to 0, you are disabling the write protection on your SD card. It is recommended to always back up your registry before making changes to avoid any accidental issues.
How to Format SD Card after Unlocking the Write Protection
Once your SD card is unlocked, congratulations, half of the job is done!
Now you can proceed with the formatting process. But before that, it is wise to move your important files to another storage device to avoid any data loss in the process.
Using CMD Diskpart to Format Write Protected SD Card
DiskPart is an inbuilt command-line disk partitioning utility available in Windows operating systems. This tool provides a powerful and flexible way to conduct various disk management tasks, such as creating, deleting, formatting, and resizing partitions.
Why are we using Diskpart for formatting? Using Diskpart provides a robust method for managing disks and partitions. Due to its ability to modify disk attributes at a low level, it is a robust solution for managing and troubleshooting storage devices like our SD cards.
👉Formatting your SD card using CMD Diskpart is a straightforward process. All you need to do is follow these precise steps on ‘how to format an SD card that is write-protected’:
- First, you need to run the Command Prompt as an administrator. To do this, type “cmd” in the Windows search bar, right-click on Command Prompt, and select Run as administrator option.
- After the CMD window appears on the screen, type “diskpart” and then press Enter.
- Now, type “list disk” and press Enter again to display all of your connected disks.
- Identify your SD card and type “select disk X” (here X is the number of your SD card). Then press Enter.
- Next, type “clean” and press Enter. All of your data on the SD card will be deleted.
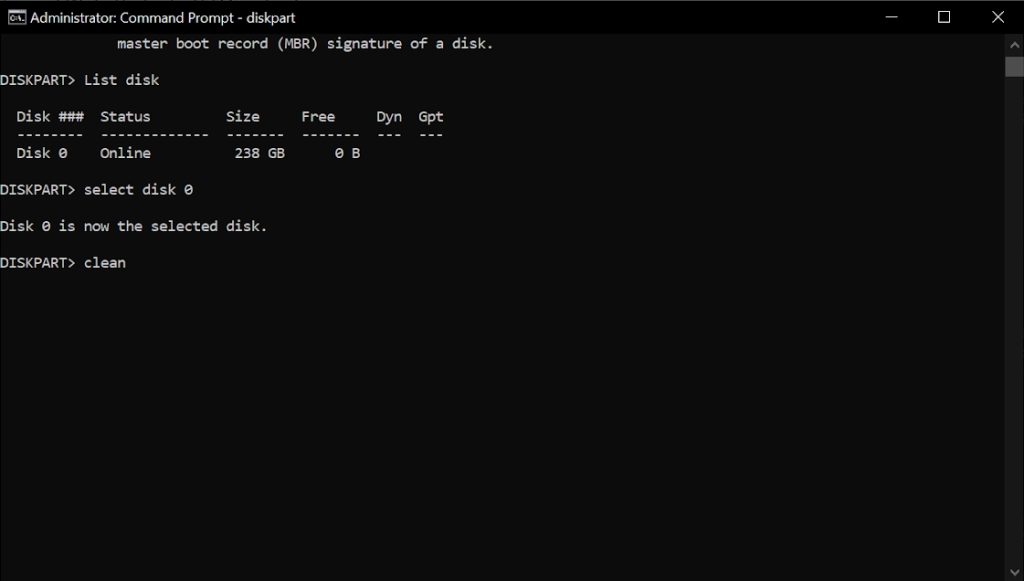
- Now, type “create partition primary” and press Enter.
- At least, format your SD Card by typing format fs=fat32 (or format fs=ntfs if you prefer NTFS format) and then press Enter.
Once these steps are completed, your SD card should be free of any write protection and ready for use again.
What Causes the SD Card Write Protected Error?
Many times, we come across the SD card write-protected error. It is caused due to many reasons including,
- ⬅️Physical write protection switch: Many SD cards have a physical switch on the side that can be set to lock. Simply slide down to unlock it.
- ⚠️File system errors: Corruption or errors in the SD card’s file system can trigger a write-protected status and it becomes difficult to write new data.
- ☢️Virus or malware: Malicious software often changes the settings of an SD card, rendering it write-protected to prevent further use.
- ⚙️Registry Policy Settings: On Windows systems, specific registry settings like HKEY_LOCAL_MACHINE\SYSTEM\CurrentControlSet\Control\StorageDevicePolicies\WriteProtect, HKEY_LOCAL_MACHINE\SYSTEM\CurrentControlSet\Services\UsbStor\Start, and HKEY_LOCAL_MACHINE\SYSTEM\CurrentControlSet\Services\Disk\Start can force a write-protected status on your removable drives.
Conclusion
Formatting a write-protected SD card involves first unlocking it and then using appropriate tools like CMD Diskpart. Following the methods outlined in our guide will ensure that you can effectively manage and recover your SD card.
FAQs on Formatting SD Card
In this section, we have addressed some common questions about how to format an SD card which is write-protected, recover deleted data, and remove write protection.
- How to Format an SD Card on a Mac?
If you are a Mac user, follow these steps on how to format write protected SD card to quickly format your SD card:
- Insert the SD card, open Disk Utility, select the SD card from the sidebar, and click Erase.
- Now, choose the file format you need, such as ExFAT or MS-DOS (FAT), and click Erase again.
This will format your SD card, making it ready for use on various devices. For a more detailed guide, visit here.
- How to Recover Accidentally Deleted Data from Formatted SD Card?
If you’ve accidentally formatted your SD card and lost important data, don’t worry. You can use ONERECOVERY by TinyFrom to recover your files. This tool is designed to retrieve lost data from formatted SD cards effectively.
👉This can be done in two easy steps. All you need to do is,
- Visit the ONERECOVERY website, download and install ONERECOVERY.
- Scan the SD card, and follow the prompts to restore your files. Easy, right?
For more detailed steps, visit this guide.
- What Should I Do If I Cannot Remove the Write Protection?
If you’re unable to remove write protection using the methods discussed above, consider checking for physical damage or trying the SD card on another device.
If the issue persists, you may need to use specialized software to unlock the card or seek professional assistance.
Some SD cards may have manufacturer-imposed write protection that cannot be disabled. In such cases, replacing the SD card might be the best solution.


